Getting started with Raspberry Pi – Installing Raspbian
In this post, we will cover all the details about how to install the official OS Raspbian on a Raspberry Pi.
Index
- Introduction
- Prerequisites
- Get a SD card
- Format the SD card
- Download the OS – Raspbian
- Write the OS to the SD card
- Starting the Raspberry Pi
Introduction
Raspberry Pi (short form: Pi) is a single-board computer. That means that everything is there, CPU, GPU, RAM, etc. All the components that makes up a fully functional computer are all soldered on the same board. The Pi is not very powerful but exceedingly small and cheap. These characteristics makes it to the perfect: “Do-what-ever-you-want-with-a-computer-and-don’t-be-afraid-to-mess-things-up” computer. It is the perfect computer for hobby projects and learning about computers. And if you should mess it up somehow in software, reinstall it and start over. And if you should mess something up hardware side, just buy a new one. Let’s get you started!
Back to Index.
Prerequisites
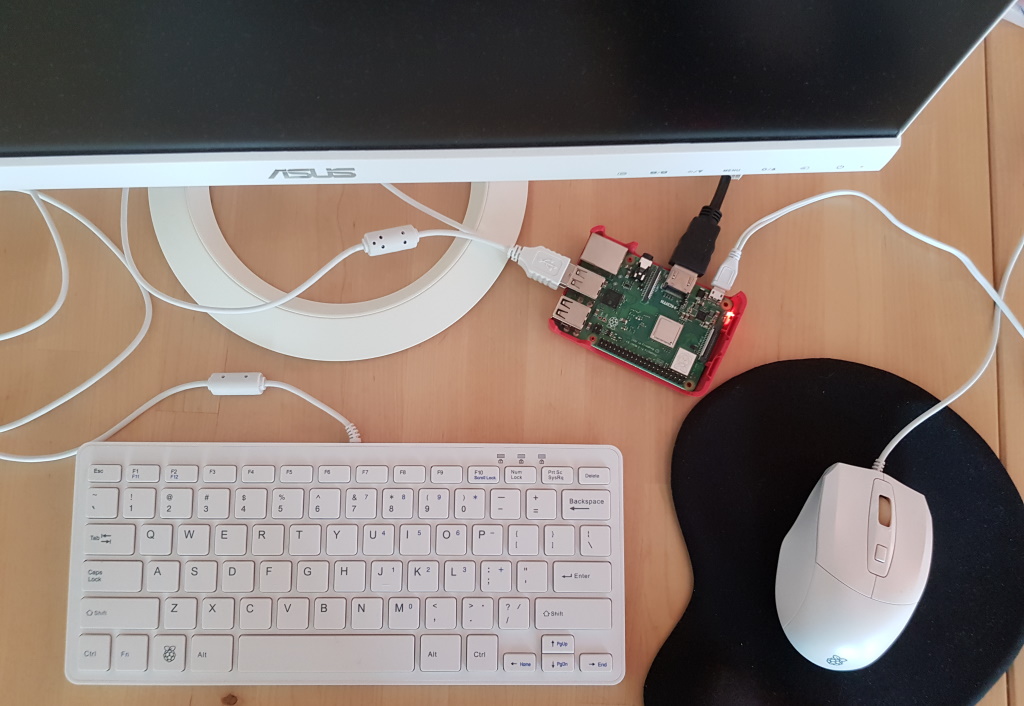
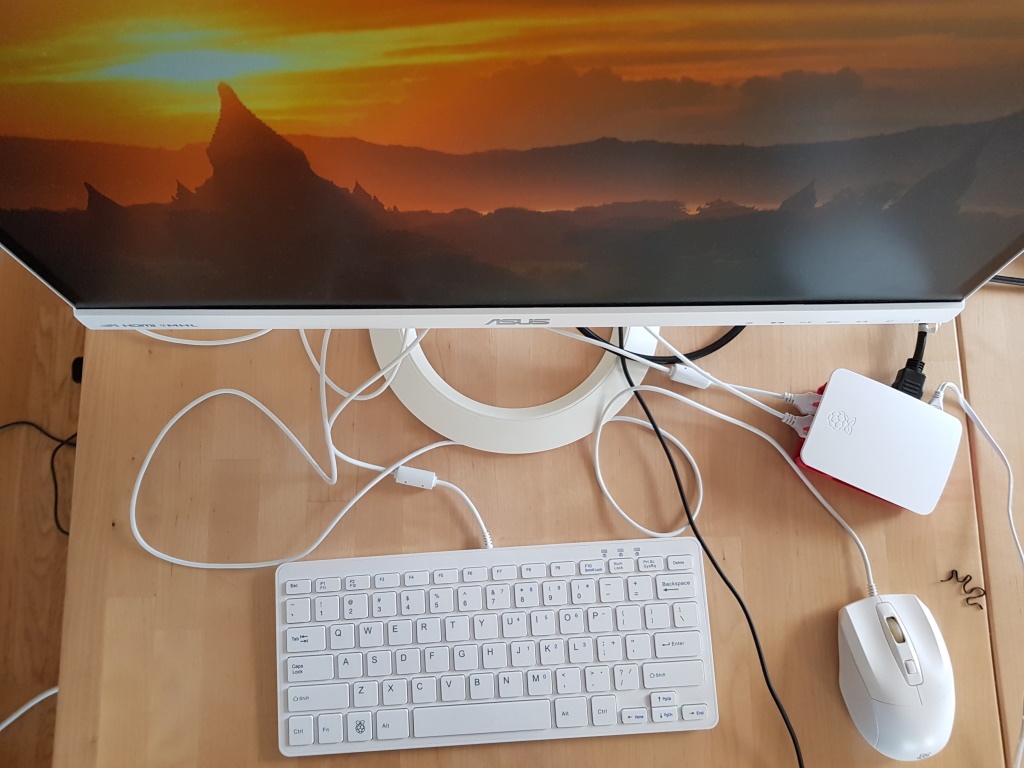
The obvious prerequisites here is that you need a decent set up – a good workstation. If you are a beginner in this world of single-board computers, I recommend that you treat your Raspberry like a workstation. Get a monitor, keyboard, and mouse like this:
Now imagine the following scenario: You just got your Raspberry Pi and you are eager to get started. You plug everything in and turn it on by plugging in the power adapter (Note that there is no power switch, this is to reduce cost of the Pi) and you will get a blank screen! Nothing.
The Pi will not start because it needs a drive with an OS (Operating System) to boot. This article will teach you how to do this!
Back to Index.
Get a SD card
A computer needs an OS to be able to run applications that the user can interact with. You can view the OS as the layer between the hardware and the software. Common OS are Mac OS X, Windows and Linux.
The computer needs to read and write information to the storage, like a hard drive to save information for its OS and applications. The Raspberry Pi utilizes an SD card as the hard drive. On the SD card, the OS will be stored and all other information like programs, files, images, etc.
Note! Not all SD cards are supported as drives for the Raspberry Pi. You may read more about it here: https://www.raspberrypi.org/documentation/installation/sd-cards.md [2020-05-10]. Search online if you are unsure if your SD card is compatible. Retailers and manufactures often put good information about the SD cards.
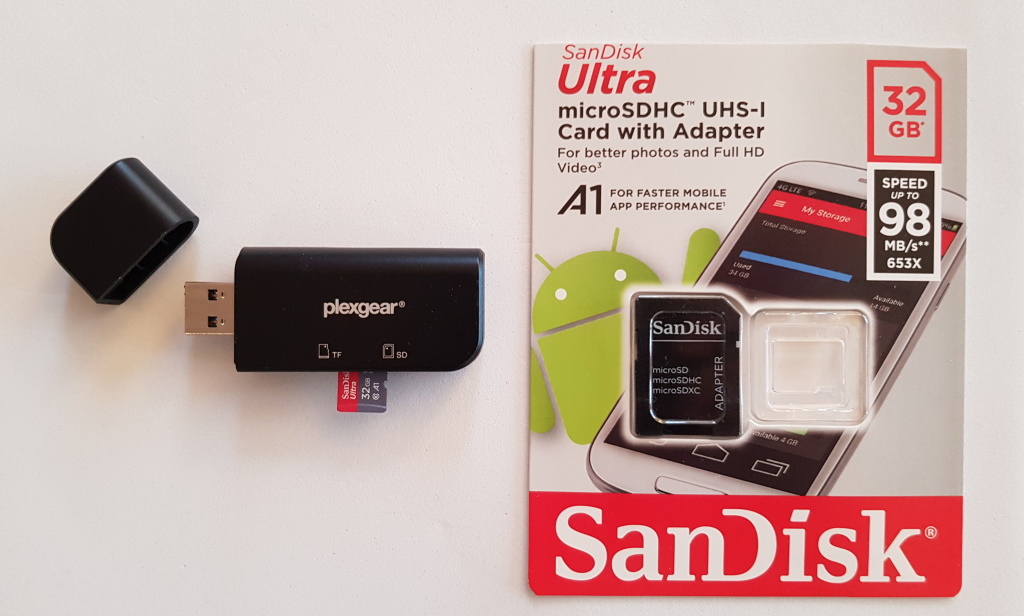
You will also need a SD card reader that can be plugged into your own computer. (Your computer might have a built in SD card reader slot) We need that in a later step to be able to format the SD card and write information to it.
Here are the SD card and SD card reader I am using. (Note that there are thousands of products like this on the market.):
Note! The lower limits for SD card on Raspberry Pi with Raspbian OS is 8GB. You may read more here: https://www.raspberrypi.org/documentation/installation/sd-cards.md [2020-05-10]. The upper limit is 32 GB for the Raspberry Pi 3 & 4. If you exceed 32GB the formatting of the SD card will not be supported. Read more here: https://maker.pro/raspberry-pi/tutorial/what-micro-sd-card-is-best-for-a-raspberry-pi-4 [2020-05-02].
If you want to format a SD card bigger than 32GB as FAT32 you can try this third party software: http://www.ridgecrop.demon.co.uk/index.htm?guiformat.htm [2020-05-22]
Back to Index.
Format the SD card
First, we need a software that can format the SD card. I am using SD Formatter, you may download it here: https://www.sdcard.org/downloads/formatter/eula_windows/ [2020-05-10].
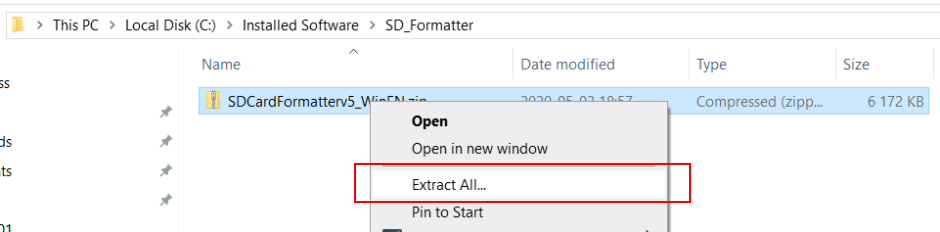
The downloaded files will be in a zip format. You need to extract them so you can browse the content. Do that by right-clicking on the downloaded folder and choose “Extract All..”:
Now you will get a browsable folder in the location you choose during the extraction.
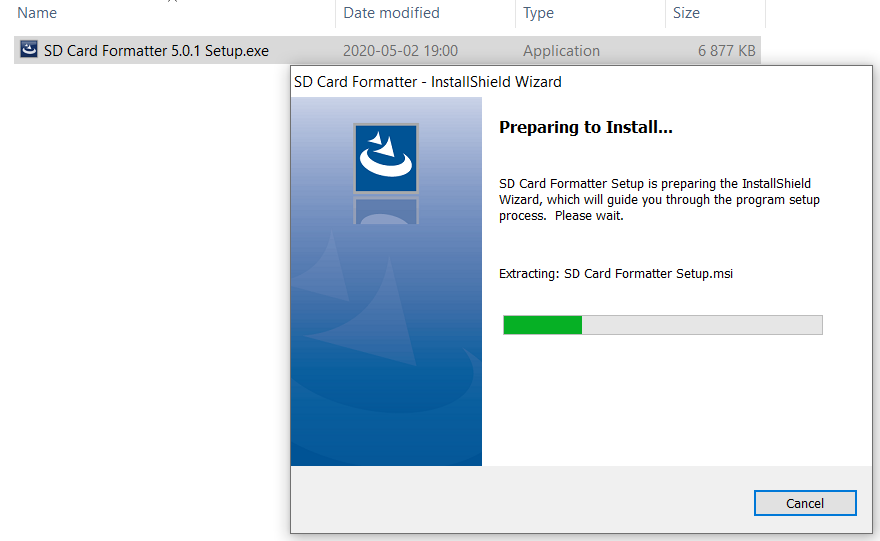
Next, find the file that ends with the file extension .exe. Right-click and choose Install. An installation wizard will start and follow the steps:
Now when you have the software installed it is time to format the SD card. Plug in the SD card reader into your computer. Make sure you know which drive letter the computer assigns to your SD card.
Note! IT IS VERY IMPORTANT that you know exactly which drive letter is assigned to your SD card. Browse the file explorer and plug it in again to see if you are unsure.
This formatting will wipe the SD card totally clean. This process cannot be reversed. If you accidentally do this to another device, it will be corrupted and unusable.
Open the SD formatter application, choose the drive letter assigned to your SD card (in my case D:\ ) and click Format. A warning dialog will pop up, same information I just wrote about. Click yes and the formatting will begin.
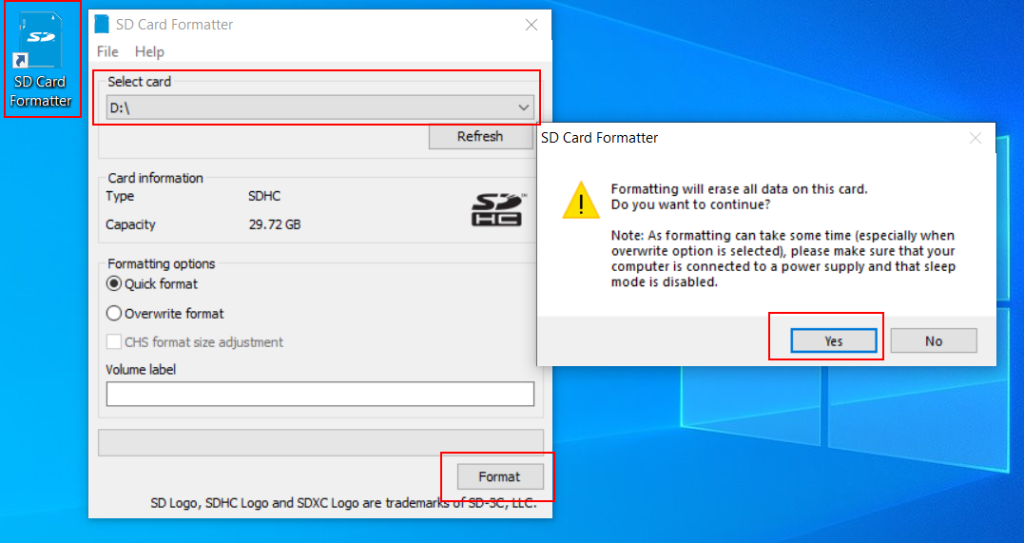
It will not take long, and you will get this message:
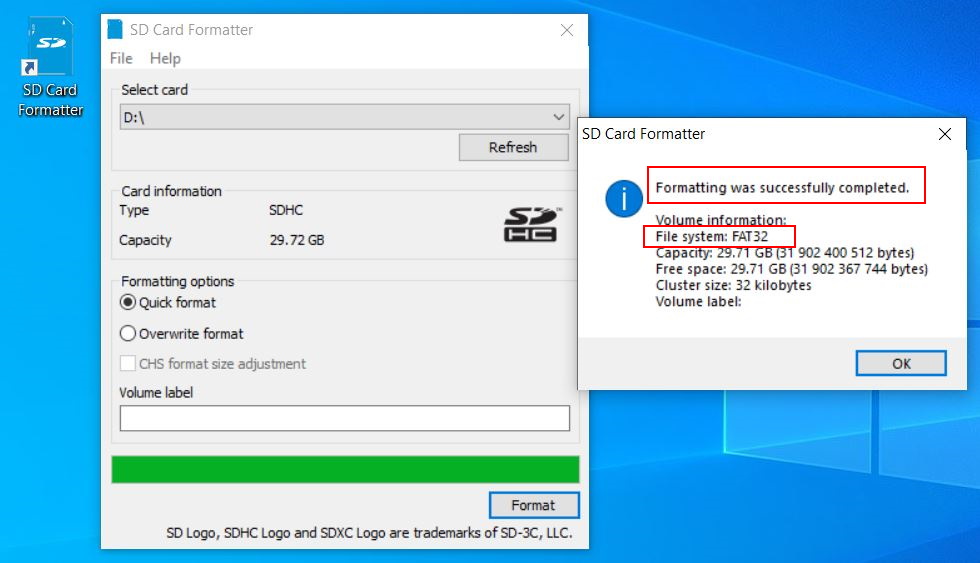
Note that this size of SD card (e.g. 32GB) will default to FAT32 format of the file system. That is precisely what we want!
Back to Index.
Download the OS – Raspbian
Raspbian is the official supported OS for the Raspberry Pi. Raspbian is built upon Debian that is a Linux distribution.
Info. A Linux distribution means that it is built on Linux and have other software bundled together for an easy to use setup. There are several Linux distributions, e.g. Debian, Ubuntu, Kali. All of them are built on Linux but comes with a little twitch and they are good for different purposes. We use Raspbian because it is built with the Raspberry Pi in mind. That means for instance that it won’t come with default software that the Pi won’t be able to run.
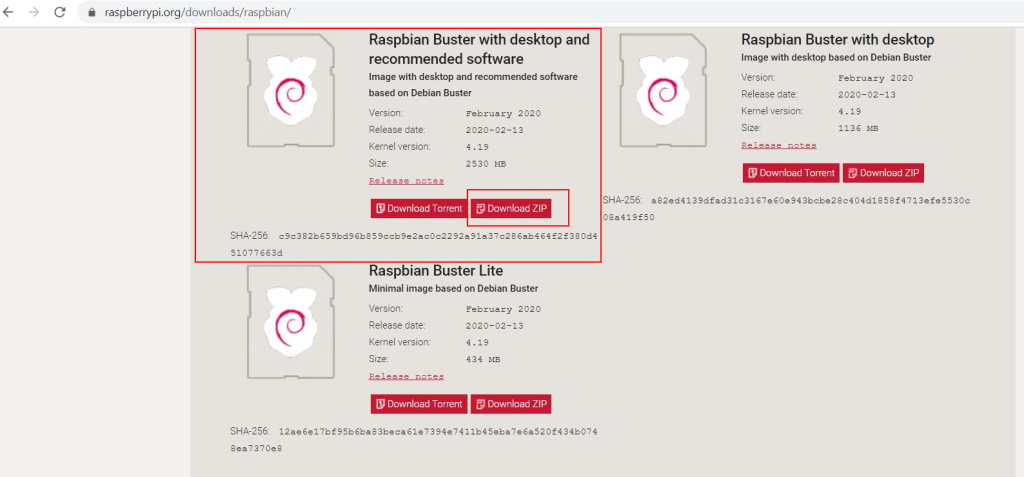
You can download Raspbian here: https://www.raspberrypi.org/downloads/raspbian/ [2020-05-11]. Raspbian has several versions. We are going to install the one that has a graphical interface and recommended software.
These versions are good for different purposes.
Info. The Raspberry Pi foundation names the versions of Raspbian. The latest one (time of writing this blog post) is Buster. There are older versions like Jessie, Strech, and Wheezy. It is just a naming convention. It could have been named Raspbian1, Raspbian2, etc. But I think it is more appeal in this naming convention.
- Raspbian with desktop and recommended software is a great place to start. Per default it comes with a graphical user interface and good to have applications, like a web browser.
- Raspbian Buster with desktop is just the OS with a graphical user interface and no preinstalled software.
- Raspbian Buster Lite is the minimum version of the OS and has no graphical user interface. Interaction with the computer will be through command lines commandos.
Download the zip file and extract it. You will get a file that ends with the extension .img.
Back to Index.
Write the OS to the SD card
Now we have a formatted SD card and an OS. I this step we will put the OS (.img file) on the SD card.
First, we need a software that can do this writing. I am using Win32DiskImager to write the OS to the SD card.
You can download it here: https://win32diskimager.download/ [2020-05-02].
Extract it and install it:

Now, get the path to the .img file and find out which drive letter is assigned to the SD card plugged in to your computer.
NOTE. Again, you must be 100% sure which drive letter is your SD card, otherwise, you might corrupt another device in, or plugged into your computer!
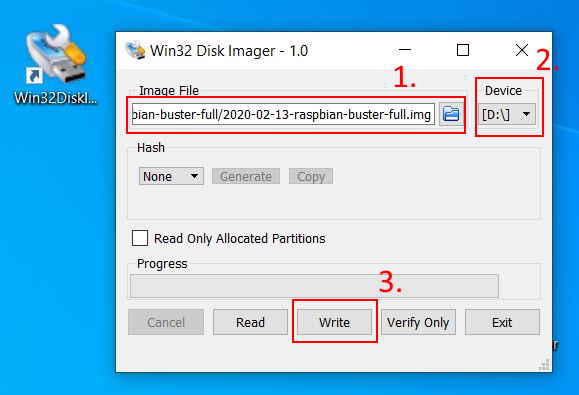
- The path to the .img file.
- Label of the SD card (Drive letter).
- Write.
When you press the button “Write” the software Win32 Disk Imager will write the Raspbian OS to the SD card. The software will ask you if you are sure and warn you that if the device is not the SD card, that device might be corrupted.
When it is finish writing, you will get this message:
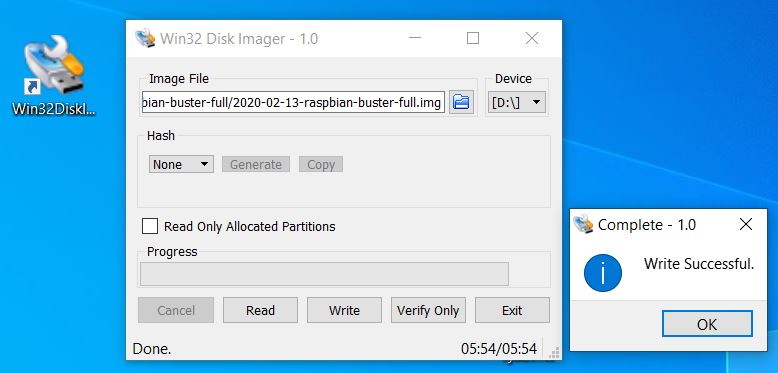
Now you are ready to plug in the SD card in your Raspberry Pi and start it!
Back to Index.
Starting the Raspberry Pi
Now when you have a SD card with an OS installed on it, simply put everything together and start the Pi. First time you do this, you will be asked questions like password, wifi etc. Go ahead and play around with the Pi!
Back to Index.