NESpi Project Part 1 – The Case, top part
This is the first blog post in a series about how to put a Raspberry Pi inside of an original NES case. The goal is to follow the principles to not damage the hardware and to keep the look and feel of an authentic NES.
Quick Guide
- Take apart the Case.
- Glue together cracks (if any).
- Clean the case in warm water and soap.
- Retro bright – apply a gel with hydrogen peroxide (e.g. Salon Care or Wellexon Perfect 12%), use a brush. Put the case in plastic wrap. Put the case under a UV lamp or in the sun. Heat is also required for the chemical process and to open up the pores in the plastic so the gel can suck in. The heat from the sun on a sunny day is enough. Repeat the process or make it in one run. About 24 hours should be enough.
- Clean the case again in warm water and soap and let it dry.
- Reassemble the parts for the case and you are finished!
Introduction
There’s a lot of guides out there how to put a Raspberry Pi inside of an original Nintendo Entertainment System (NES) case. This is in my opinion a splendid idea! You will get the authentic look of a genuine Nintendo video game console. And at the same time, you will have the possibility to emulate hundreds of games and with modern conveniences like e.g. save states.
However, it really hurts me to see that a lot of people are drilling holes and gluing things to the original cases! Those cases belong to a museum! The old video game consoles we love so much are getting fewer and fewer. There is no need to “sacrifice” an original case just to put a Raspberry Pi inside.
This will be the first blog post in a series about how to put a Raspberry Pi inside an original NES case with minimal damage to the hardware. Through the project, I am guided by these principles:
- The finished console should look and feel authentic.
- Minimal or no damage to the original hardware.
Step 1 – Get to know your NES

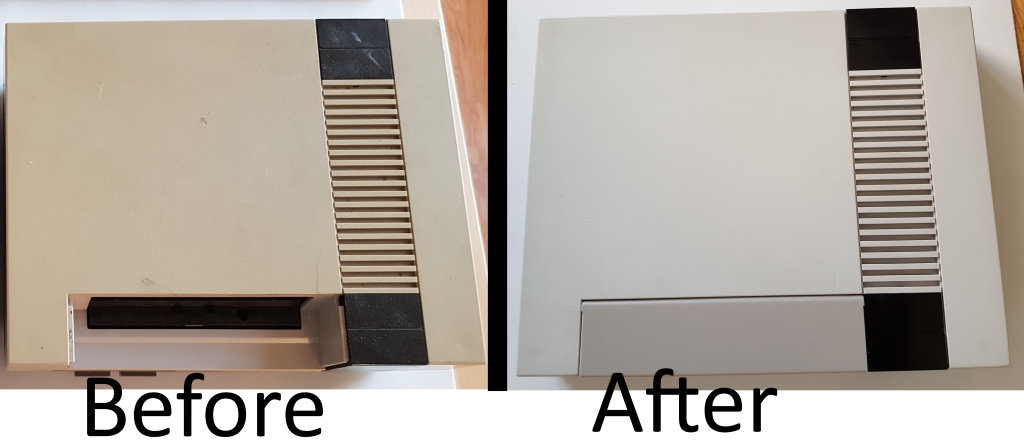
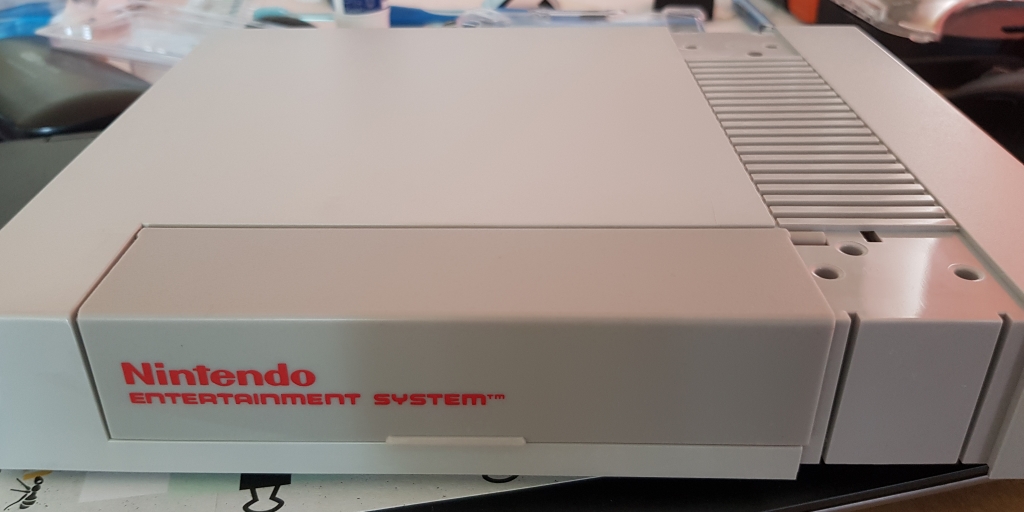
To the left is my NES, which I regular play on. To the right is the NES, which I will put a Raspberry Pi inside of.
For this project I deliberately bought a NES that does not work and is in terrible condition. I already stated that I have a huge respect for these old gaming consoles. And instead of “sacrificing” a working NES, I will bring new life into a NES that is close to been thrown into the garbage and forgotten.
Info. You can’t really see it on the picture, but please believe me when I tell you that the right one is really filthy!
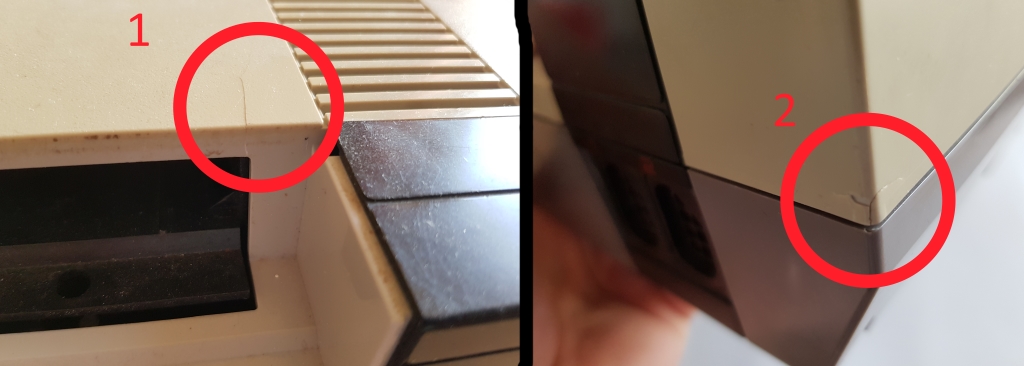
Before I take apart the case I want to show you some cracks and damages to the case.
- This crack I won’t do anything about. I’m afraid that if I use sand paper or glue or just anything, I will only make the crack more visibly than before. (I guess the crack is from when the lid was torn apart.)
- There are bad cracks on three of the four corners. The pieces are really close to fall off. I will try to seal these damages with glue. (the damages could be from someone that tightened the screws to the case too hard.)
Step 2 – Take Apart the Case
Organization of your tools and parts are important and will make the project more fun to work with in the long run. (You will be very angry with yourself if you ever loose one of the screws or parts!) Look at this image:
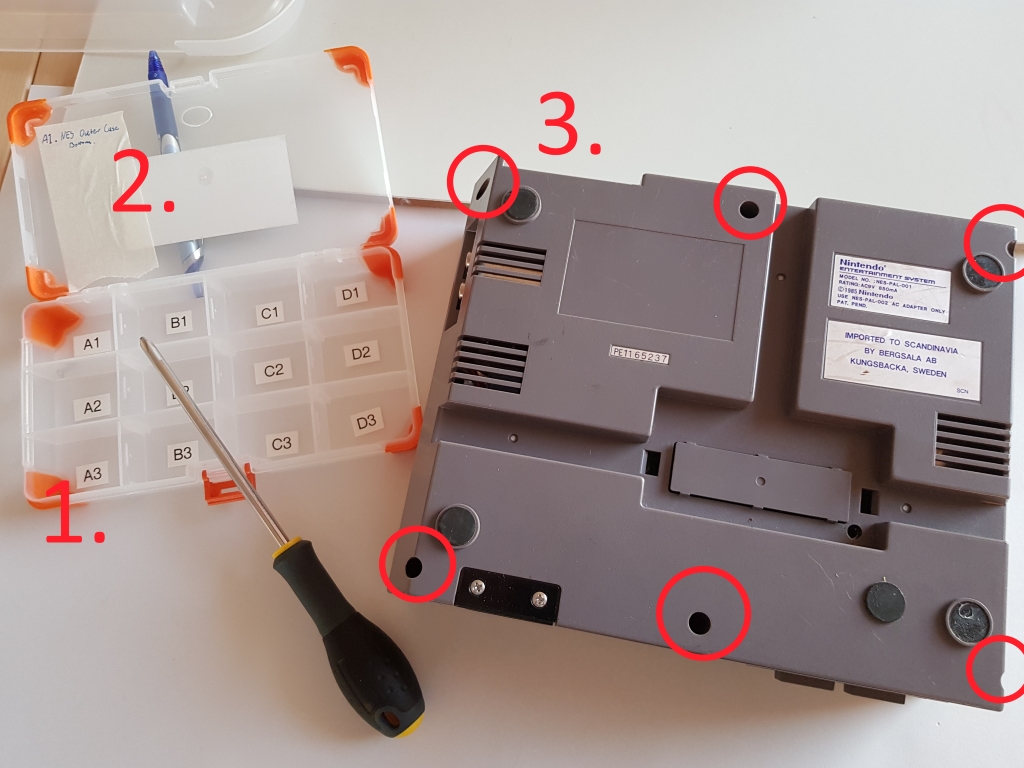
- I’ve labelled a box with several sections.
- For each project I write down on a masking tape which parts in each section and how many of them. This helps a lot to organize all tiny parts!
- To open the NES, unscrew 6 screws under the console. Use a Phillips screw driver.
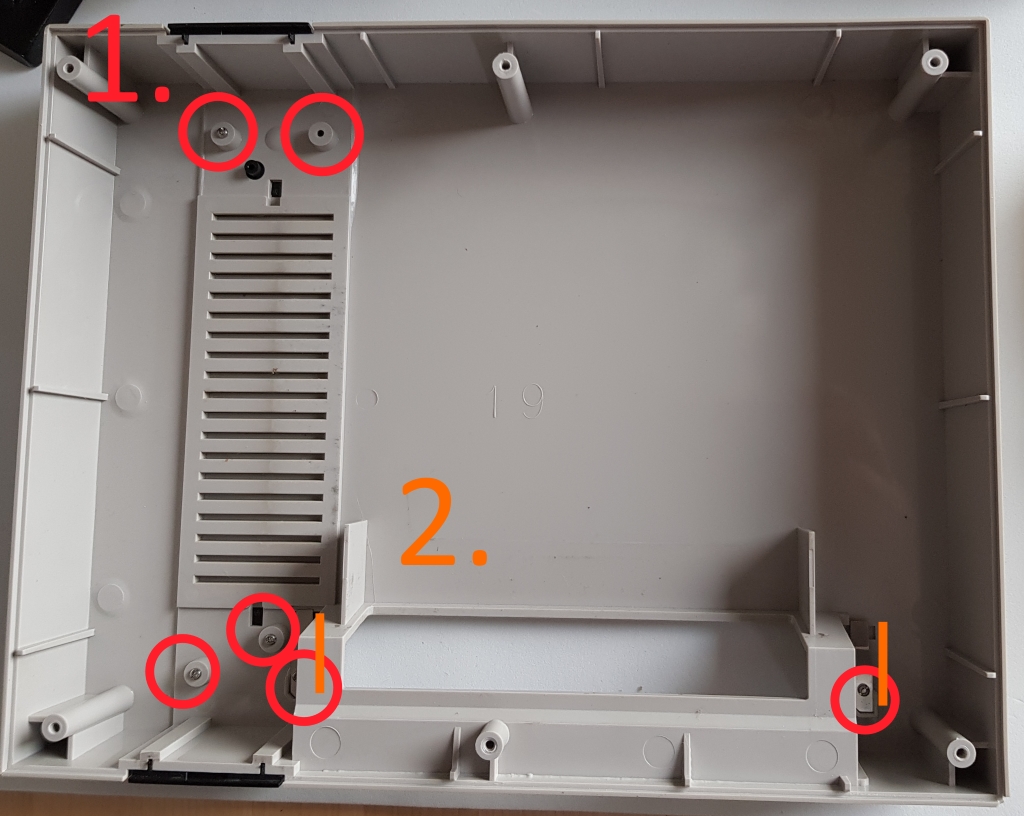
Here are the final screws and parts of the top case. You are able to reach them from the inside.
- Six identical screws are holding the external parts together (red).
- Two small metallic plates are holding the lid (orange). (The lid is missing on my NES so I have to replace it somehow).
Step 3 – Washing
After everything is striped of, it’s time for washing.
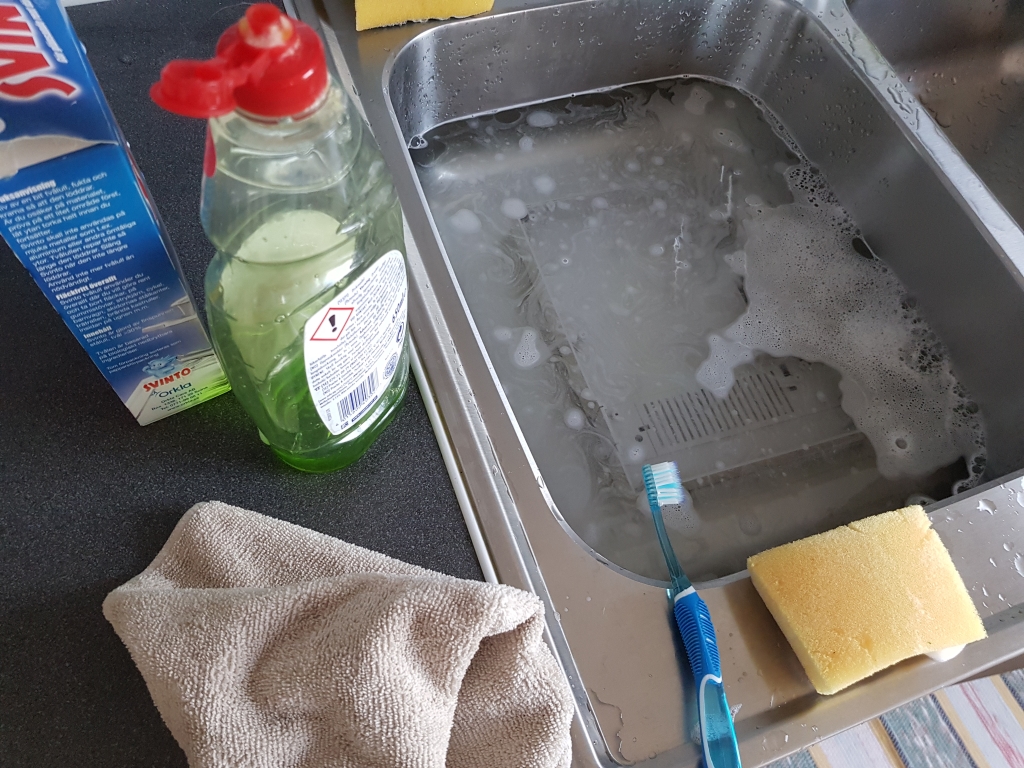
Nothing special here, I’m just using warm water and soap. I use a sponge and a toothbrush while washing. I dry clean it with a microfibre towel.
This is how the case looks like after washing, cleaning and striping:
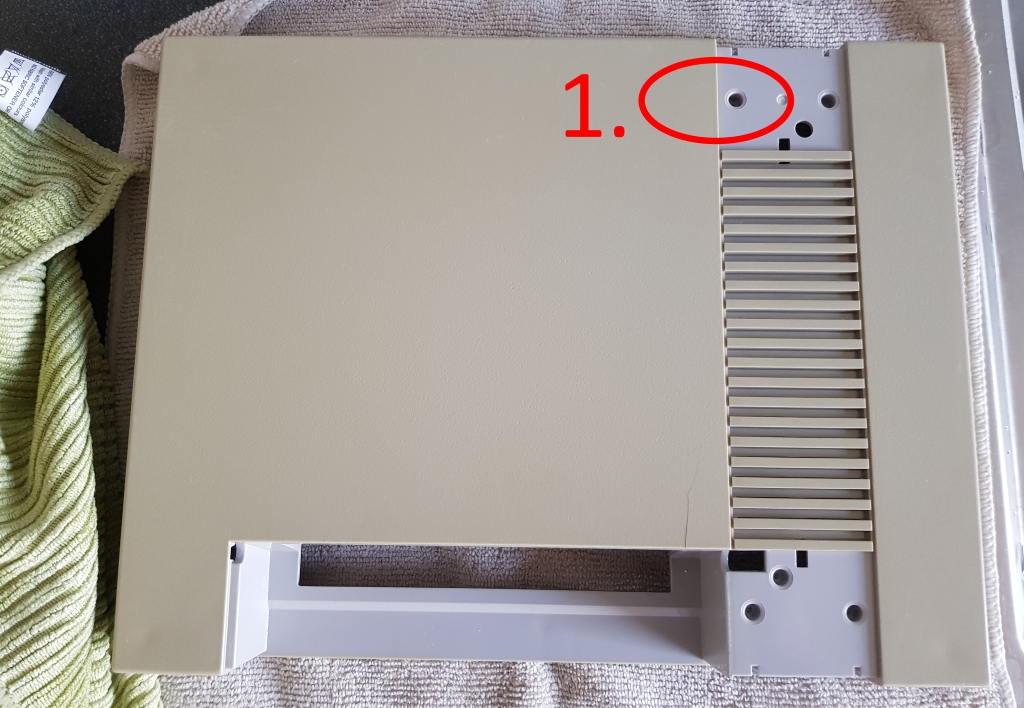
- You can clearly see that the plastic has turned yellowish during the console’s life time. This is due to UV light from the sun. The grey areas are those who has not been exposed to UV light, and it is the original colour. This case has to be retro brighten.
Step 4 – Glue the Corners
I had to do something about the corners. Just looking at them might cause them to fall apart. For this case I washed the corners first and glued them together before I did anything else with the case (because of the fragile state of them).
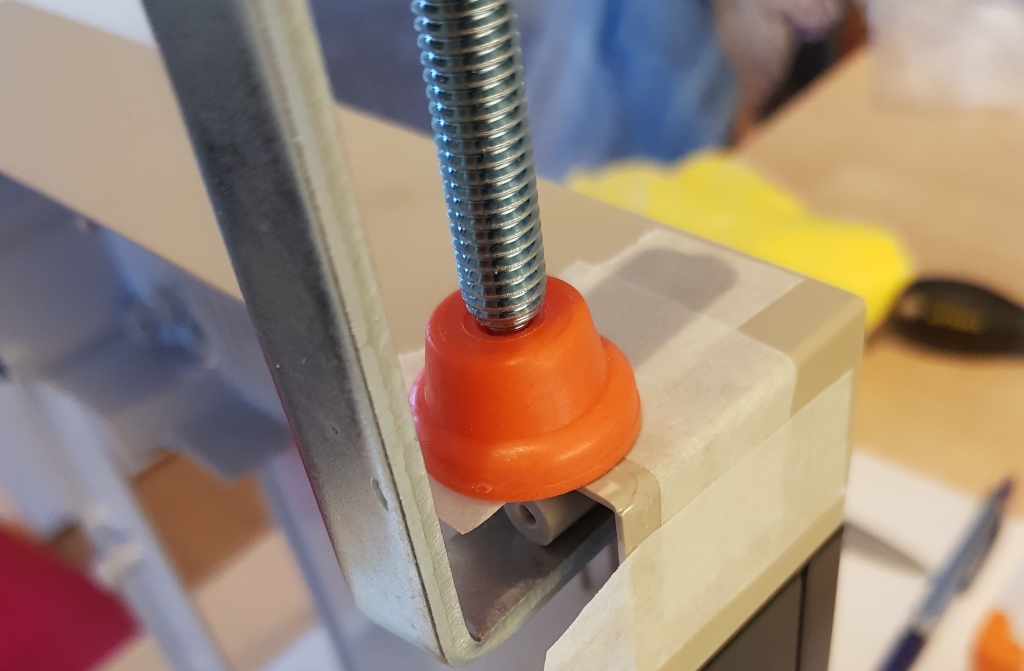
This image shows how I glue the corners and put a protecting glue over them, to prevent any further damage. I used a clamp to hold the pieces together. Note, make sure you don’t glue the clamp to the case itself! I used a two-component epoxy glue. I used masking tape to prevent any glue on unwanted places. I used a small brush to apply the glue. After a few minutes after I applied the glue, I removed the tape, otherwise it will be stuck with the glue.
NOTE! I’m not really happy with the result here. It turned out that I used too much glue. Also, the glue covering the corners will prevent the retro brightening I will use later. This is what I should have done:
- Gently wash the corners.
- Put fast acting adhesive on a thin needle. Use the needle to work in the glue into the cracks and the damages pieces. Use a clamp, if necessarily.
- Retro bright the console. Be careful that the pieces won’t fall apart when you wash the case.
- As a final touch, put a VERY thin layer of glue over the corners. Make the surface smooth.
Step 5 – Retro bright
Retro bright is the name of the process when you try to restore the original colour of yellowed plastics. There are several of methods but in this blog post I will only cover the one I normally use. This method suits me because it won’t leave much waste and I can perform it in my small apartment.
Info. What all retro bright methods has in common is to apply UV light, heat and hydrogen peroxide. That will make the process of yellowed plastic to go backwards and regain the original colour.
Note! Check with your local regulations how to dispose the waste.
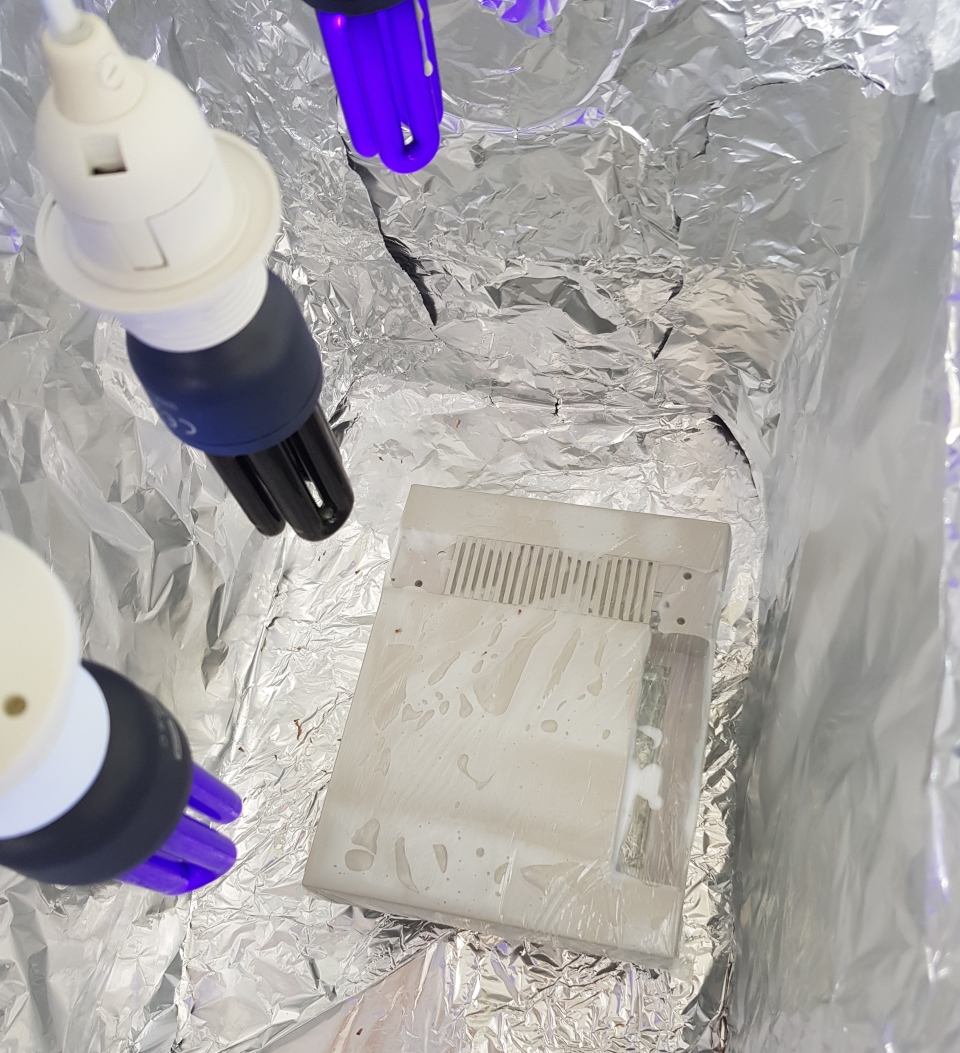
Here is my setup for the Retro bright:
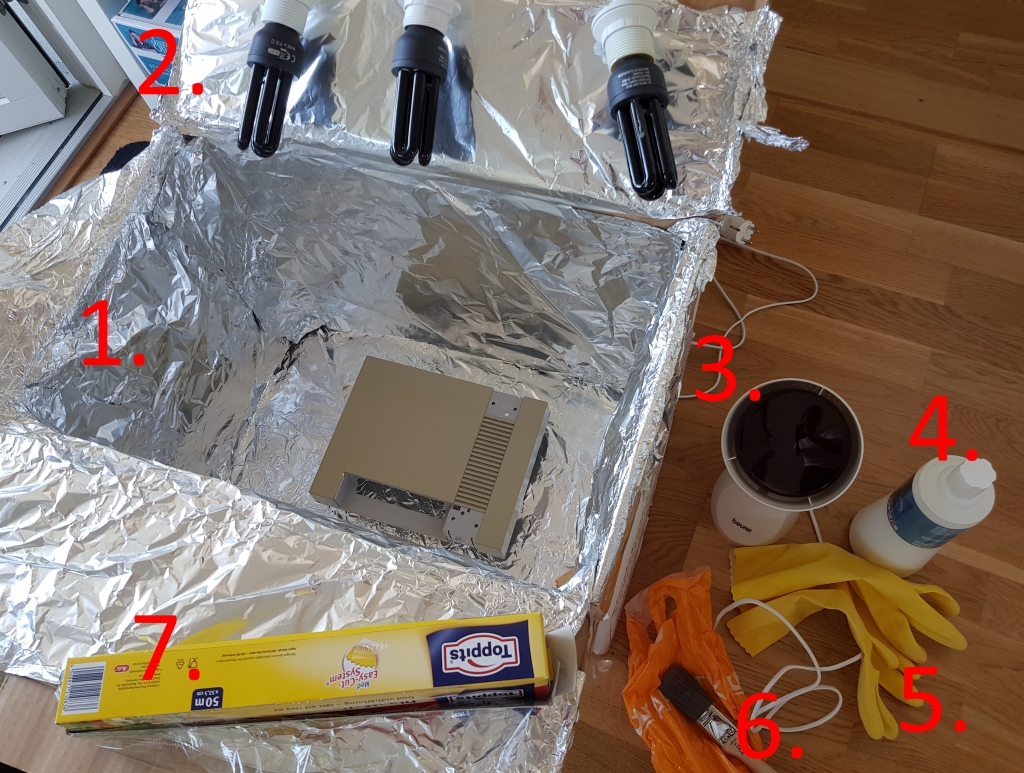
- I covered the inside of a moving box with aluminium foil.
- 3 UV lamps will provide the UV light and enough heat. (I do this on my balcony, if the weather is nice, two lamps is enough.)
- If it is winter, sometimes I use an infrared lamp to increase the heat. The process should be warm but not so warm that you burn anything!
- I use a hairdresser crème for bleaching hair that contains 12% hydrogen peroxide. The name of the crème I’m using: WELLOXON PERFECT – oxidations Crème 12% 40 VOL.
- It says on the bottle to avoid contact with skin and eyes. I use rubber glues while working with the crème.
- I use a brush to apply the crème.
- Before I put everything into the box, I wrap the case in plastic film.
Here is the work in progress:
It is a time-consuming process to use this method, bud the result is rewarding. This week after work and before I went to bed, I put the case in the box for retro brightening. I repeated the process described 4 times, 5 hours each treatment. After each time I washed the case clean. Here is the result:
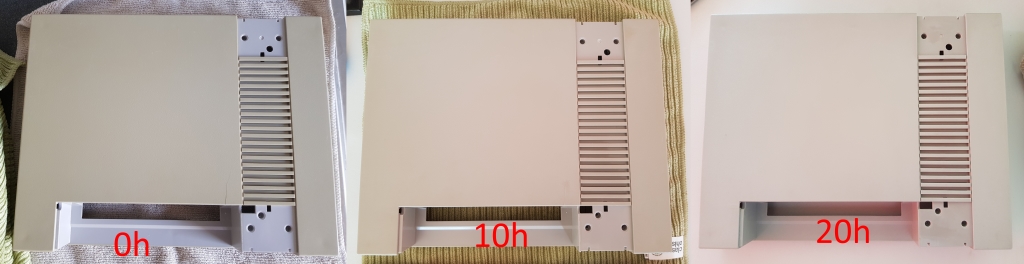
I think most people would have settle for the result after 10 hours, it looks good. Just for curiosity I continued the treatment and after the 4th time it almost turned white! I stopped there.
Note. Various sources on the Internet says that you should do this treatment in one single run for 24-36 hours. I think, I don’t need so many hours when I several times washed the case and added new crème.
Step 6 – The Black Plastic Details
I wanted to make the black plastic parts to look better. I got my inspiration from car care products to do that. Cars often have black plastics that get faded by time. There are literally hundreds of products out there for the purpose to restore black plastics. I was looking for something that could do the following:
- Get rid of small scratches.
- Something that works deeper into the plastic to restore it.
- UV-protection.
- Polish or a good finish.
Note! the following examples didn’t turn out as I hoped. It’s a fine result but not perfect. The products and method work, but I don’t think they are the best approach out there. Please experiment on your own to find out what suits you.
- I used toothpaste and a microfiber sponge for the small scratches. This is an old trick to take care of scratches on cd-discs.
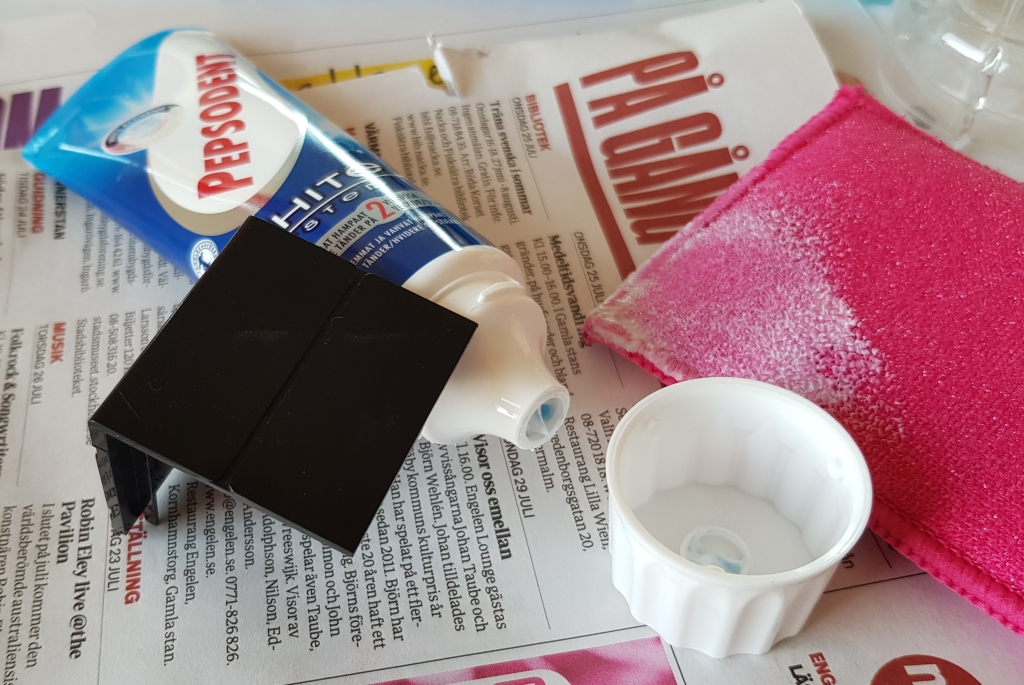
- I used the following products to restore the plastics. The product to the left is deeper restoring plastics. The product to the right has UV-protection and a finishing layer combined.
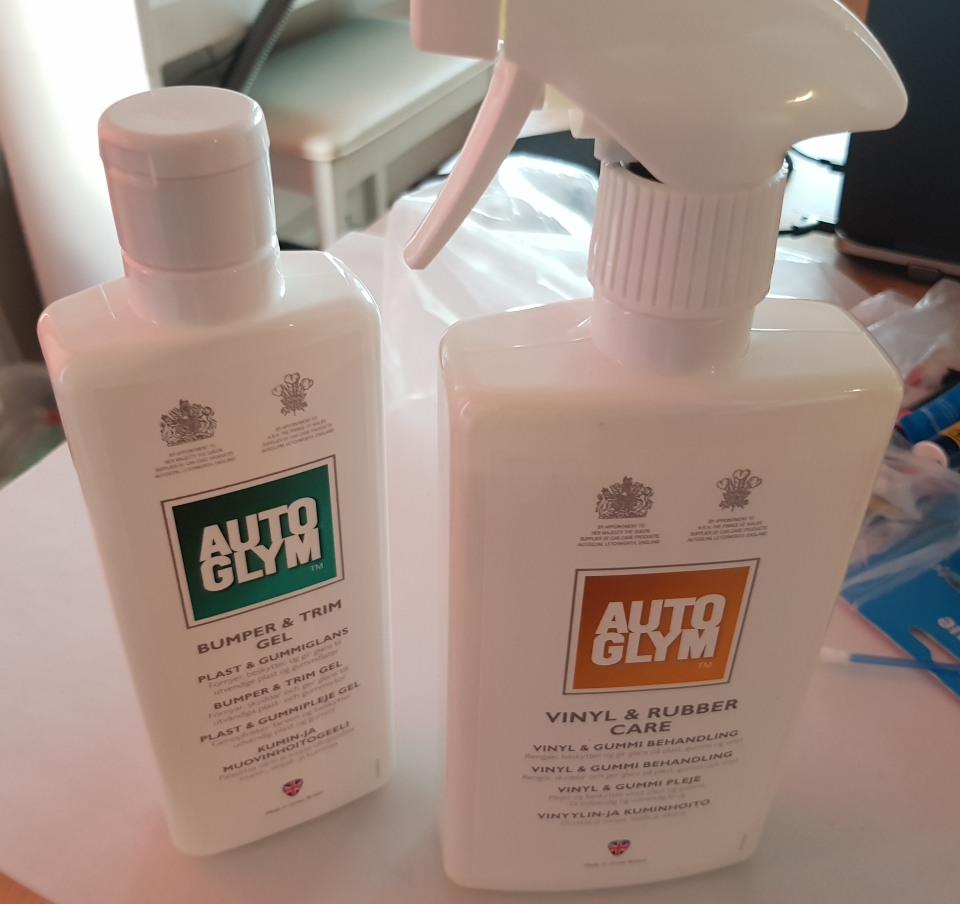
NOTE! I don’t know the long-time effect of this treatment. Do this at your own risk.
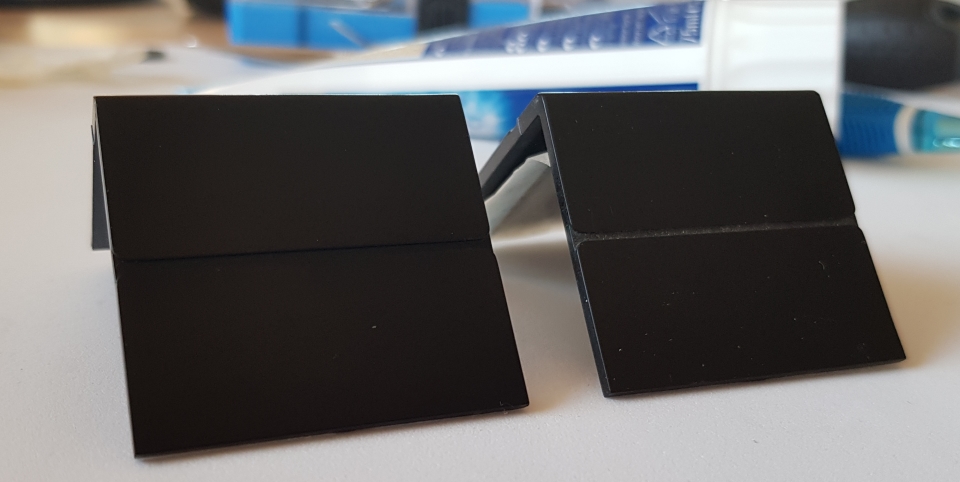
The result (to the left, a part with treatment. To the right, a part with no treatment):
Step 7 – The Lid
My NES is missing the lid. So, I bought a new one, an after-market product. And guess what, the colour of the plastics doesn’t match! And there is no way to change this. My best advise is to by the lid before you attempt to retro bright the case. Then you at least have some chance to match the colour. I just have to live with this:
Anyhow, we are bringing a NES in very bad condition back to life here!
Step 8 – Reassembling
This is the funniest part! Put all the pieces back together and enjoy!
I finished by putting a very thin layer of UV-protection on the surface.