NESPi Project Part 7 – Installing and Configure Software
Finally, we are going to see something on a screen/monitor. I won’t go into deep details in this blog post because software tends to change quiet much from version to version. I will try to give you a general idea about how it works. If you encounter any errors or troubles, I strongly suggest that you check the documentation and forums for each software I’m using. Let’s go!
Quick Guide
- Specification of software and versions I am using.
- Download RetroPie.
- Format and write the Images to the micro SD card.
- Boot the Raspberry Pi
- Display Settings
- Transfer ROMs
- Scrape ROMs
- Splashscreen
- Configure Retroarch.cfg (Controller Input)
Step 1 – Software and Versions
It is a good habit to document what you are using.
Hardware:
- Raspberry Pi 3 model B rev 3.
- PC Windows 10.
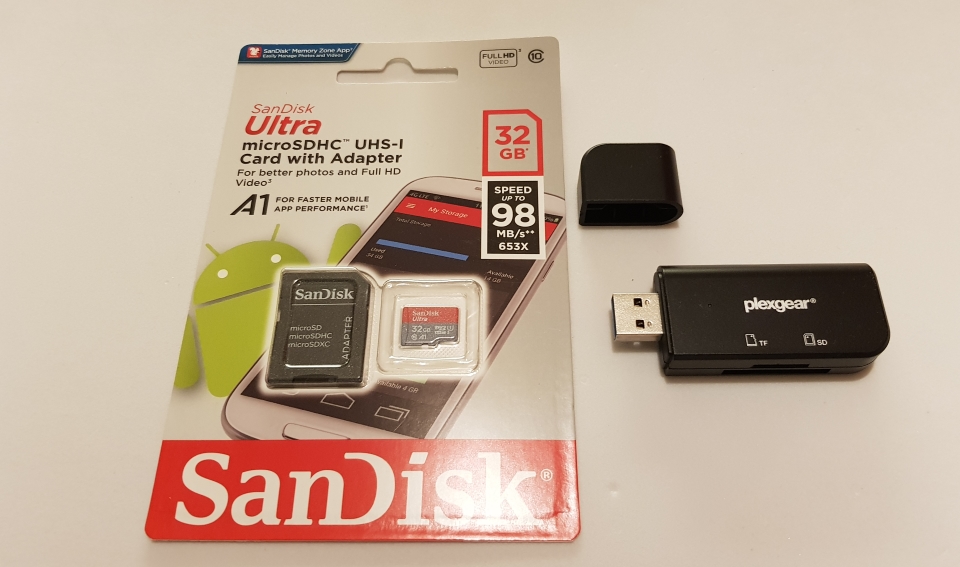
- SD micro card 32GB SanDisk Ultra.
Software:
| Name | Version | Purpose | Link | Note |
|---|---|---|---|---|
| SDformater | V4.0 | Format the micro SD card, so you can write an image to it. Use it as hard drive. | https://www.sdcard.org/downloads/formatter_4/index.html | FAT32, preferred. |
| 7-Zip | 18.05 | Extract zipped files. | https://www.7-zip.org/ | |
| RetroPie | retropie-4.4-rpi2_rpi3.img.gz | Image. OS built on Raspian that can emulate old video games. | https://retropie.org.uk/download/ | Please donate to RetroPie. Wonderful project! |
| Win32 Disk Imager | 1.0 | To write an Image (OS) to a drive (SD card). | https://sourceforge.net/projects/win32diskimager/ | |
| Universal XML Scraper V2 | V2 | Srape, put nice boxarts and description about the games in RetroPie game menu. | https://github.com/Universal-Rom-Tools/Universal-XML-Scraper/releases | There is a built-in scraper in RetroPie, but I prefer this one. |
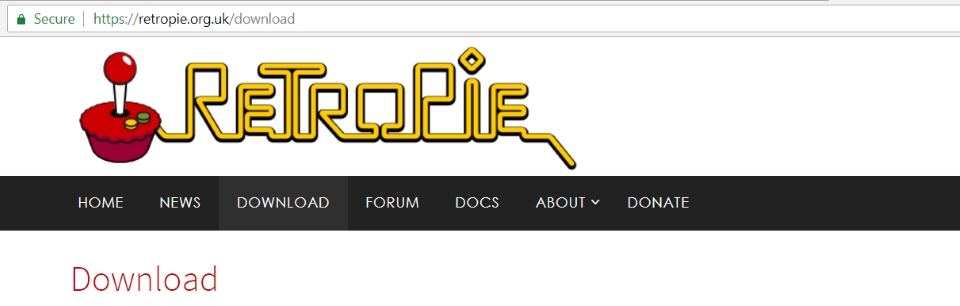
Step 2 – Download RetroPie
RetroPie makes dreams come true! It is an OS built upon Raspian OS that can emulate old video games.
Note. No ROMs (games) are included of legal reasons.
RetroPie comes with a great GUI and powerful ways to configure it. Please help the team behind it and donate: https://retropie.org.uk/donate/
My suggestion is that you read RetroPie’s documentation (which is a good one) and familiarize yourself with it. It will help you a lot. As I already stated, I won’t go into details in this post because software changes from version to version. It’s much better that you follow the official documentation: https://retropie.org.uk/docs/.
Download:
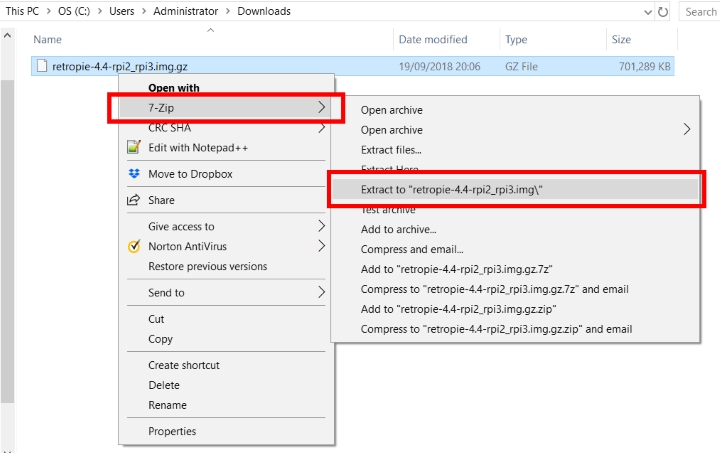
Once you downloaded the zip-file you must unzip it (extract). Normally just right click on the folder and choose extract. I use 7-zip tool for this. Remember where you choose to extract the file so you easily can find it later.
Step 3 – Format and write the Images to the micro SD card.
The SD card will work as a hard drive in the Raspberry Pi. To make this work we need two things:
- Format the SD card so it can work as a hard drive.
- Write the Images (OS, Operative System) so the Raspberry Pi has something to boot.
Format the SD card:
Connect the SD card to your computer. I used an USB SD card reader for this:
As formatter software, I used SDFormatter, it will automatic format the SD card to FAT32, that is required.
Note. I think, if you use a large SD card, let’s say over 64GB it might give you exFAT format, this might not work when booting the Pi later. Avoid this by only using recommended sd cards for the Raspberry Pi. Standard format is FAT32, you will get that automatically with SDFormatter and a compatible SD card.
SDFormatter software:
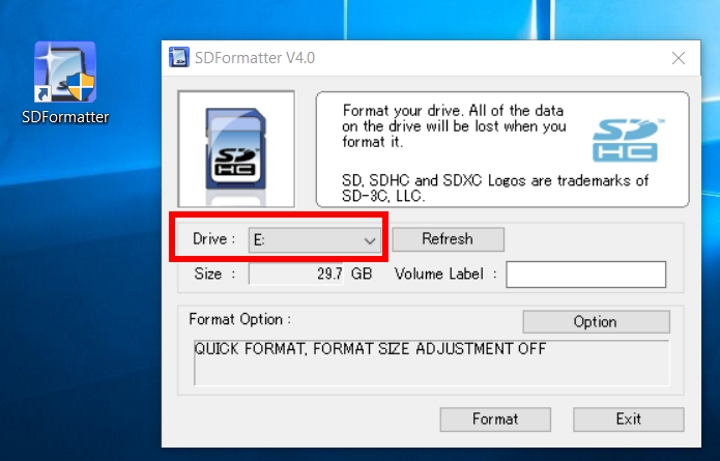
Note. Make sure you know which drive your SD card is! If you accidently format another drive, you will wipe the content there! Avoiding this, don’t connect anything else to your computer while formatting a drive.
Write the Images to the SD card:
An image is like a copy of an OS and everything included to make it boot and run. It can also be seen as a snapshot of a hard drive.
Let’s write the RetroPie Image to the formatted SD card. For this. I’m using Win32 Disk Imager.
Disk Imager writing and reading software – Win32 Disk Imager.
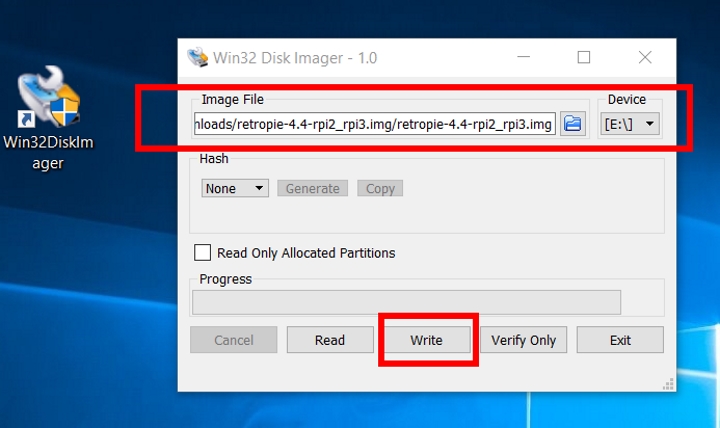
Pick up the image-file you extracted from the RetroPie zip-file. Then choose the right device and write it.
Step 4 – Boot the Raspberry Pi
Put the SD card in the Raspberry Pi (#1, image below) and power it up. The first time it boots up it will take additional time. Once it is ready you will be asked to configure an input device (#2, image below). I am using the NES controller via the Arduino micro controller (see previous blog post about the NES controller protocol), it is recognized as a keyboard:
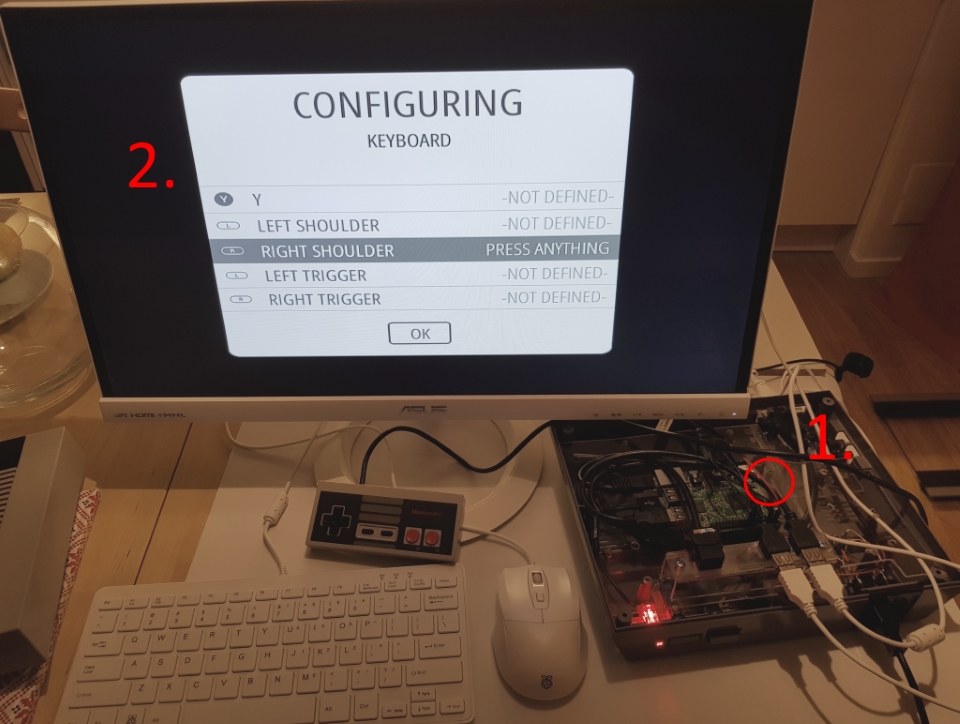
If you don’t want to map a button, or you can’t (the NES controller doesn’t have so many buttons as requested), just press an already mapped button and it will jump down to the next one.
The last button to be mapped is the hotkey, I set select button on the NES controller to be the hotkey.
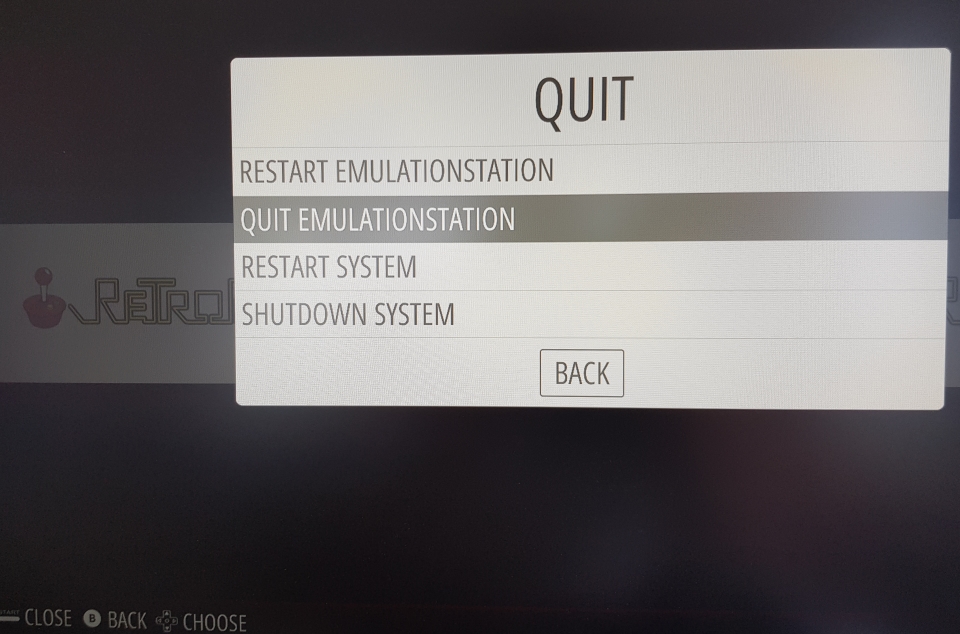
After the mapping is done, you will see the RetroPie GUI. Now I strongly suggest that you boot the Pi once more.
You can reboot the Pi by open the Menu and choose Quit. Now you have several options. Reboot by choosing RESTART SYSTEM. Notice the option quit emulationstation, we will use this option later in this post and blog series.
Step 5 – Display Settings
I never get the display settings right from the beginning. Raspberry Pi should automatically detect a good setting for your screen or monitor. But for me it always seems a bit off. I can’t really give you a “this is how you should do” advice because all screens behave different. However, I will provide two examples how to set the display settings and I hope that will get you going on your own.
Tip. The display settings are always in the underlying OS Raspian. I suggest you don’t try any settings in the RetroPie GUI for resolution etc. Focus on to get it right in Raspian via the terminal. I found more control in this way.
Example 1 – My Computer Monitor, GUI config
When I program the Pi, I’m using a computer monitor: Asus, a few years old, good quality. This is how I do:
- Exit the emulationsstation via the menu or hit f4.
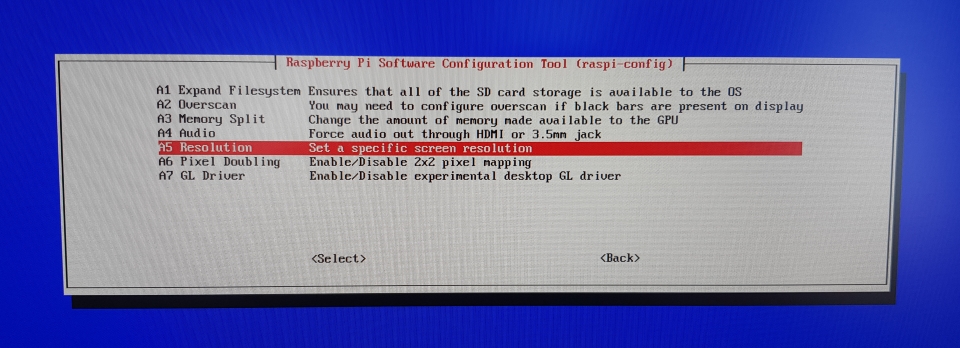
- type: sudo raspi-config , it will give you a GUI that will make changes in the /boot/config.txt file that holds all screen and monitor settings in Raspian.
- Go to Advanced options.
- Choose Resolution, here you can do some trial and error and see how it works out.
Example 2 – My TV screen, Manually config
I have a Panasonic modern flat screen TV. I play all my console on this TV and I am very keen to have a good picture. I do the settings for the TV manually.
- Exit emulation station via menu or hit f4.
- Type sudo nano /boot/config.txt it will bring up a terminal editor (nano) that allows you to change the content in file config.txt.
- # are one line comments. Remove the # character to activate a line. My settings are the following:
hdmi_group=1
hdmi_mode=16
overscan_left=-8
overscan_right=-8
overscan_top=-21
overscan_bottom=-21
You can read more about hdmi, hdmi group and hdmi mode here: https://elinux.org/RPiconfig.
Hdmi group 1 is intendent for TV screens, Hdmi group 2 is for computer monitors. Hdmi group 2 for DMT (computer monitors) don’t carry sound by default. If you have a computer screen with built in speakers you can still use group 2 (DMT) and force sound by uncomment #hdmi_drive=2.
Step 6 – Transfer ROMs
Info. Please read RetroPie’s documentation, there are several options of transferring ROMs.
Note. Read on your own about how you legally can get or make ROMs. ROMs are the games you want to play, they are stored in files called ROMs. They are under copyright protection.
The easiest way to transfer ROMs is to plug in an ethernet cable to the Pi from your Router. The Pi and your computer with the ROMs must be on the same network.
Open a file explorer and type: \\RETROPIE
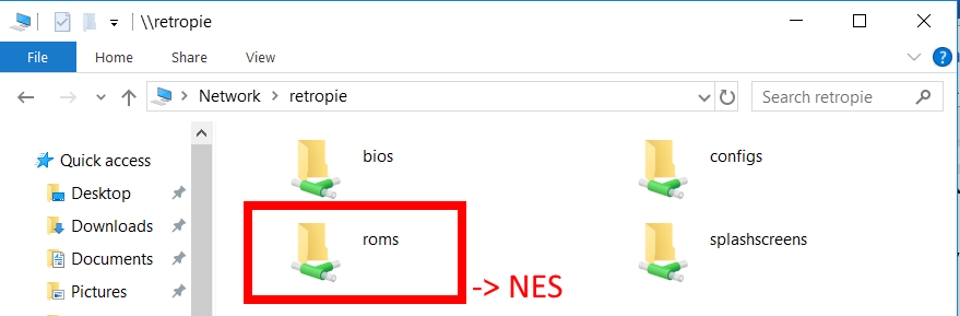
Info. The reason this works is that the creator of RetroPie has enabled something called samba. Samba allows communication between a Linux based system like Raspian and e.g. a PC running windows.
Put the ROMs in the right game folder. I will only use NES because this Pi will be dedicated to only run NES games.
Step 7 – Scrape ROMs (build a good-looking game library)
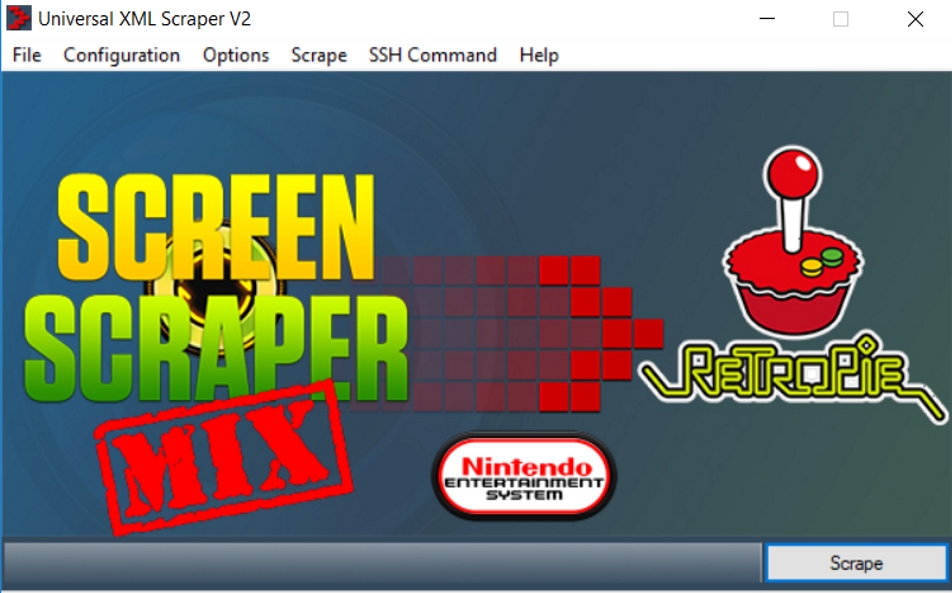
If you don’t scrape the ROMs you have, they will only show up in a list with their names. My favourite scraping tool is Universal XML V2, it really makes the job. Visit their website or follow a tutorial on the web. I won’t go into details how it works. I just want to promote that this fantastic tool is out there!
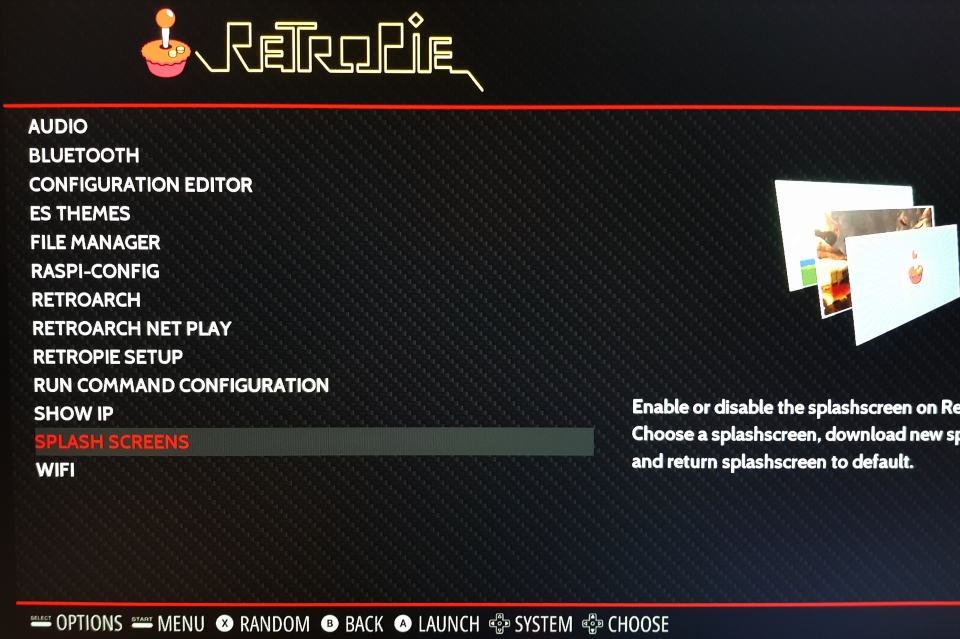
Step 8 – Splashscreen (Loading screen)
This is not an important thing, but I think it is a nice feature. There is a good-looking animated load screen I want to show.
Open the RetroPie Menu from the GUI:

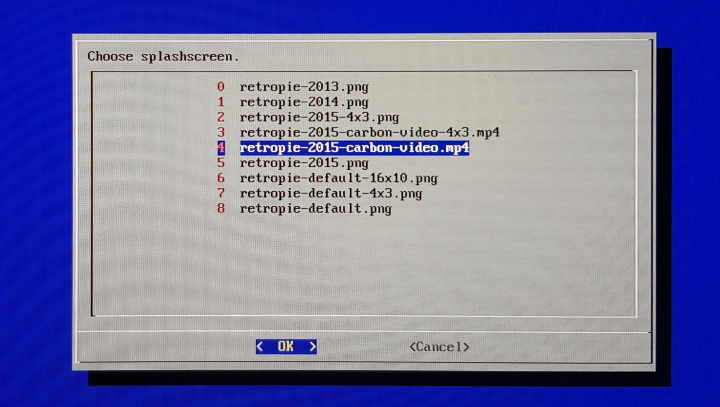
Choose splashscreen:
You want to test RetroPie-carbon-video:
Step 9 – Configure Retroarch.cfg (Controller Input)
The file that holds all configs for the user input is retroarch.cfg. you can edit the file from the terminal: sudo nano /opt/retropie/configs/all/retroarch.cfg.
Note. There are several retroarch.cfg files and they are bound to a hierarchy. the ../all/retroarch.cfg makes the settings for all emulators in retropie, it’s the master settings file. But if you go in to e.g. /opt/retropie/configs/nes/retroarch.cfg and make changes. You will override the master file and apply settings only for that system, in this case NES emulators. It is also possible to make specific settings just for a single game. The simplest way to do that is to launch the game while holding any mapped button, it will bring you to a menu where to enter settings. It will automatically save the file in the right place and with the right filename. (There is no winning in adding this manually the first time, better make retropie create the first file for you, my opinion.) Example of path to a game specific config file: /RetroPie/roms/nes/Adventures of Lolo(Europe).nes.cfg.
In the file: /opt/retropie/configs/all/retroarch.cfg I mapped the emulated keyboard presses from the NES controllers. Here are my settings to make it work:
input_player1_a = “enter”
input_player1_b = “backspace”
input_player1_start = “space”
input_player1_select = “rshift”
input_player1_left = “left”
input_player1_right = “right”
input_player1_up = “up”
input_player1_down = “down”
input_reset = null
input_player2_a = “j”
input_player2_b = “h”
input_player2_start = “g”
input_player2_select = “t”
input_player2_left = “a”
input_player2_right = “d”
input_player2_up = “w”
input_player2_down = “s”
input_save_state = “down”
input_load_state= “up”
input_state_slot_increase = “right”
input_state_slot_decrease = “left”
input_exit_emulator = “space”
input_enable_hotkey_btn = “rshift”
Note! I have noticed that even if short commands for certain actions are commented out, they still can be active! If this happens you can unbind the short command by binding it to nul like this:
input_toggle_fullscreen = null
I mentioned earlier that you can make games specific button mappings. Here is one example when I switched the hotkeys for start and select button. It is more convenient to play the game with the following settings (Adventure of Lolo):
/RetroPie/roms/nes/Adventures of Lolo(Europe).nes.cfg
input_enable_hotkey = space
input_exit_emulator = rshift
input_toggle_fast_forward = s
Note. When browsing the retroarch.cfg file, you will see a lot of video settings. The video settings in retroarch.cfg are mainly for enhancing retro feeling, like imitating a CRT TV etc. Get the display settings right in the /boot/config.txt file before you try any settings in the retroarch.cfg!