DNS server in local network (Hyper-V)
In a previous post (https://www.raspberryfield.life/2019/03/12/create-a-lan-between-vms-in-hyper-v/) we looked at how to create a private network in Hyper-V. Now, we will add a DNS-server to that network.
Info. This post is tagged with “my notebook”. That means, that the purpose of the post is mainly for me to remember something I did. The information here might be incomplete, hard for others to read or contain faults and misconceptions. I’ve chosen to publish my notes, please help me improve them by feedback in the comments section. I hope someone will gain something from these kinds of notes.
TL;DR
- Assign the DNS role to a server.
- Create and register entries in Forward Lookup Zone.
- Create and register entries in Reverse Lookup Zone.
- Use the nslookup tool from command prompt to check DNS registers.
Index
- Prerequisites
- DNS server
- Setup in Hyper-V
- Add IP address to DNS server
- Add DNS feature to DNS server
- DNS – Forward Lookup Zones
- DNS – Reverse Lookup Zones
- DNS – nslookup
- Summary
Prerequisites
If you find information lacking or too hard in this post, try to read this one first: https://www.raspberryfield.life/2019/03/12/create-a-lan-between-vms-in-hyper-v/ [2019-03-12]
Back to Index.
DNS server
DNS stand for Domain Name System. The purpose of the DNS server is to resolve an IP address to a name or the other way around: a name of a computer on the network to a IP address.
This doesn’t look much but, believe me, DNS will come in handy many times.
Computers communicates with a numerical representation of each other (IP addresses) and that works fine for computers. However, humans have a hard time to remember long numbers, therefore we use name representation. And for that we need a DNS server. You rather type www.google.com instead of e.g. 216.58.207.196 (you shouldn’t try to access a website with its IP, but it is possible. It’s just for demonstration).
Another reason to use DNS names from a DNS server is that computers during their lifetime tends to be given different IP addresses. Maybe you have to move a computer to another network or subnet due to security improvement, then that computer needs a new IP address. If you don’t use DNS, then you have to update every piece of code or configuration that connects to this computer and manually change the IP to the new IP address. This is a terrible work to do! ALWAYS stick to the DNS name in your code and configurations.
Back to Index.
Setup in Hyper-V
This post builds on a previous post where we installed two servers on the same private network in Hyper-V (see prerequisites). We will now add another VM with Windows Server 2016 OS to use as a DNS server. When you are done, you will have three servers in the Hyper-V Manager:
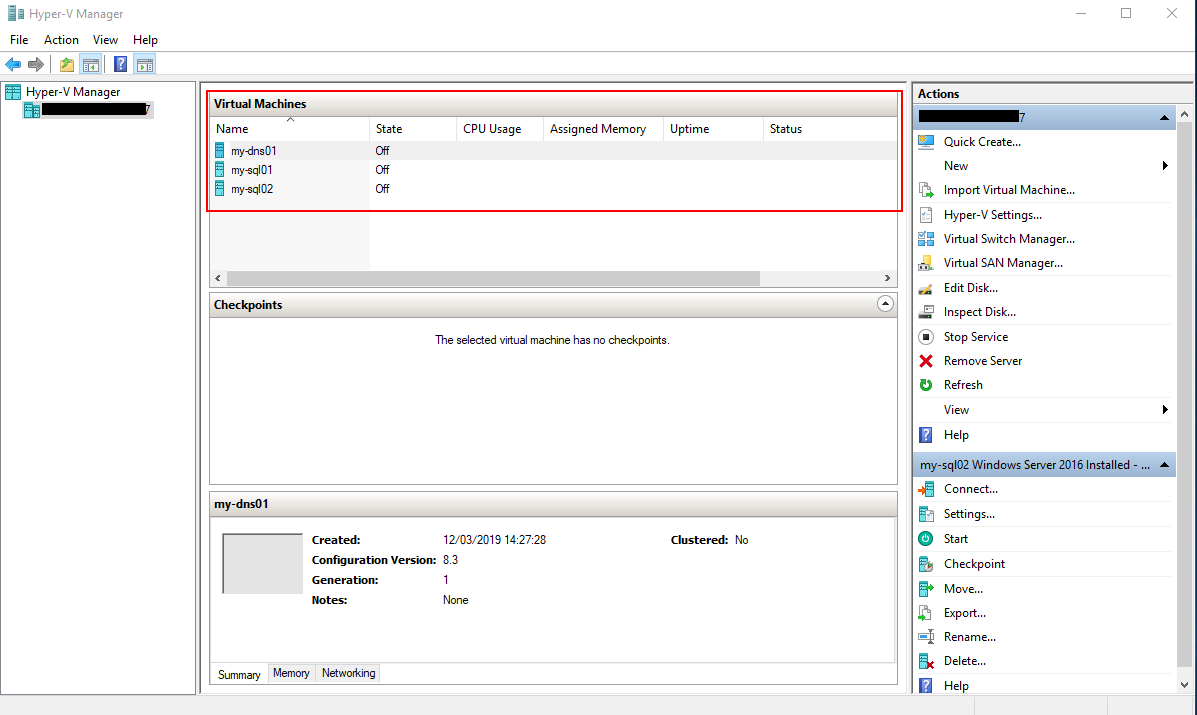
Server names and IP addresses (IPv4):
| Server Name | IP Address | my-dns01 | 192.168.10.1 | my-sql01 | 192.168.10.21 | my-sql02 | 192.168.10.22 |
|---|
Make sure you can ping each machine (see previous post).
Note. Turn off the Windows Firewall, in this lab environment we don’t need it. We will only be wasting time in setting up firewall rules.
Back to Index.
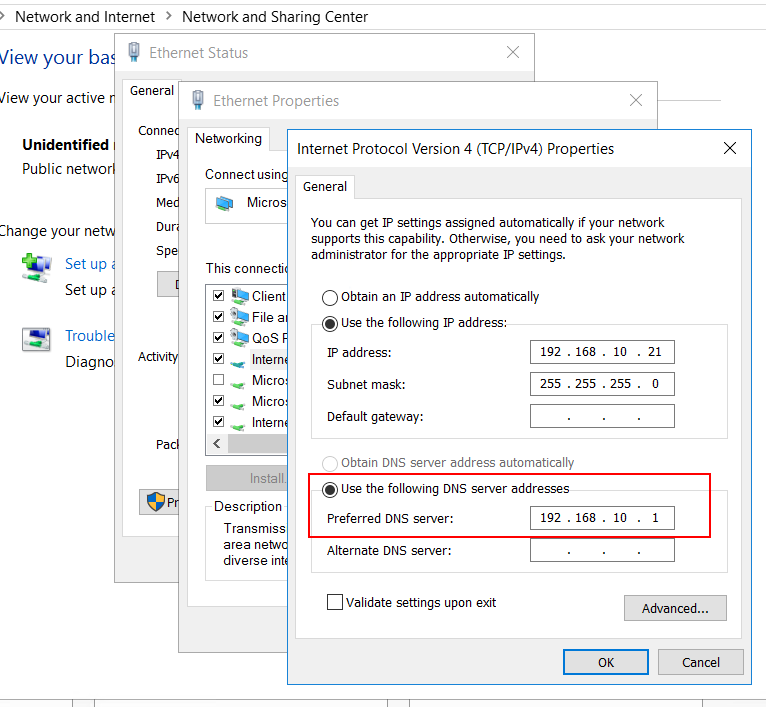
Add IP address to DNS server
You have to add the DNS IP address on each server (the address to the DNS server: my-dns01 is 192.168.10.1):
Back to Index.
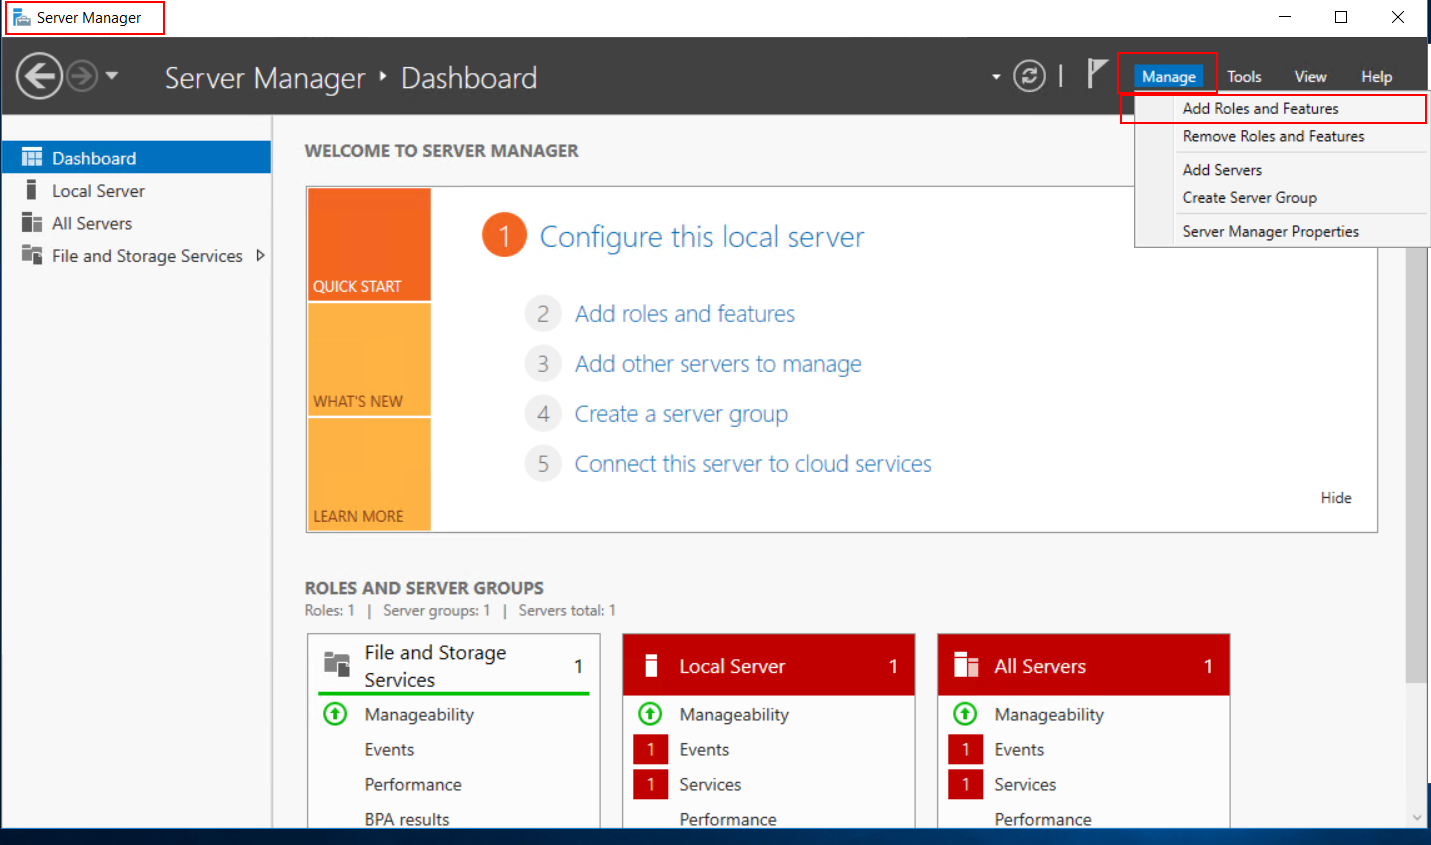
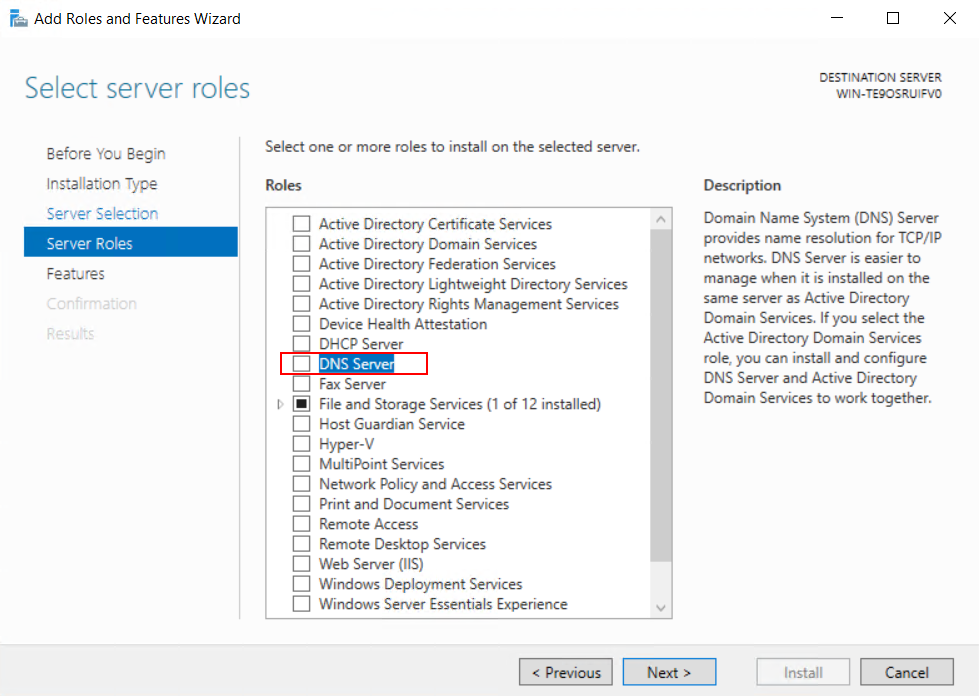
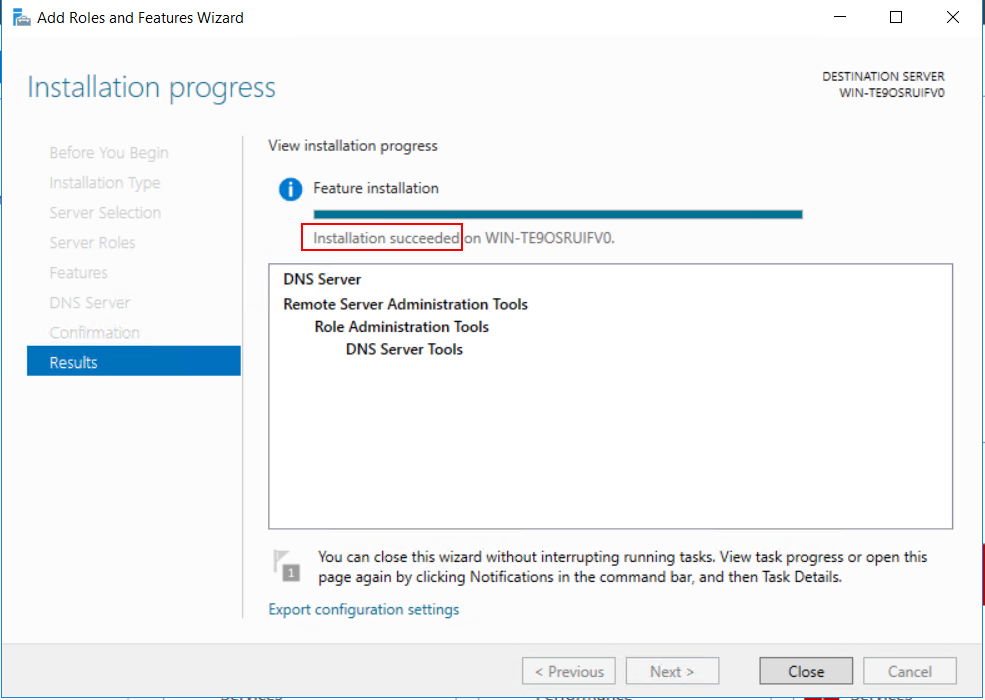
Add DNS feature to DNS server
Click next until you get to this stage and click the box next to DNS Server:
Click Add Features:

And finish by clicking Install:
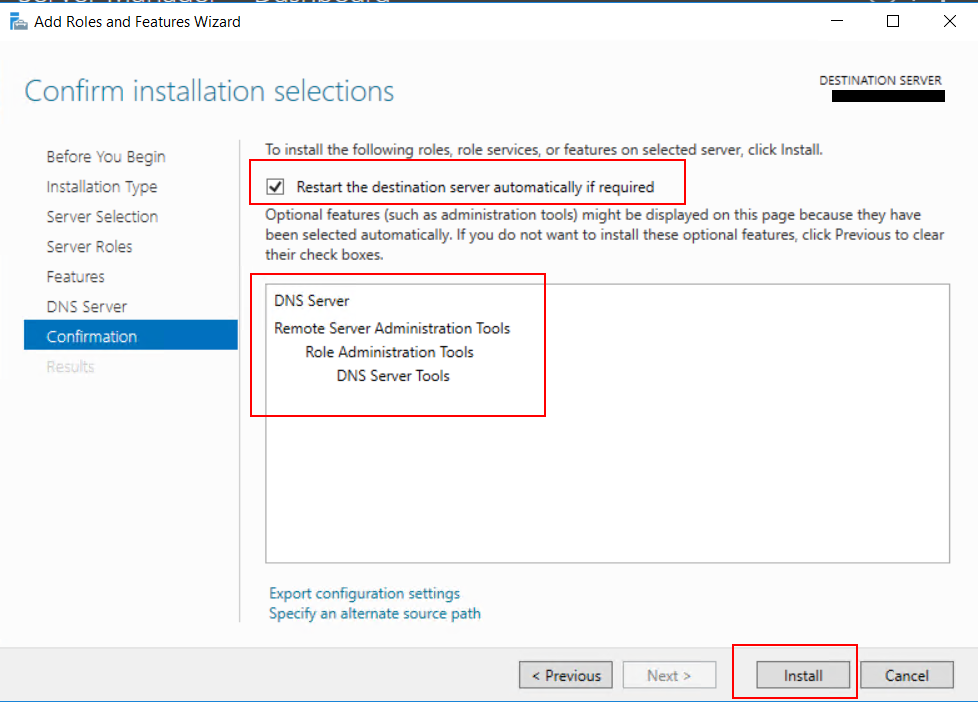
Wait for the installation to complete.
Back to Index.
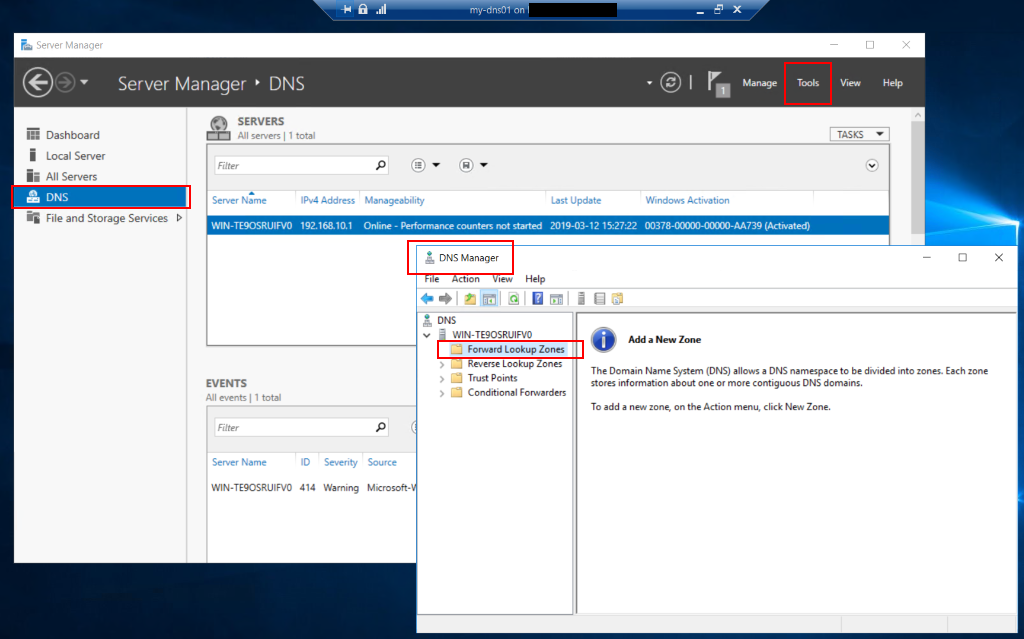
DNS – Forward Lookup Zones
After you have added the DNS feature to the server, you can open DNS manager from Server Manager: Server Manager-> Tools DNS Manager.
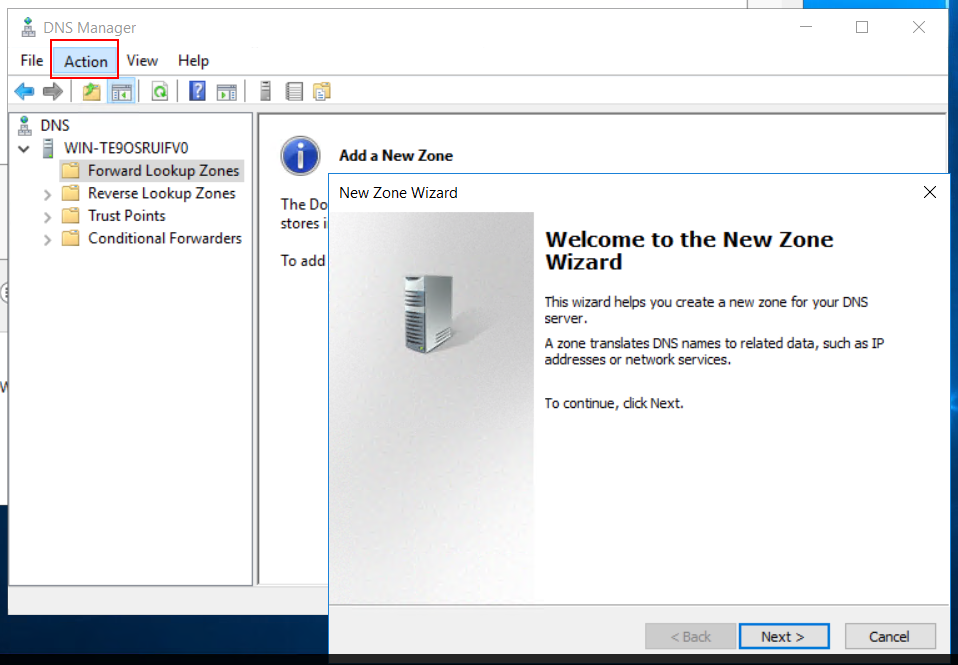
Now, go to Forward Lookup Zones in DNS manager:
Click Action-> New Zone… (A wizard will open):
Create a zone with the following values in the wizard:
| Zone type | Primary Zone |
| Zone name | lab.local |
| Create a new file… | Use the one suggested. |
| Dynamic update | Do not allow |
When you have the zone you can add a host (in our case server). Click on lab.local then action new host.:
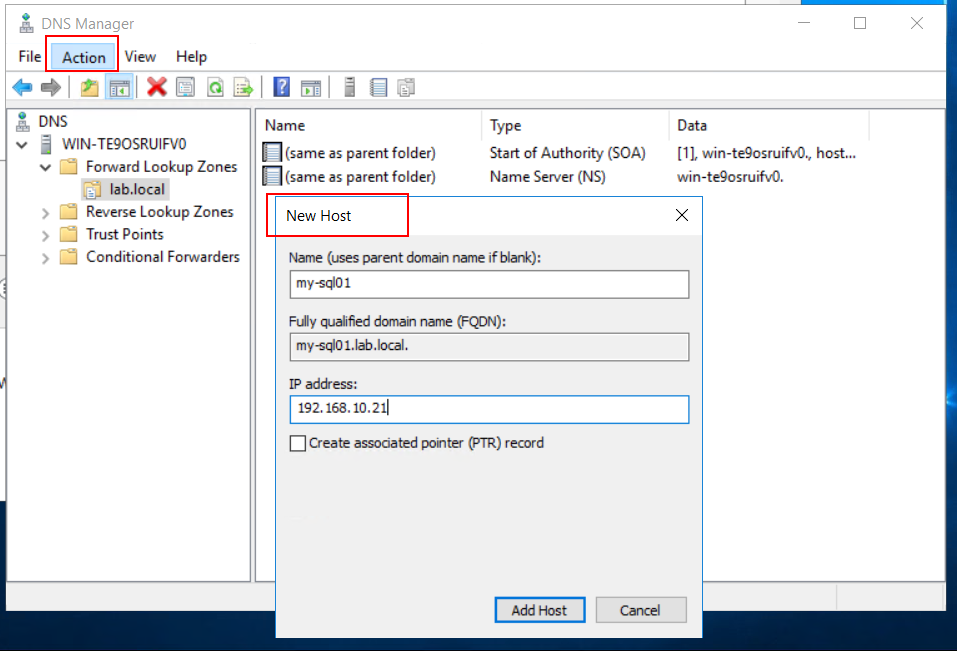
Make sure the Firewalls are turned off.
Now you can try to ping the server with the dns name:
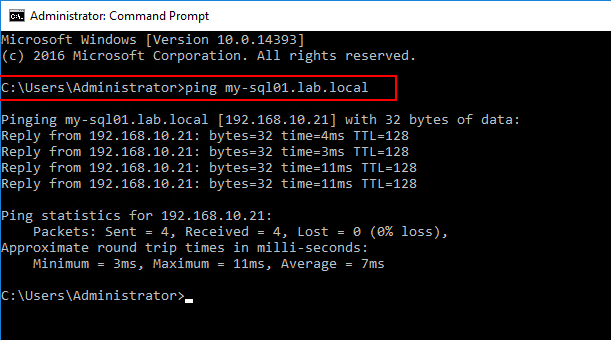
Without the DNS-server we could not to this.
Back to Index.
DNS – Reverse Lookup Zone
With the forward lookup zone, we can translate IP addresses to DNS names, but it is not working the other way around. If we want to translate DNS name to an IP address, we need another configuration that is called reversed lookup zone. Here is how to create such a zone an add an entry:
Click on Reverse Lookup Zone-> Action-> New Zone…:

Settings in the wizard:
| Zone type | Primary Zone |
| Type of IP | IPv4 Reverse Lookup Zone |
| Network ID | 192.168.10 |
| Create a new file with this file name: | Chose default suggestion |
| Dynamic Update | Do not allow dynamic updates |
| Finish |
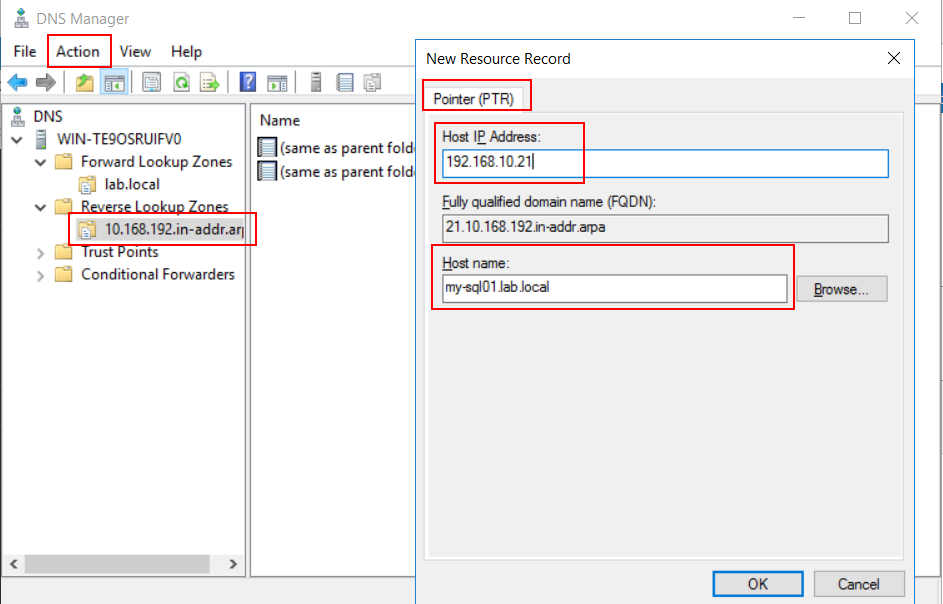
Now add a new entry, called pointer, in reversed lookup zone:
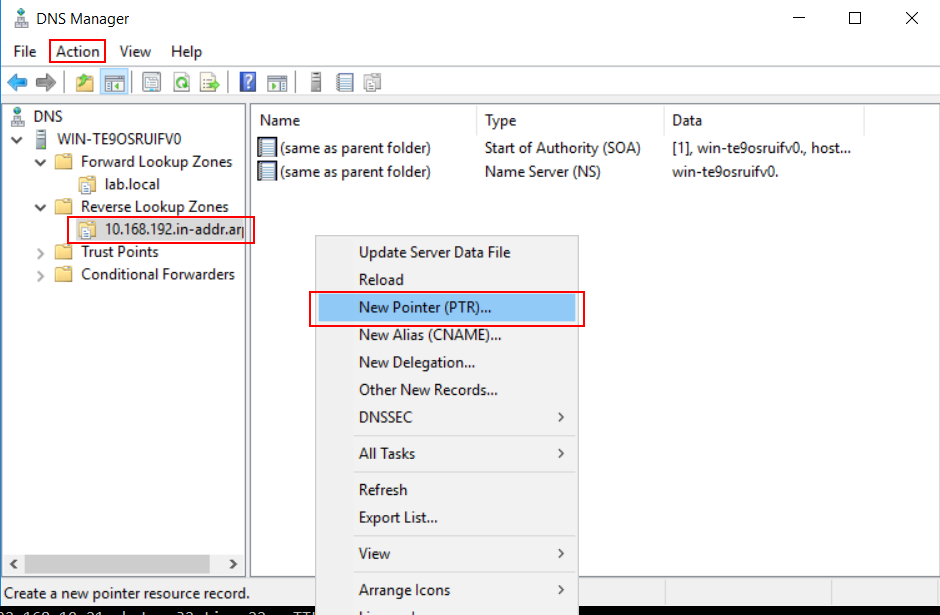
Write the name of the server corresponding to the IP-address:
Now when you have registered a reversed lookup entry you can use the ping -a command to get the DNS name:
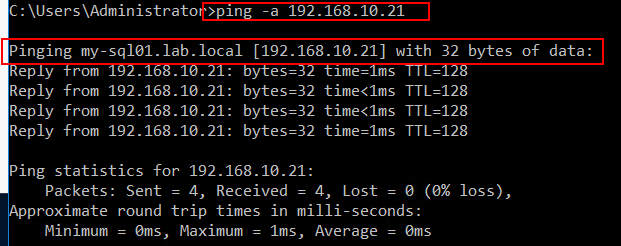
Note! Don’t forget to add your other servers including the DNS server into the register in forward and reversed lookup zones!
Back to Index.
DNS – nslookup
In this post and the previous one, we have familiarized us with the ping command. Ping is good to find out if a computer is available on the network. However, when checking DNS names, nslookup is a better tool.
In command prompt type nslookup followed by the IP address you want to check:
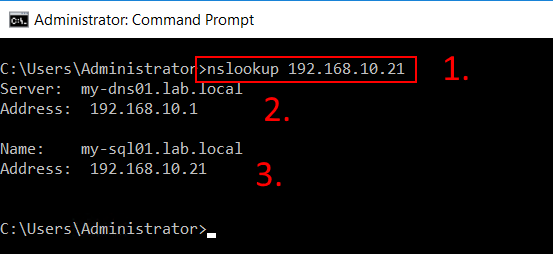
- nslookup command.
- Information about the DNS that replied with an answer.
- Information about the IP you checked.
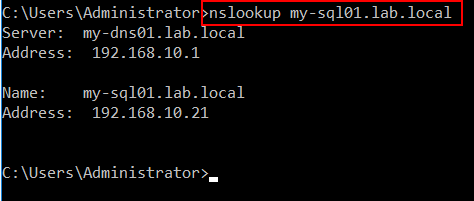
If you have a reversed lookup zones with correct entries, you can also use nslookup with the DNS name:
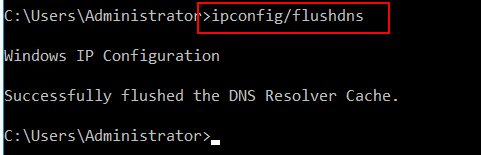
If you make changes in the DNS manager and you don’t get the results you expect. It might be a good idea to flush the DNS cache. Sometimes the DNS names are cached and don’t get updated when you want to. You can do this with the command: ipconfig/flushdns :
Back to Index.
Summary
In this post we have learned about the purpose of a DNS server and we have looked at how to:
- Assign the DNS role to a server.
- Register entries in DNS Manager
- Use nslookup to check the DNS names.
Back to Index.