Install SQL Server on a Failover Cluster
In this post we will look at how to install SQL Server on a Windows Failover Cluster. By doing so, we are trying to achieve High Availability in our environment. If one of the SQL servers fails or are by purpose taken offline for maintenance, the other server (node) will take over and the database(s) are still available.
Note! In this lab I only used Administrator accounts for all installations. Normally you would like to create groups in your AD for different configurations. But this is just a local lab so I am cutting corners here.
TL;DR
- Download installation media of SQL Server 2016.
- Mount media and run setup.exe as Administrator on node 1.
- On node 1 run installment option New SQL Server failover cluster installation.
- On node 2 run installment option Add node to a SQL Server failover cluster.
- Review the installment from Failover Cluster Manager.
- Test the cluster from SSMS and Failover Cluster Manager.
Index
- Setup in Hyper-V
- Download SQL Server
- Install SQL Server on the 1st node
- What happens after the installation of the 1st node?
- Install SQL Server on the 2nd node
- What happen after the installation of the 2nd node?
- Connect to the Cluster with SSMS
- Test the Cluster from SSMS
- Summary
- References
Setup in Hyper-V
Info.
- All servers in this lab are virtual machines, created in Hyper-V.
- All servers are installed with Windows Server 2016 and have the same update.
- All Servers are joined in the domain lab.com
Note! In previous post the domain can be named lab.local, don’t be confused. It should be one domain, and it should be named lab.com in this blog series. When you read lab.local just look at it as lab.com or vice versa.
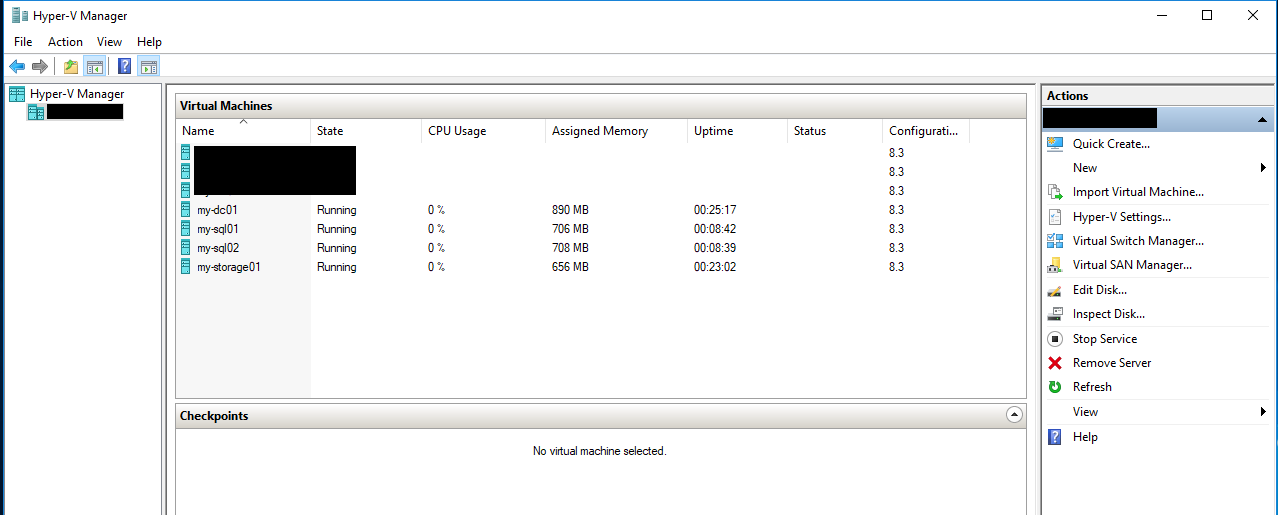
About the servers:
| Server Name | IP Address | Role/Feature/Installment |
|---|---|---|
| my-dc01.lab.com | 192.168.10.1 | DC, AD, DNS |
| my-storage01.lab.com | 192.168.10.31 | iSCSI target (Virtual storage for the cluster). |
| my-sql01.lab.com | 192.168.10.21 | Node 1 in the cluster. |
| my-sql02.lab.com | 192.168.10.22 | Node 2 in the cluster. |
About the clusters:
| Cluster Name | IP Address | Type |
|---|---|---|
| my-winclu01.lab.com | 192.168.10.20 | Windows Failover Cluster |
| my-sqlclu01.lab.com | 192.168.10.23 | SQL Server cluster |
About SQL installation (instance):
| MYINSTANCE01 | SQL instance name |
Info. You could save the number of server if you assign the domain controller to be a file server as well and set up the virtual disk there for the cluster. Then you don’t need a separate file server as in my example.
Back to Index.
Download SQL Server
My final goal with these tutorials is to connect a BizTalk Server to a SQL cluster. The compatible version with BizTalk Server 2016 is the SQL Server 2016 with Service Pack (SP) 2.
Download SQL Server with SP 2 at: https://www.microsoft.com/en-us/evalcenter/evaluate-sql-server-2016 [2019-04-01]
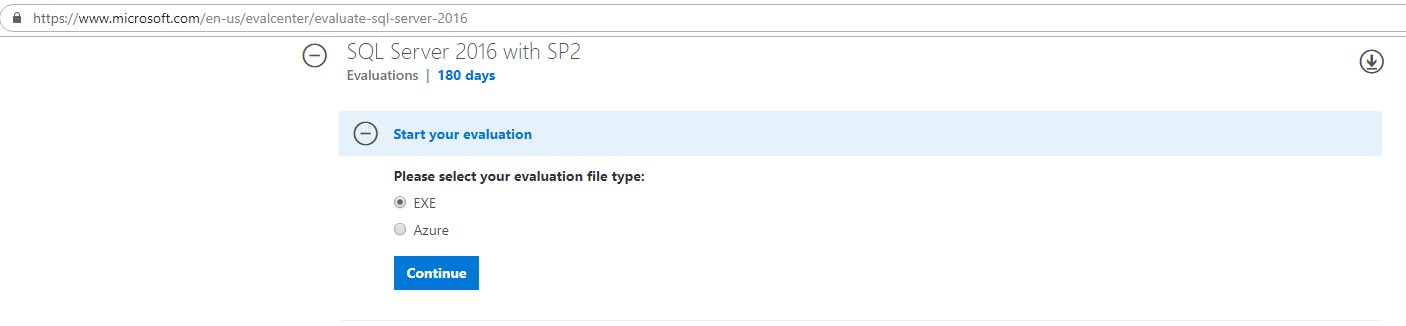
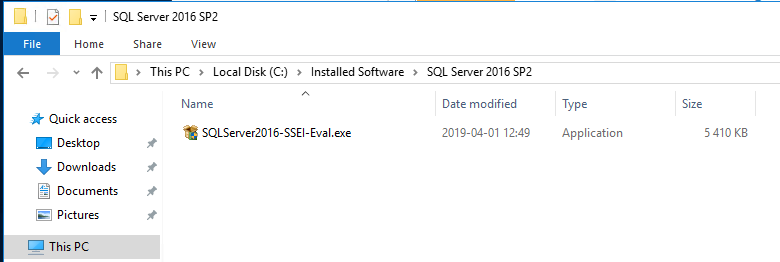
Once downloaded, run the file As Administrator. The computer needs an Internet connection:
Choose Download Media:
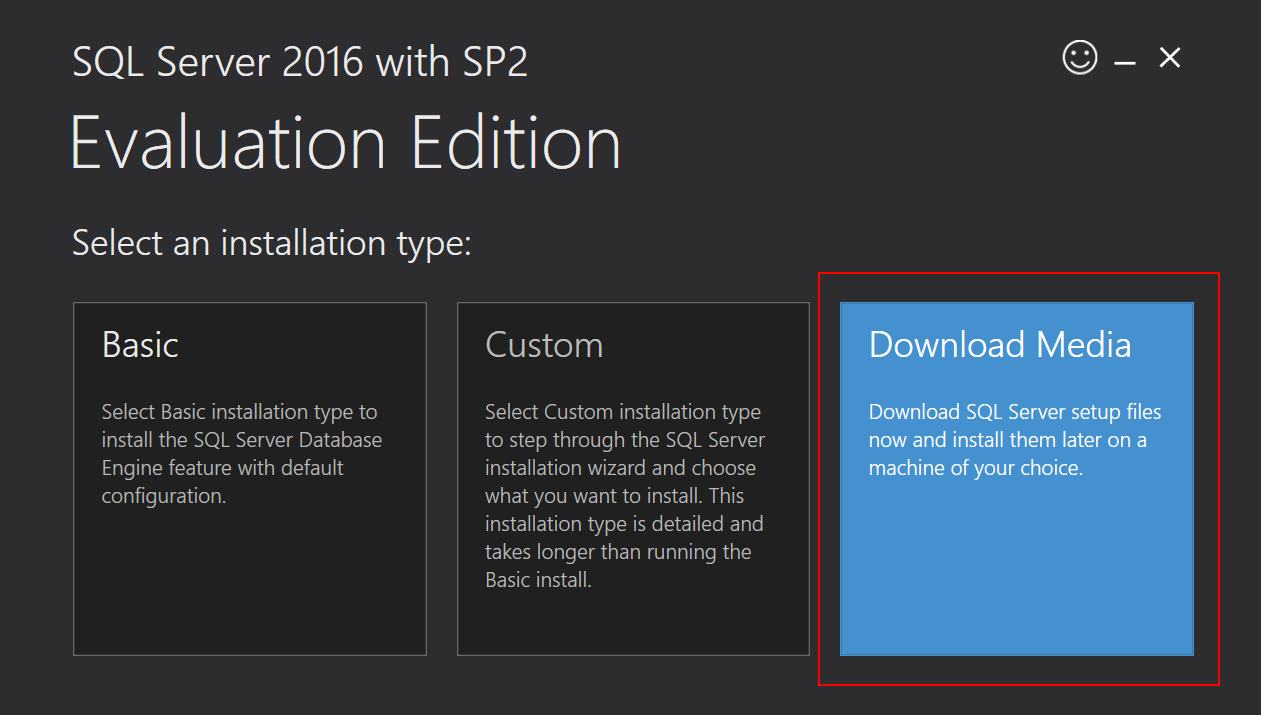
- Download the ISO file.
When you have downloaded the ISO, copy it to the server (my-sql01) where you want to install it.
Back to Index.
Install SQL Server on the 1st node
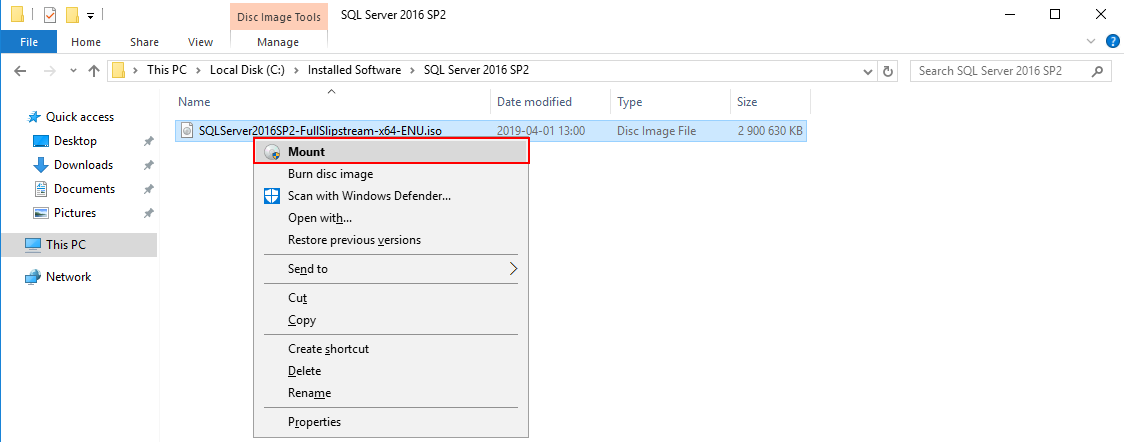
Once, the ISO file is in place on the server (my-sql01), mount the files:
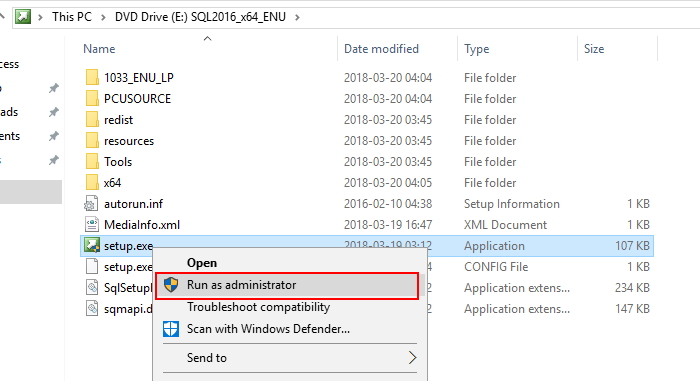
Run the setup.exe as Administrator and a wizard will start.
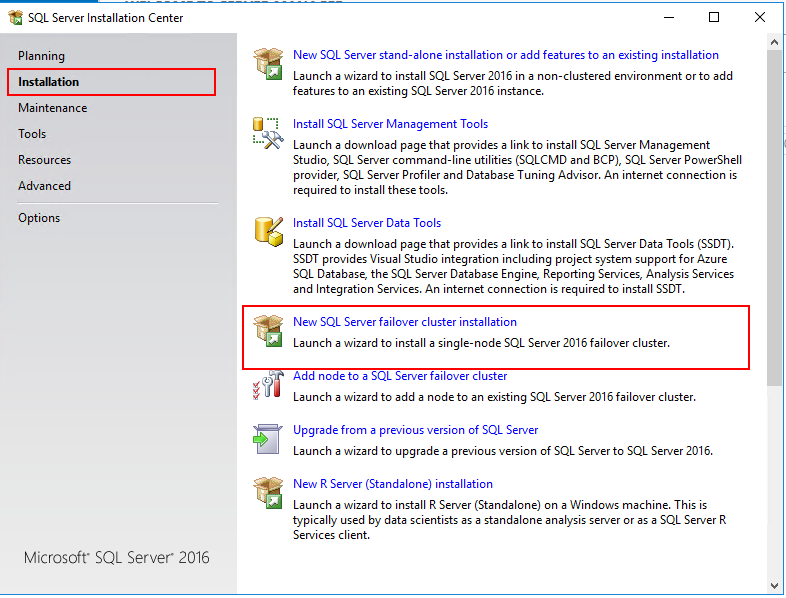
Go to Installation and choose New SQL Server failover cluster installation:
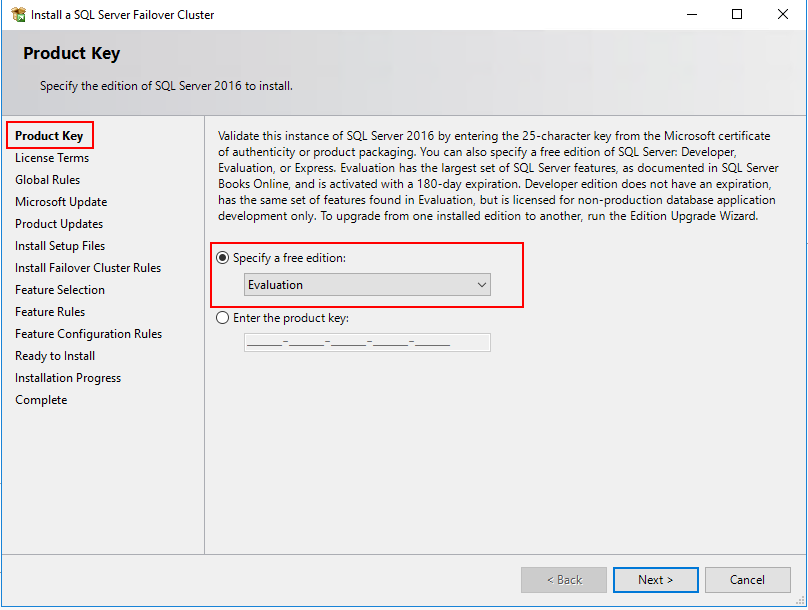
First, choose the free evaluation edition (remember this is a tutorial for a lab environment, not a production environment):
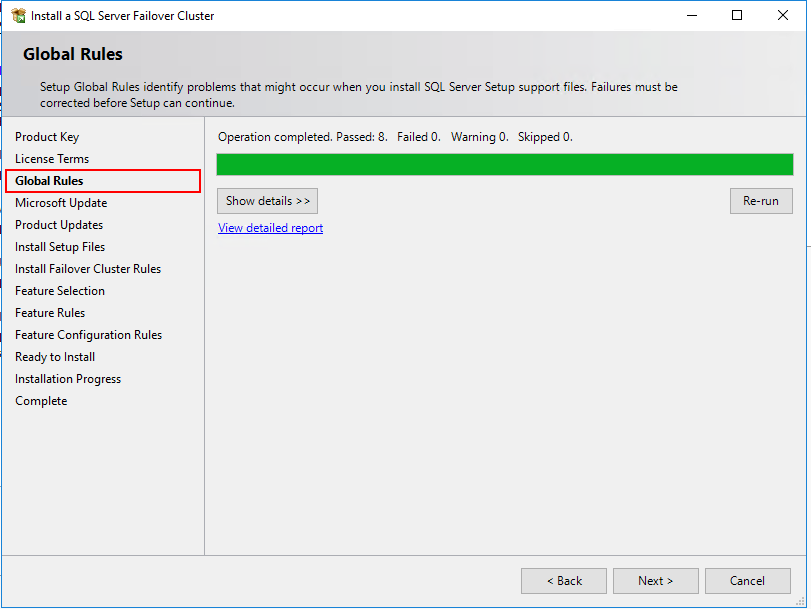
Accept the license terms and let the Global Rules test run:
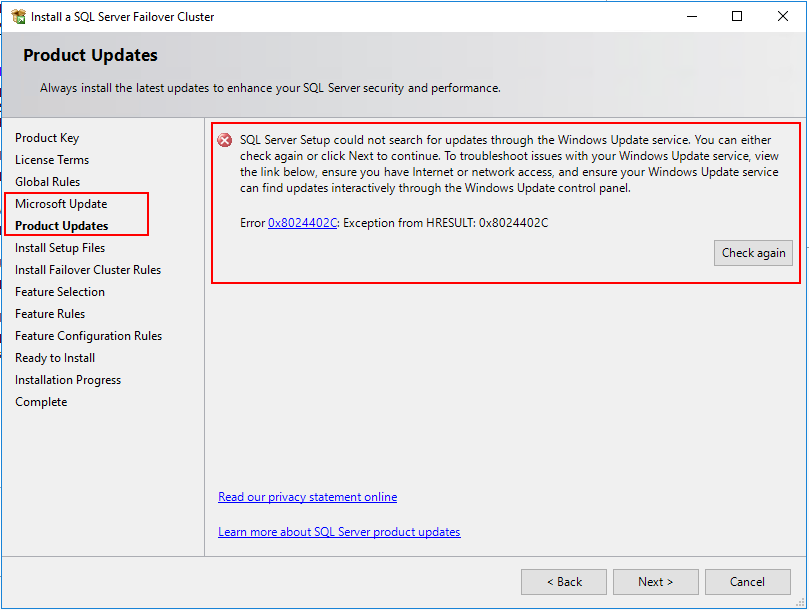
When setting up a lab environment, I normally don’t care about the Microsoft Updates, they take too much time of the lab. I production however, I would have a strategy for the updates. Uncheck the Microsoft update option (another reason is that I don’t have internet connection on this server):

For this lab we can ignore the warnings due to that we didn’t check for updates:
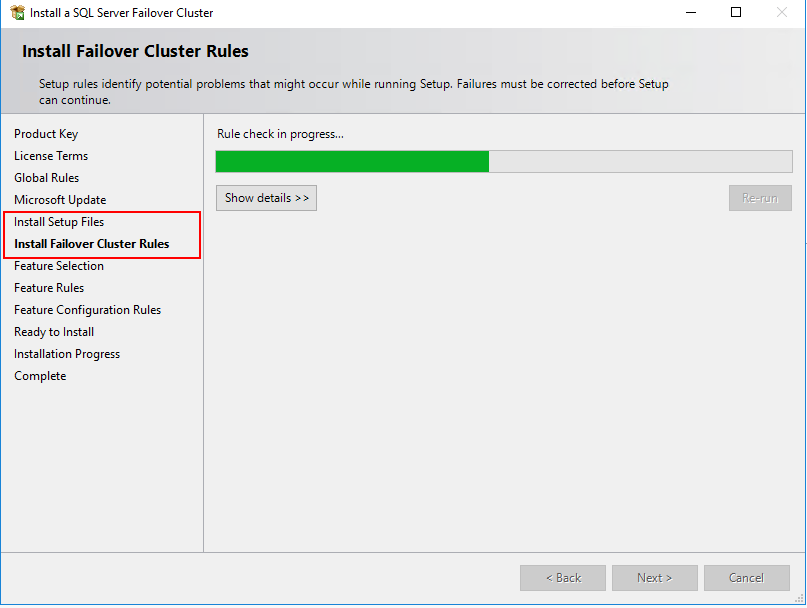
In the next step, let the installation run:
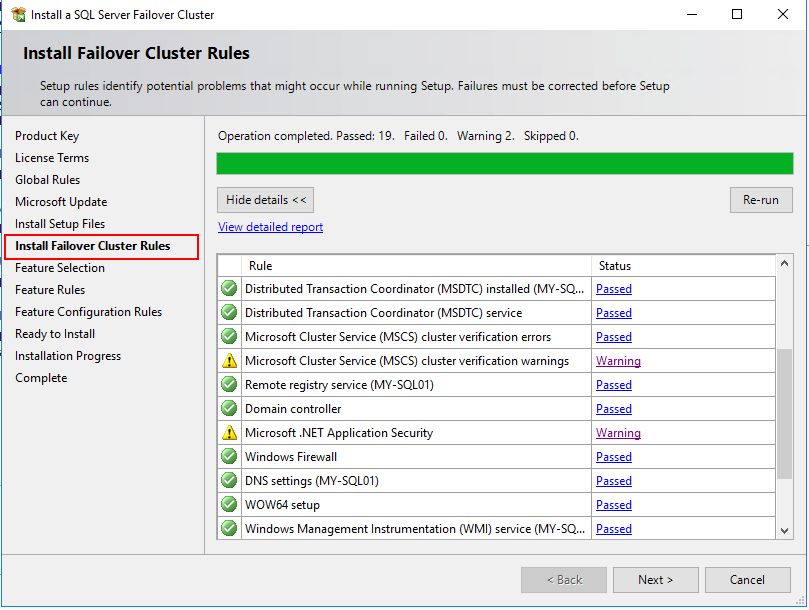
These warnings can be ignored in our lab environment, they are related to that the cluster only have one network path of communication and that the server is offline and can’t find updates for .NET Applications.
Next is the Feature Selection for MS SQL server:
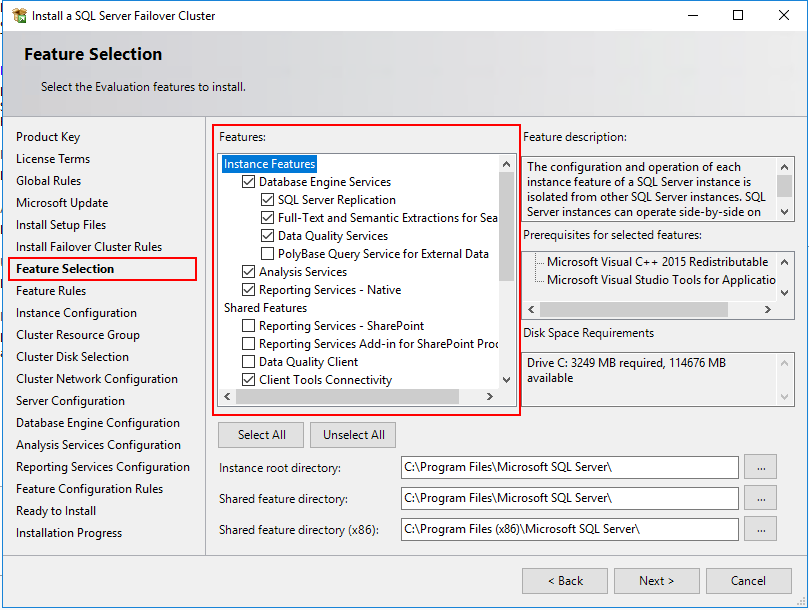
Info. For a full BizTalk installation, you need the following features:
- Database Engine Services
- SQL Server Replication
- R Service (In-Database)
- Full-Text and Semantic Extractions for Search
- Analysis Service
- Reporting Services – Native
- Client Tools Connectivity
- Integration Services
Next is the Instance Configuration:

- Yes, the SQL will have its own name and IP on the network. Note the difference between the windows failover cluster name and the SQL cluster name, they are different and independent. When the installation is complete you will be able to ping my-sqlclu01.lab.com to check if it is available on the network.
- I want to have a custom name of my instance of the SQL installation. Each SQL server installation creates an instance on the windows server. If you use the default instance name, you don’t need to specify the instance name when you connect to the SQL server via e.g. SSMS. It can exist one default instance on a SQL server installation on a windows server.
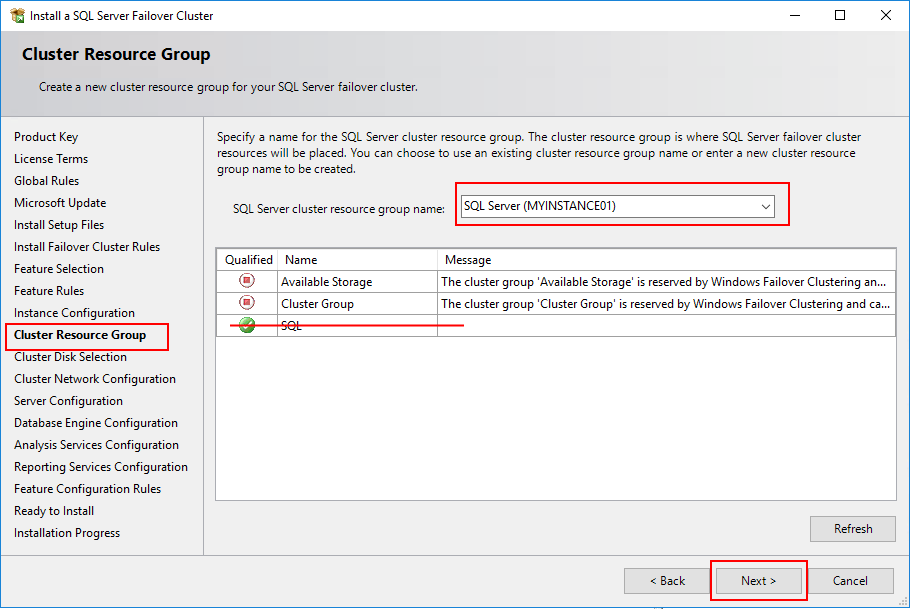
The next step Cluster Resource Group, I think the GUI is a bit misleading. Here you can just click Next and continue.
Info. I want to explain what was confusing for me in this step: It looks like everything is unqualified and you can’t continue:
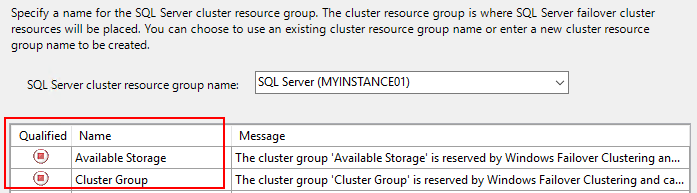
But this is how it works, if you create an empty role in the Windows Failover Cluster Manager, it will show up in the wizard under Qualified in the Cluster Resource Group step.
You can either choose this empty role, or don’t choose anything and just click next. If you click next with no selections, a role in the Failover Cluster Manager will be created with the name in the box (SQL Server (MYINSTANCE01)). Long explanation of why just to click NEXT.
Next step, Cluster Disk Selection choose the disk for the SQL cluster:
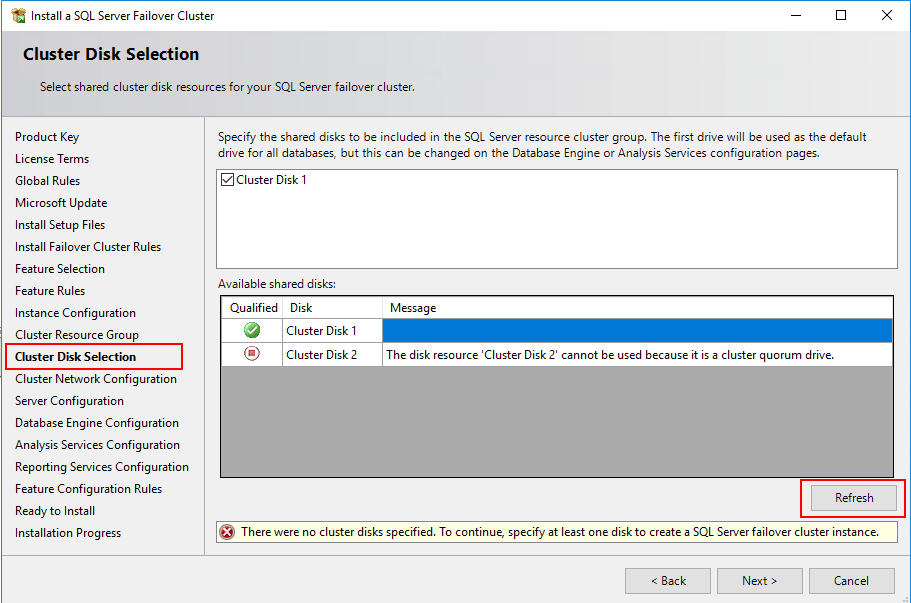
Note. Analysis Service as a feature has some demands regarding disk in a SQL cluster. Read more about it here: https://docs.microsoft.com/en-us/sql/sql-server/install/cluster-disk-selection?view=sql-server-2014 . The disk must be a shared cluster disk.
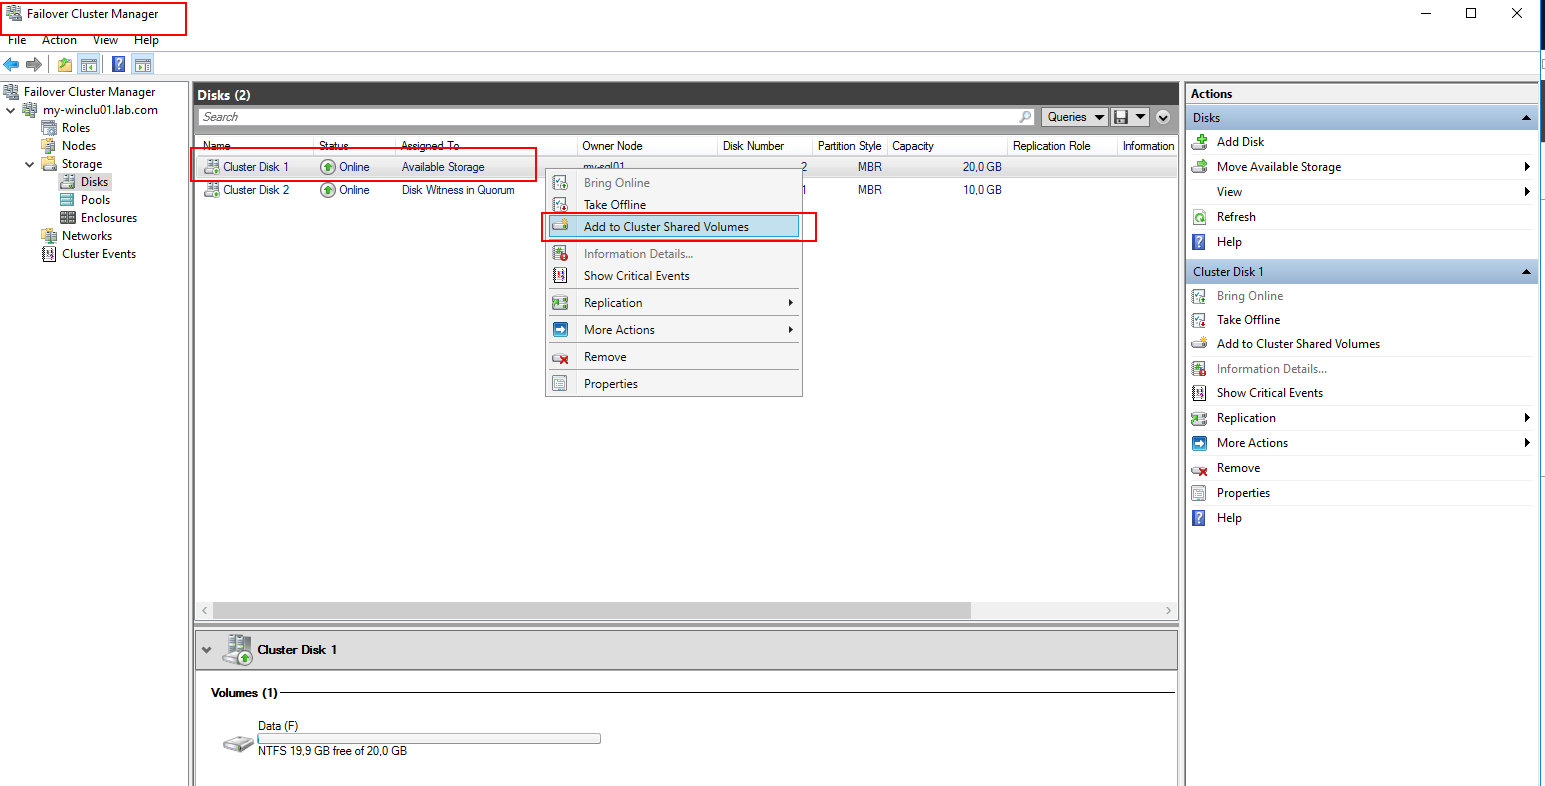
I can’t really remember but you might want to do this in the Failover Manager to make the disk appear as qualified. Add the disk to Cluster Shared Volumes:
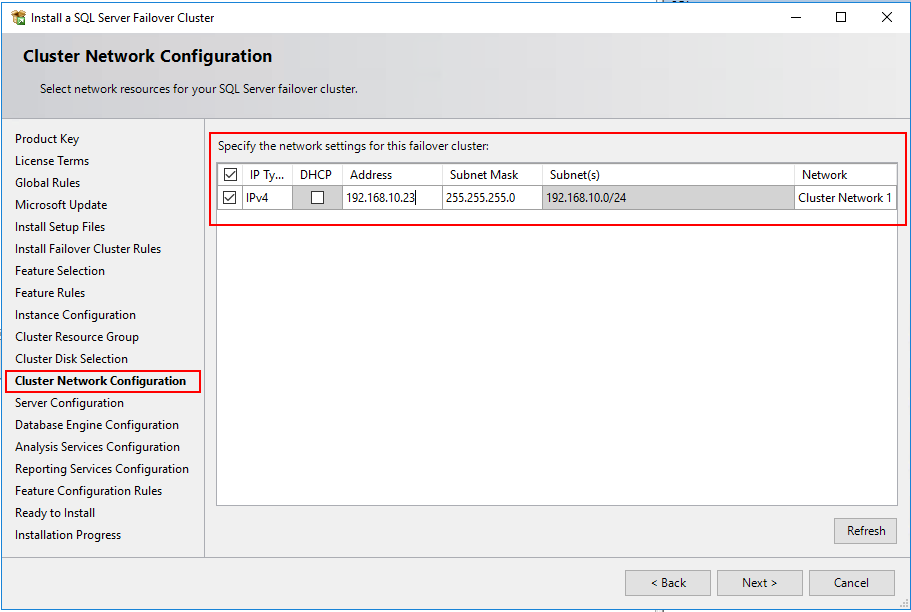
Next step, Cluster Network Configuration here we will set the IP address:
Next step, Server Configuration:
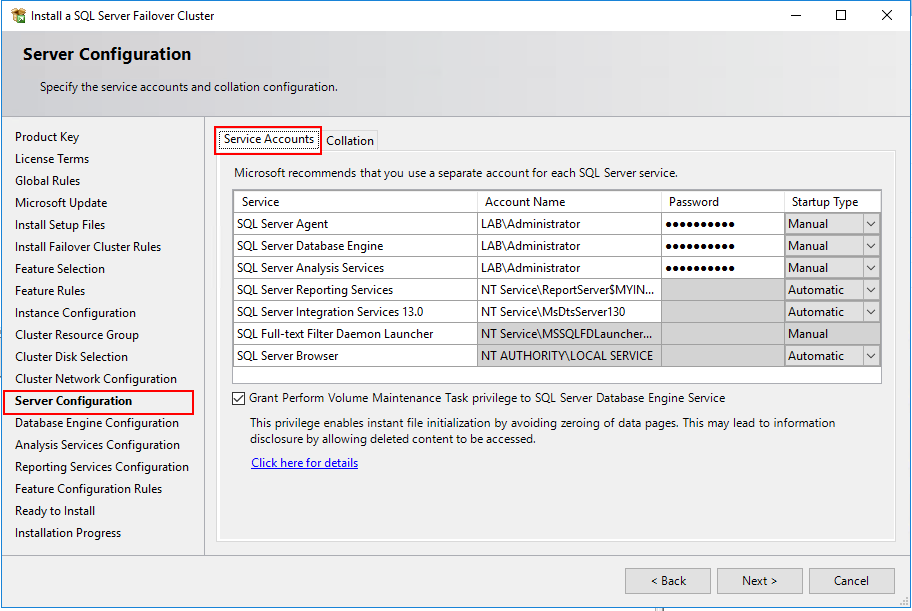
Under Tab Collation choose the collation of your need. Collation is the setting for which characters to allow in the database, which Unicode to address.
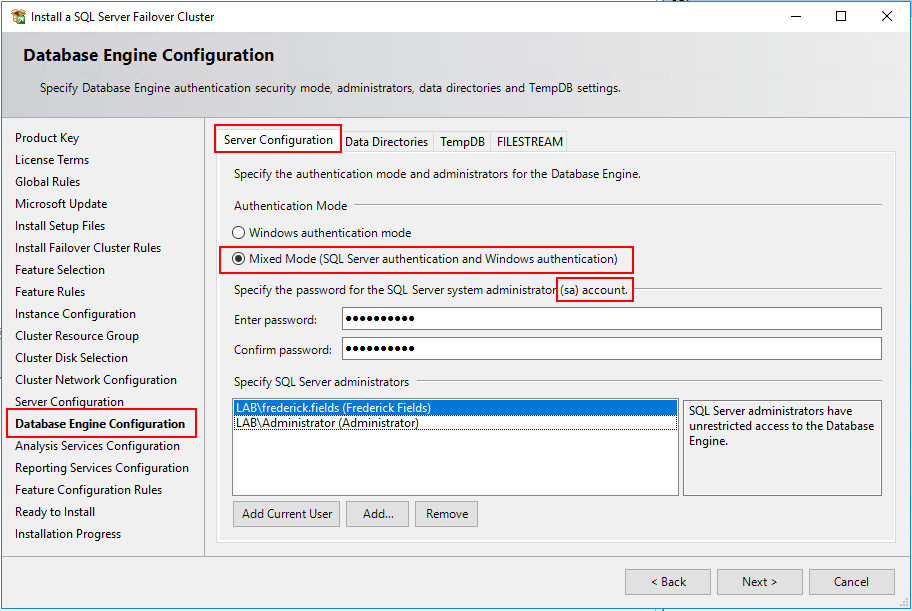
Next step, Database Engine Configuration. The tabs Data Directories, TempDB, FILESTREAM I didn’t change anything, default values.
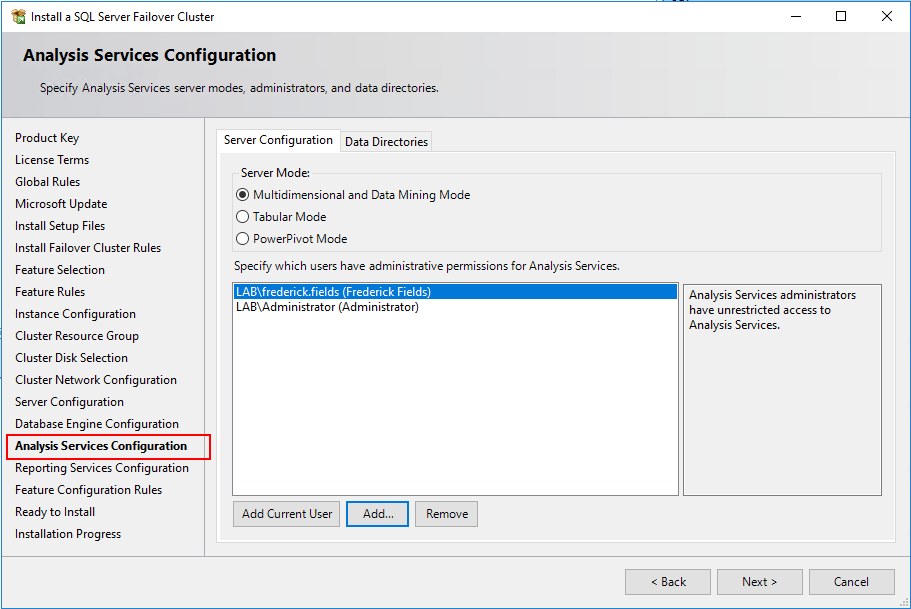
Next step, Analysis Service Configuration:
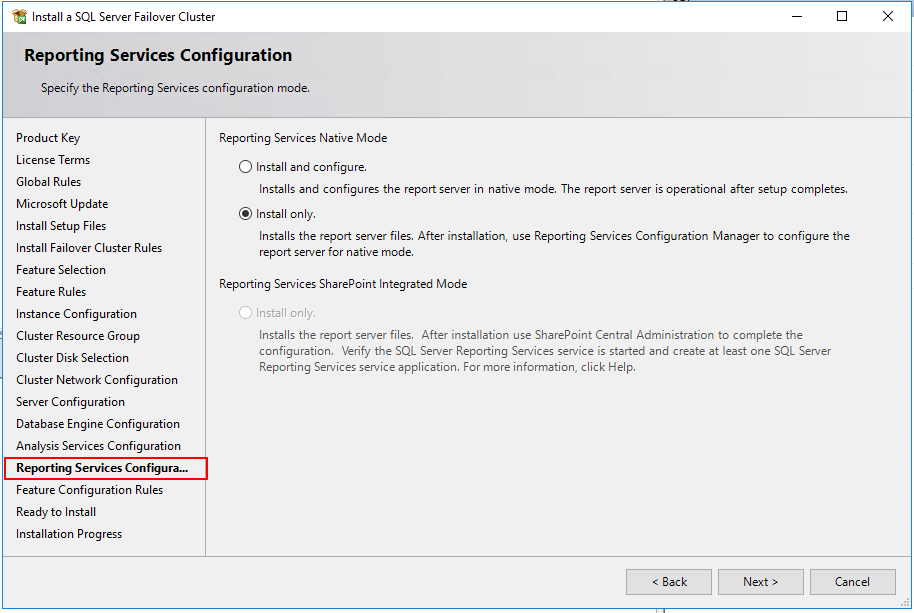
Next step, Reporting Service Configuration. I choose just to install it:
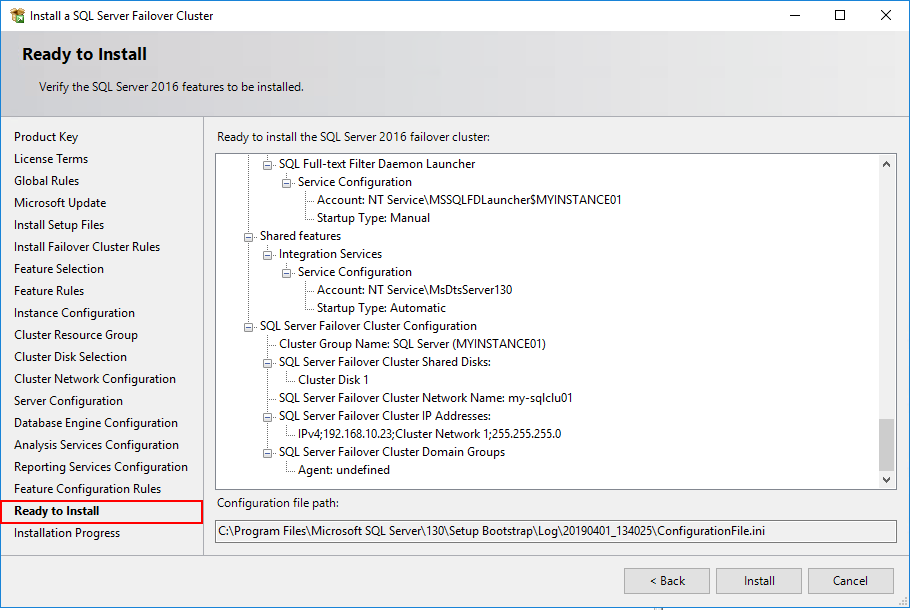
When you click next, it will run a check in Feature Configuration Rules. And after that is completed next step Ready to Install will open:
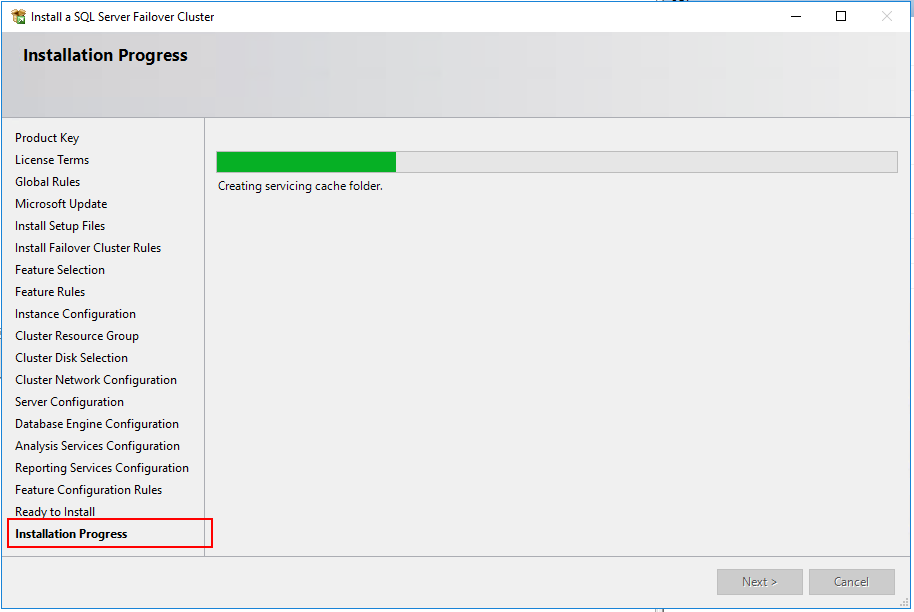
Installation will start after you click Install:
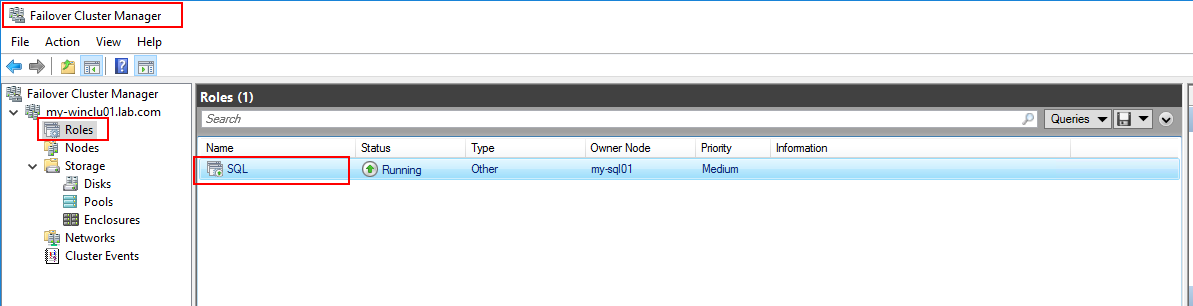
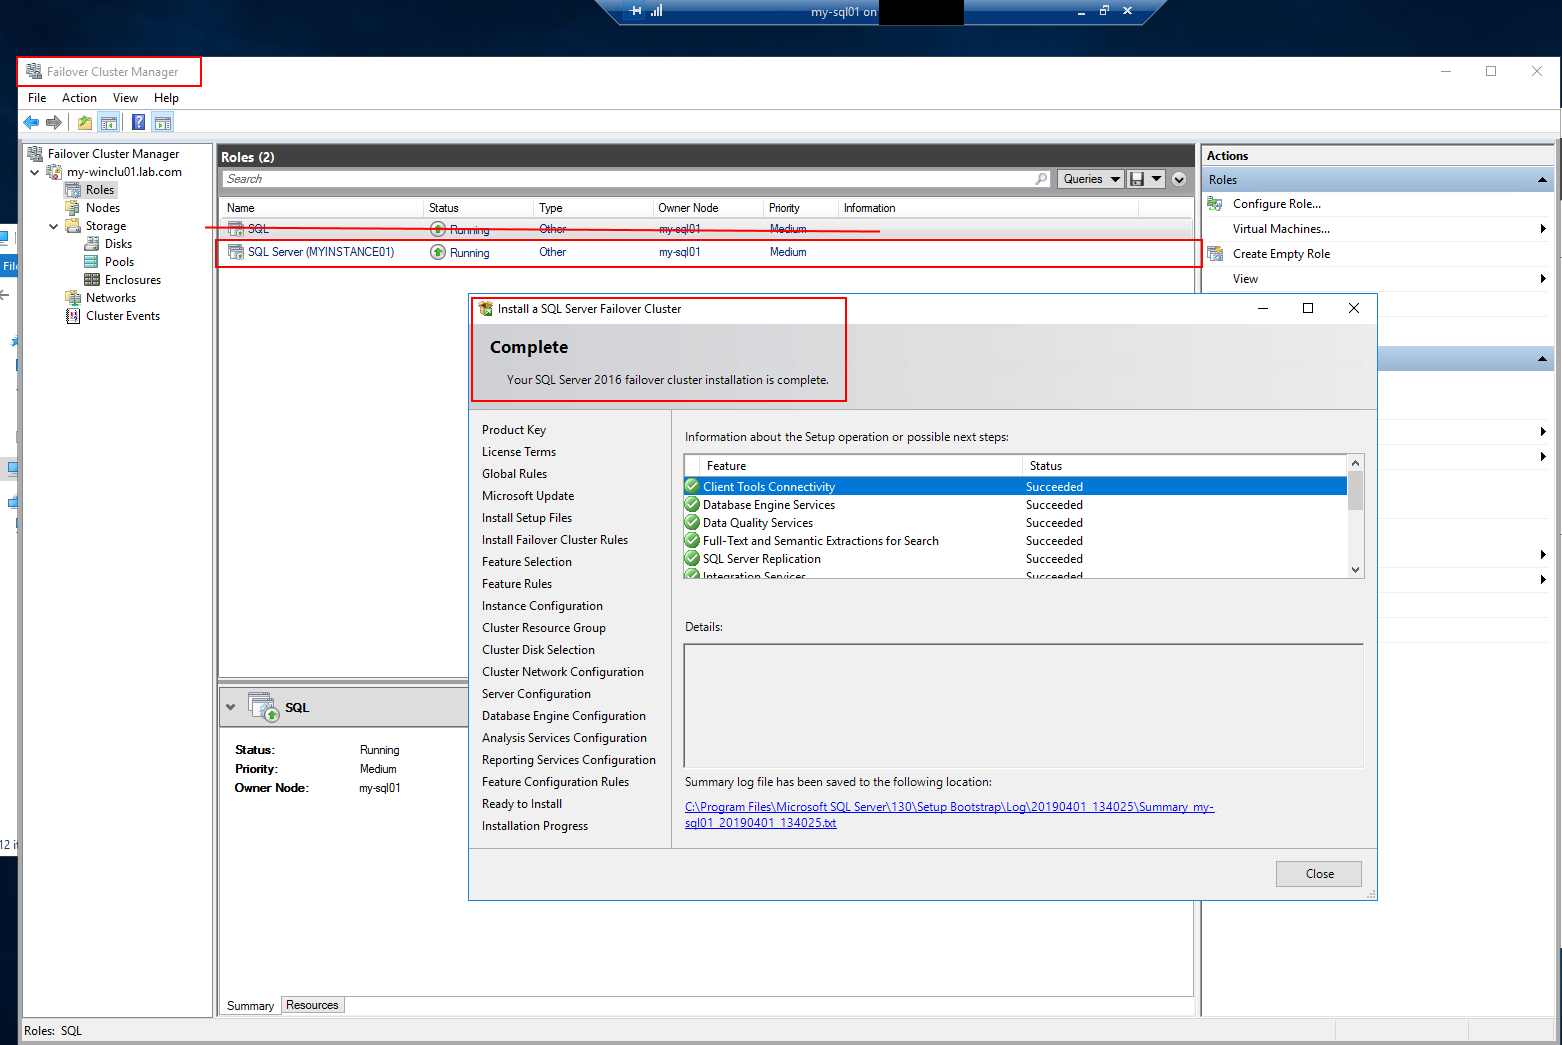
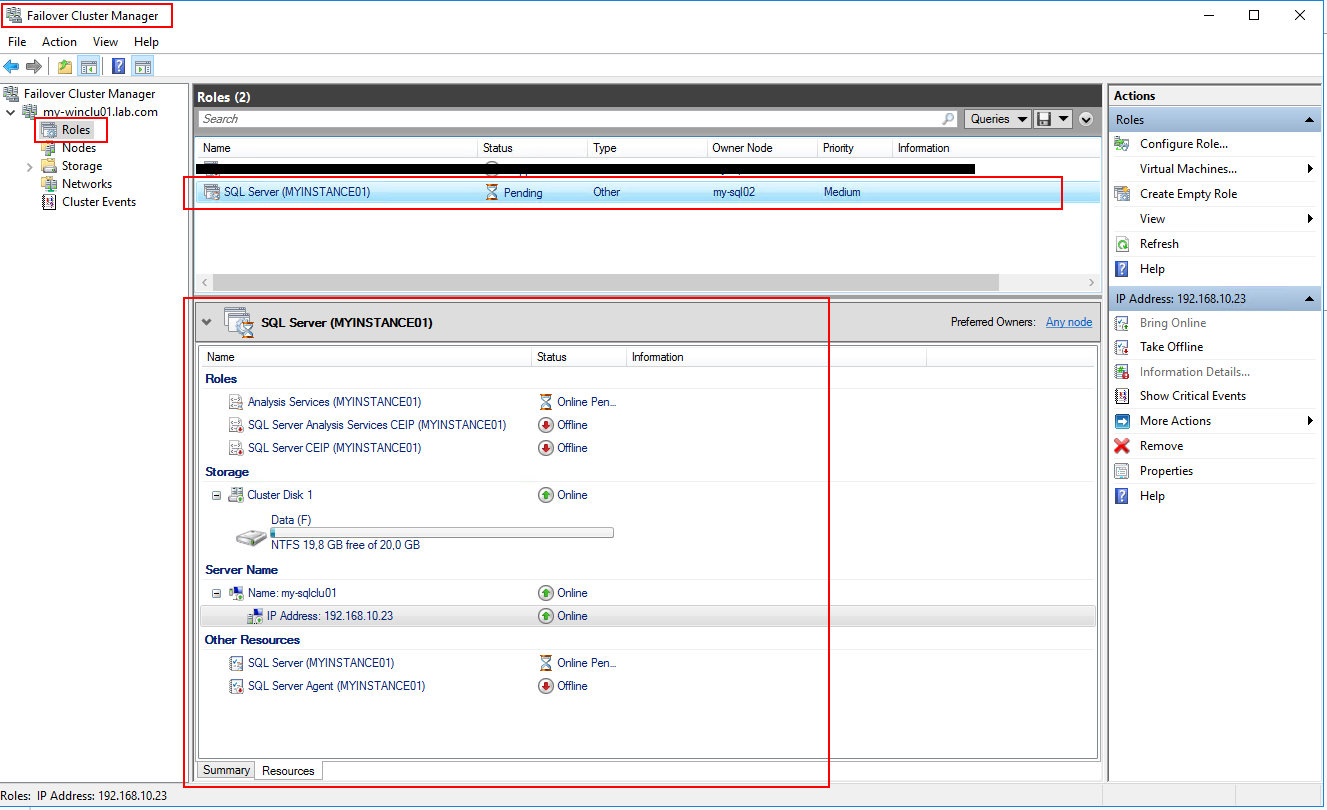
And hopefully everything should be fine. Here is a print screen that shows SQL installation is complete. You can also see in the failover cluster manager that the installed instance of SQL server shows up in the GUI as a new Role. (Don’t care about the empty role ‘SQL’ it was a test I did during the installation, see info text above in this heading.):
Back to Index.
What happens after the installation of the 1st node?
As you saw in the last image in the previous section, a cluster resource will be added in the Failover Cluster Manager after the installation is completed. There are also other things to pay notice to.
After the installation, the cluster network name will be added as a computer in the Active Directory:
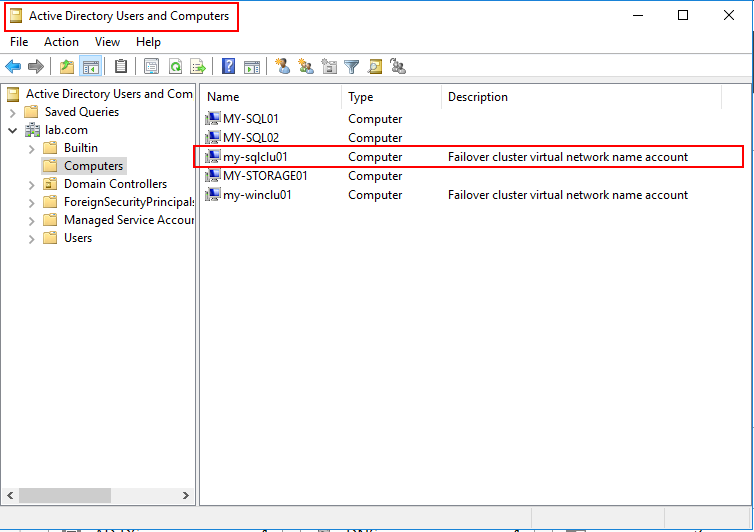
Note, that both the SQL-cluster and the windows cluster itself has their own names in the AD and also own IP addresses even thought they are not physical computers. That’s how it is solved with clusters, you get virtual names and IP addresses for each resource.
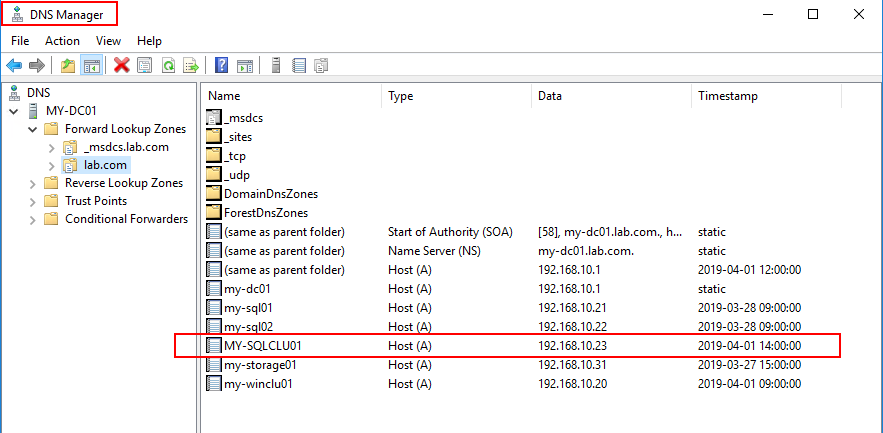
Also, in the DNS, you can see that the installation registered the SQL cluster:
Back to Index.
Install SQL Server on the 2nd node
We made the first installment and configurations on the 1st server (node) my-sql01.lab.com. Now we will do a similar thing on the second server (node) my-sql02.lab.com that I want in the cluster. (A cluster with only one server is not a cluster, right?).
Now, copy the installation media of SQL-server to the second server. Mount the media as you did before and run the setup.exe file as Administrator. Just like before but on the second server.
Now, IMPORTANT!
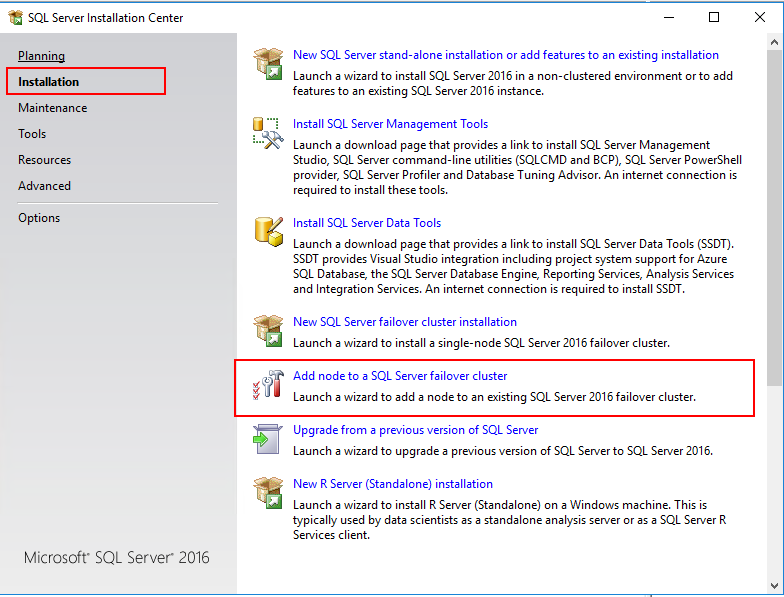
First step is to choose Add node to a SQL Server failover cluster.
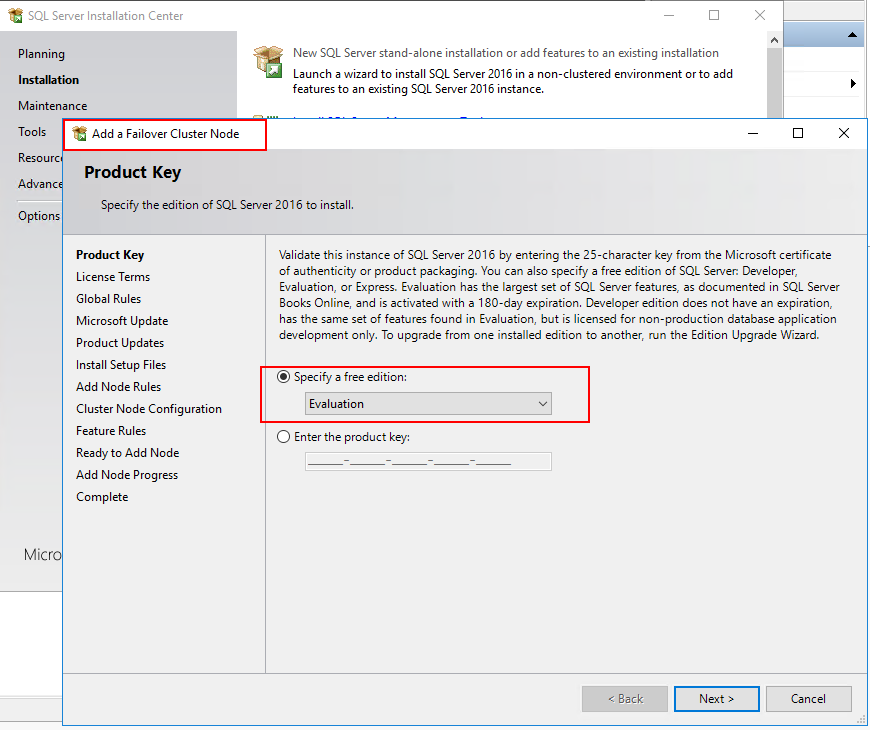
Next, Add a Failover Cluster Node wizard will start. Specify Evaluation and click Next:
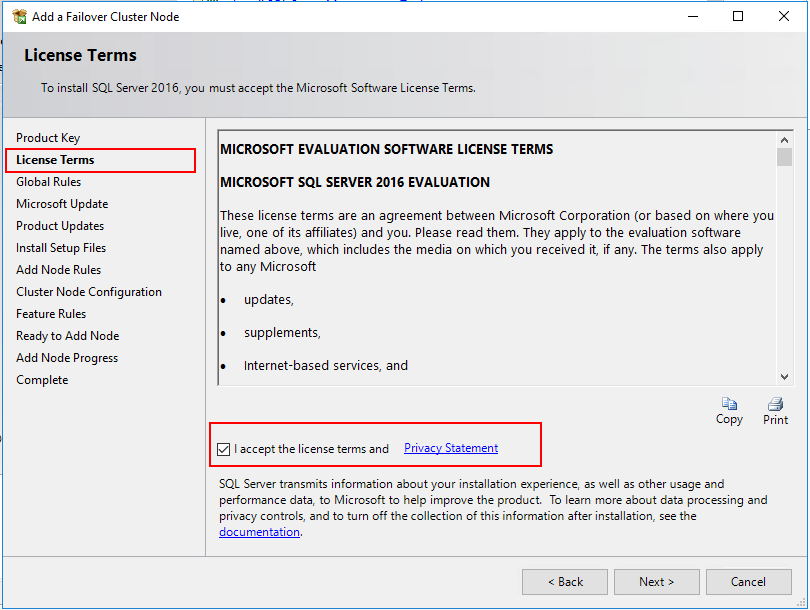
Accept the license terms:
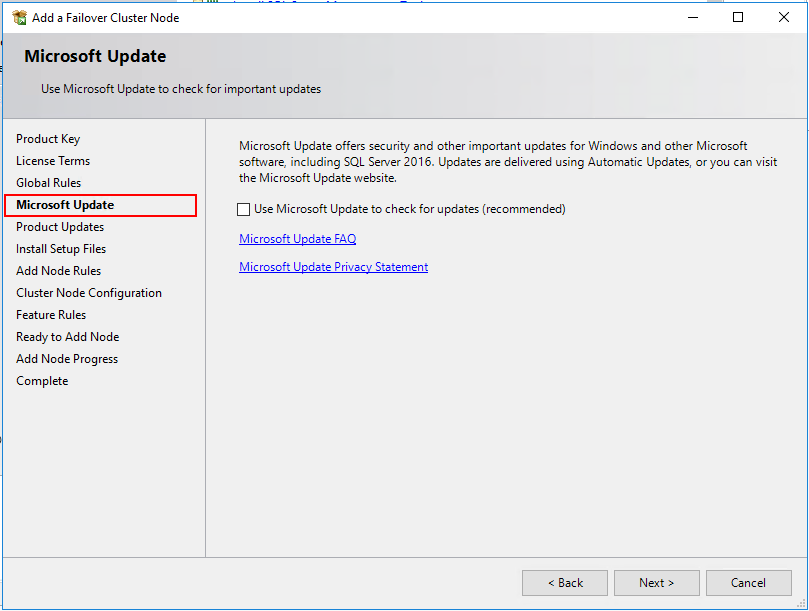
Next step, Microsoft Update. I don’t need this in my lab environment, just takes additional time and the servers has no internet connection.
Because of no internet connection and Microsoft Update is unchecked, there will be an error in the next step, Product Updates.

Next, Install Setup Files will be checked, and the step Add Node Rules will start, this can take some time:
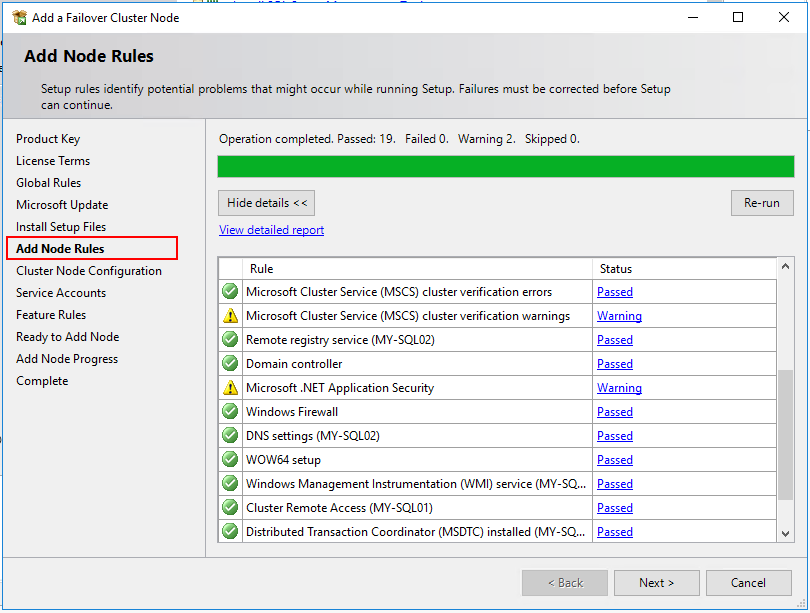
Note. The warnings above are due to that there is no internet connection and that there is only one connection path between the nodes in the failover cluster. In my lab environment, I can just skip these warnings.
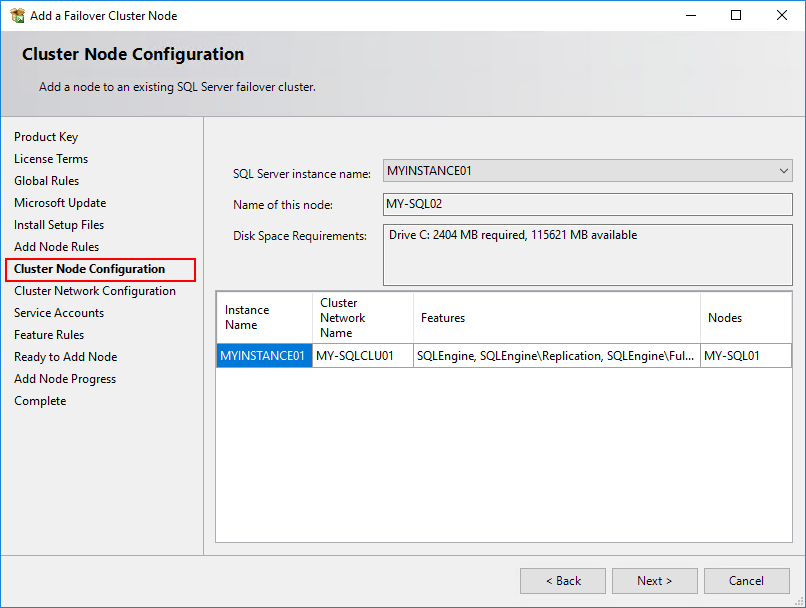
Next step, Cluster Node Configuration. The wizard will pick up the configurations of the SQL cluster you are trying to attach to on this node:
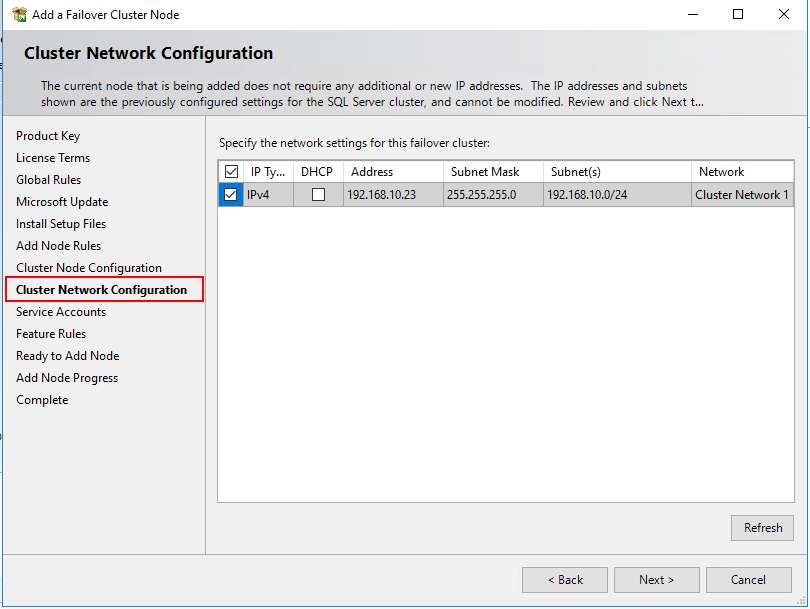
Next step, Cluster Network Configuration is just a review of the already configured SQL cluster:
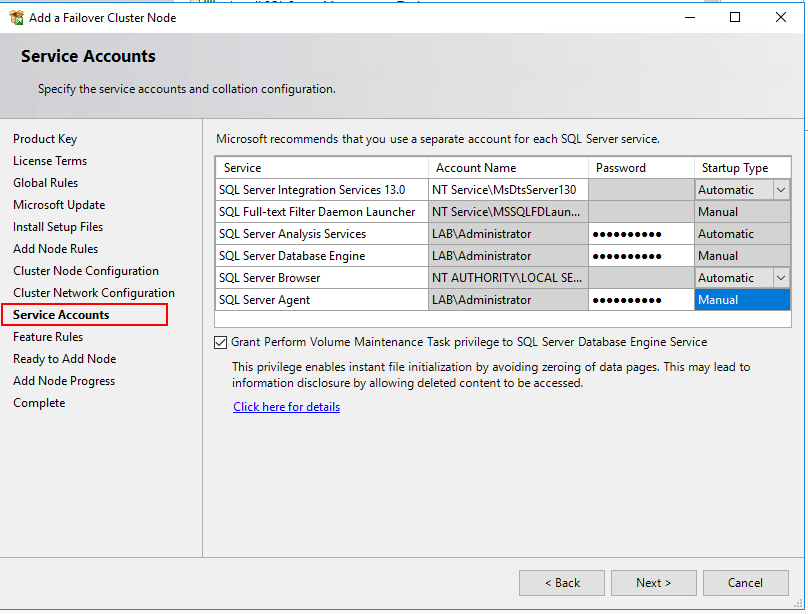
Next step, Service Accounts. I made it easy for me in this tutorial. I use the same account with Admin rights everywhere. In a production environment, you should have policies for how and which groups to use during installation.
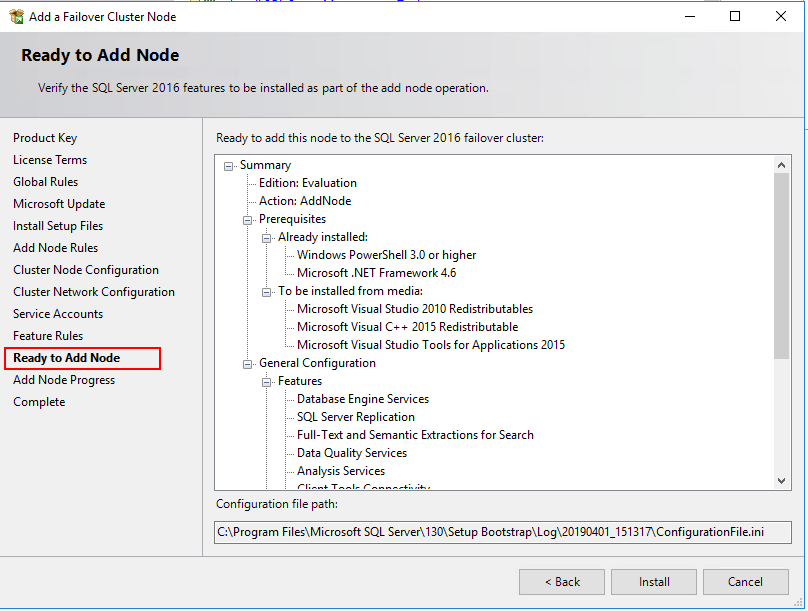
Next, Feature Rules will be skipped and under Ready to Add Node you are given a final chance to review before the installation:
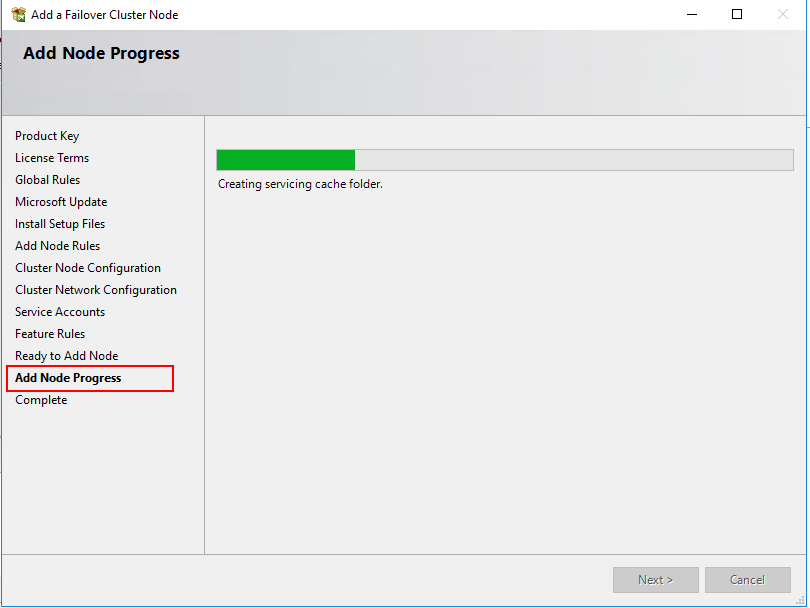
Next, Add Node Progress:
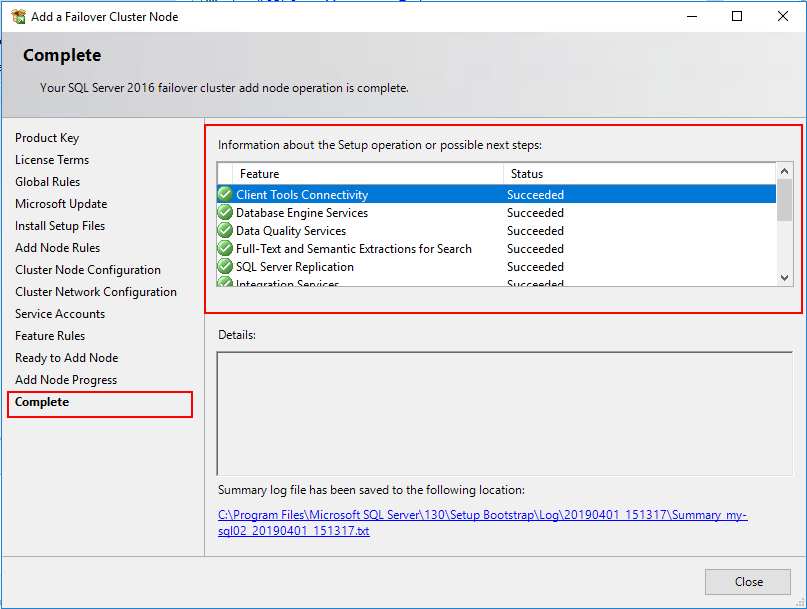
This is what you aim for. Everything with status Succeeded:
Back to Index.
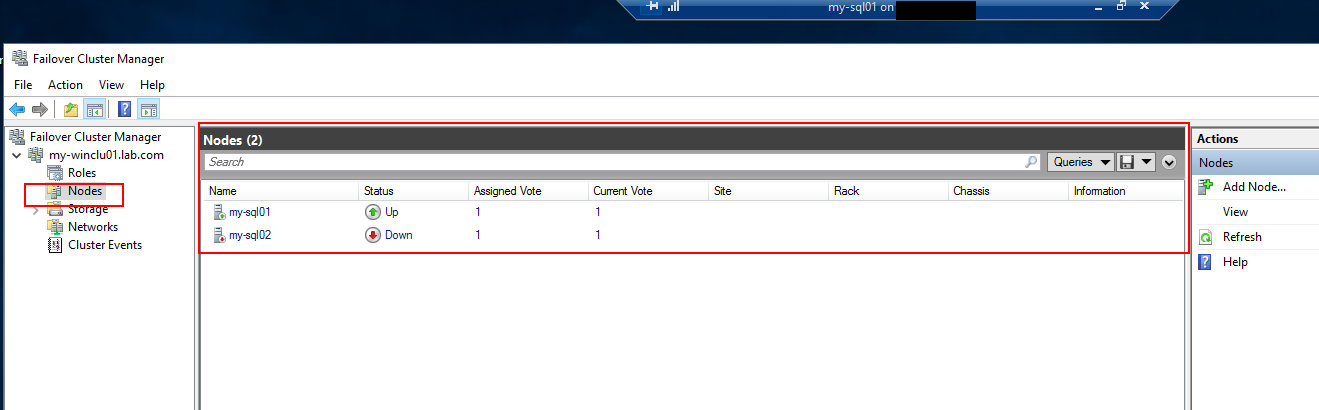
What happen after the installation of the 2nd node?
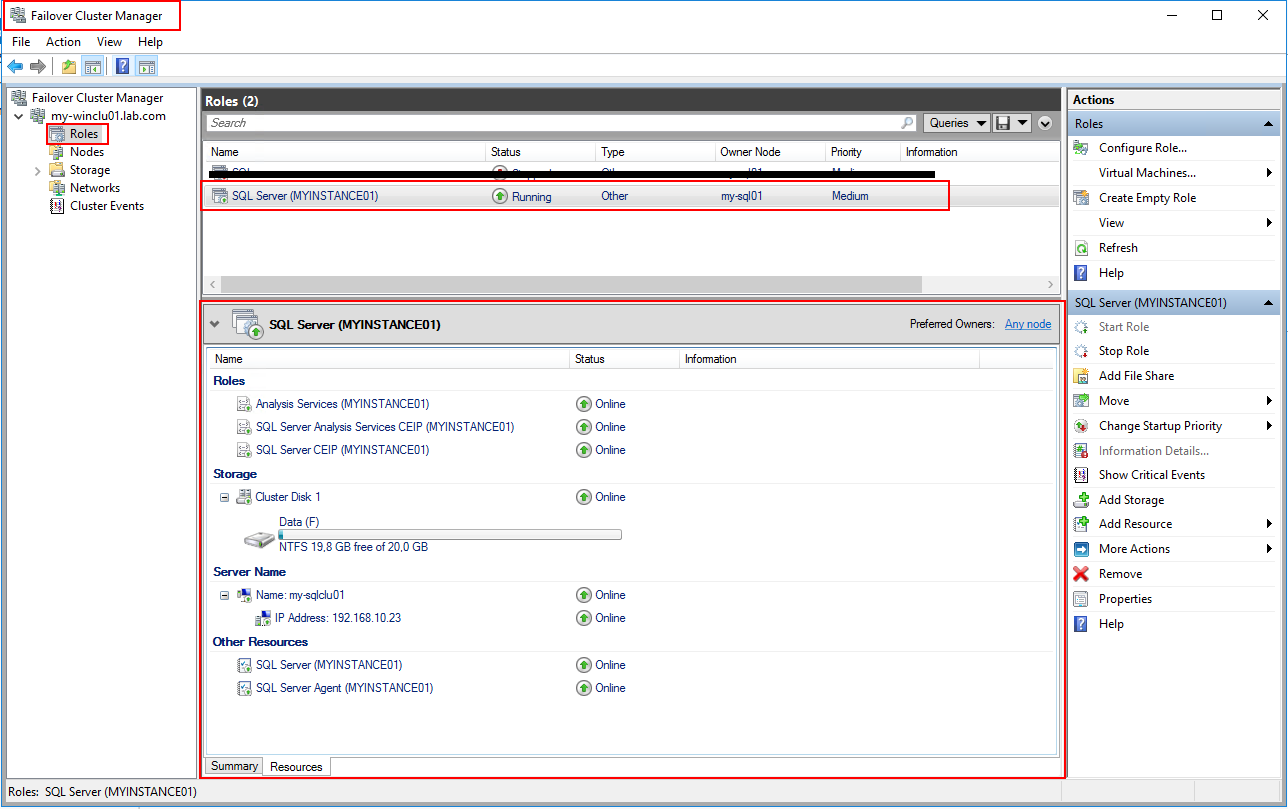
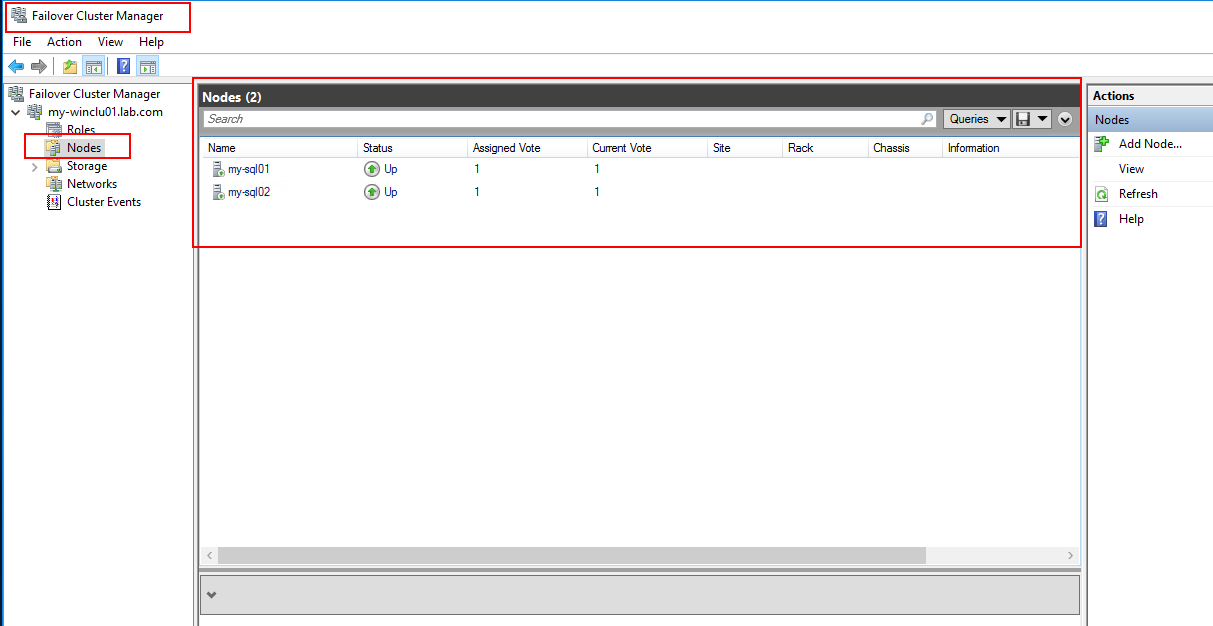
After you have completed the installation of the 2nd node. It will be added to the cluster Role SQL Server (MYINSTANCE01). Under nodes, you can also see that there are two servers there.
The nodes:
Back to Index.
Connect to the Cluster with SSMS
First, I installed SSMS (downloaded from Microsoft) on a server with connection to the cluster, in my case the storage server:
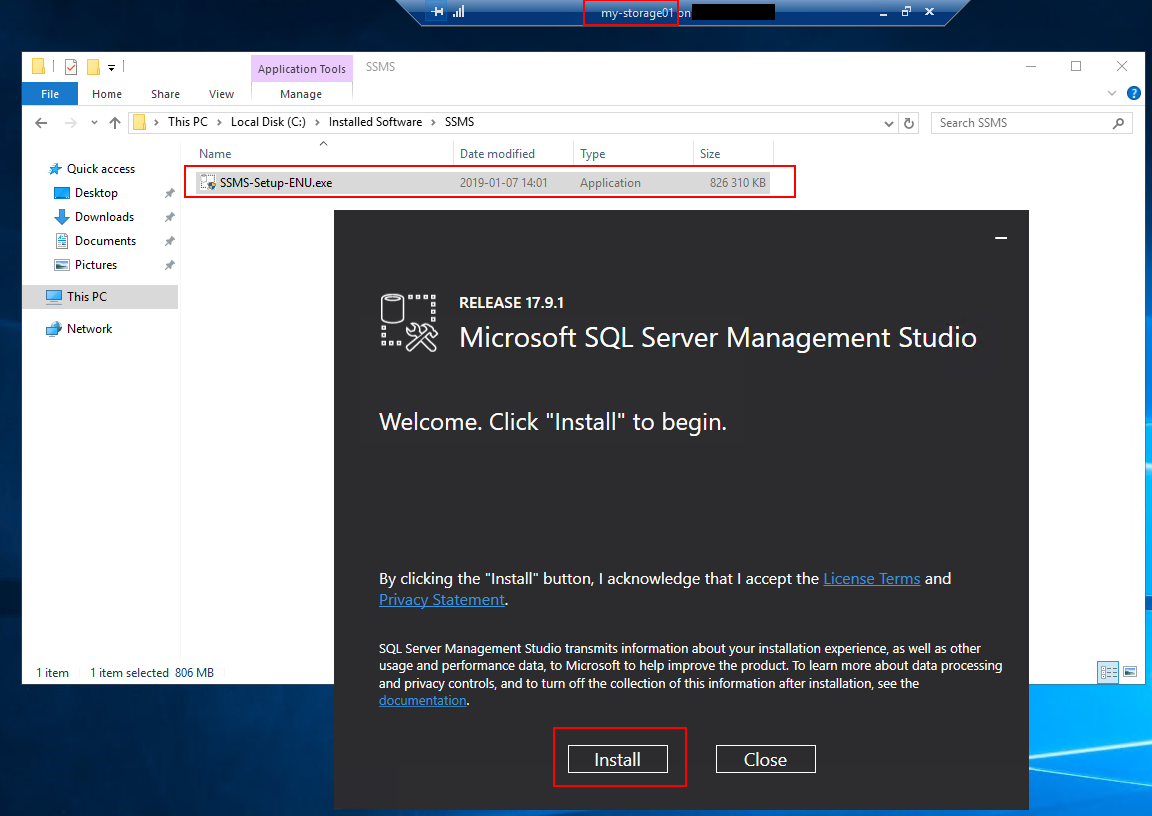
Open SSMS, Start-> Microsoft SQL Server Management Studio 17:

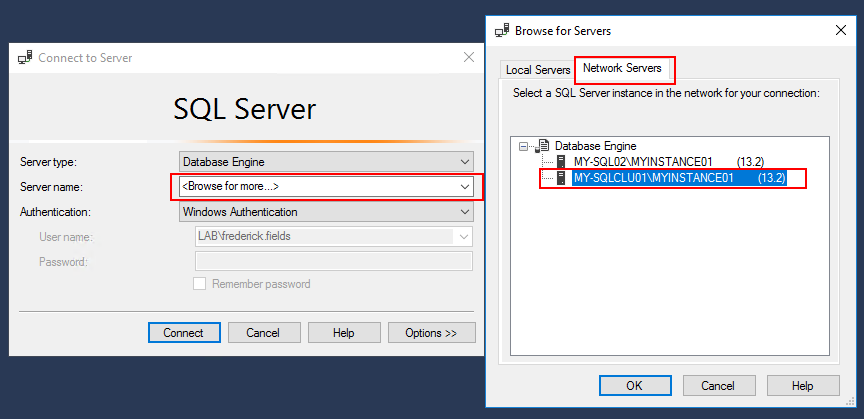
When you connect. Click Browse for more. You want to connect to the SQL cluster instance (not any local, I’m a bit surprised that it shows up at all):
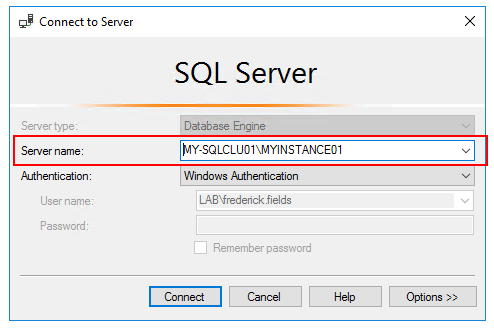
Info. If SQL Server is installed with the default instance name, you only need the server name to connect.
If you know the server name and the instance name, simply connect like this <servername>\<instancename>:
Back to Index.
Test the Cluster from SSMS
I performed a very simple test with SQL Server Management Studios (SSMS).
First, I created a table with some data in the database:
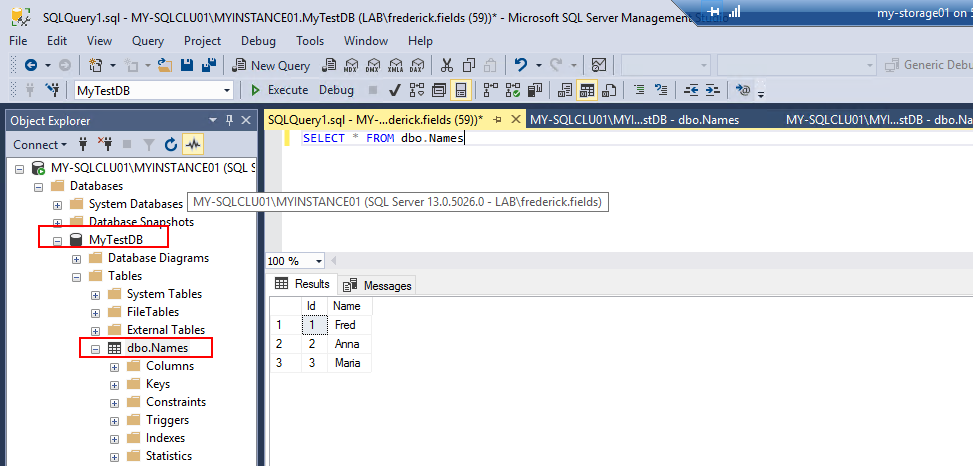
Then I took the first node offline, tested to insert data into the table. Then brought the node back online again. Then I repeated the process by taking the second node offline and tested to inset data. And everything worked fine!
This is how it looks in the Failover Manager when one node is offline:
This is how it looks like when the cluster is failing over to another node (during this time there will be a short period when the cluster is unresponsive):
Back to Index.
Summary
In this post we how looked at how to install SQL Server on a Windows Failover Cluster to achieve High Availability (HA).
Back to Index.
References
Microsoft: https://docs.microsoft.com/en-us/sql/sql-server/install/cluster-disk-selection?view=sql-server-2014 [2019-04-01]
Back to Index.