Create a LAN between VMs in Hyper-V
This post will explain how to set up a LAN between two virtual machines (VM) in Hyper-V.
Info. This post is tagged with “my notebook”. That means, that the purpose of the post is mainly for me to remember something I did. The information here might be incomplete, hard for others to read or contain faults and misconceptions. I’ve chosen to publish my notes, please help me improve them by feedback in the comments section. I hope someone will gain something from these kinds of notes.
TL;DR
- Create a private switch in Virtual Switch manager in Hyper-V Manager.
- Create to VMs with the Windows Server 2016 OS.
- Connect the VMs to the private switch.
- Set unique IP addresses on each server (node), use IPv4.
- Turn off the Windows Firewall (only in lab environment).
- Test communication with Ping.
Index
- Prerequisites
- Background
- Create a private switch in Hyper-V
- Create two VMs
- Set IP addresses on the two nodes (servers)
- Windows Firewall
- Ping
- Summary
- References
Prerequisites
Read more about Hyper-V, Virtualization, Virtual Machines (VMs) and Windows Server 2016 here:
https://www.raspberryfield.life/2019/03/03/a-brief-look-at-virtualization-and-virtual-machines-windows-10-pro/ [2019-03-12]
Back to Index.
Background
I am a developer with background in SQL, java and C#. Recently I had to roll up my sleeves to understand basic network and Windows domains (I truly don’t know anything about these subjects). I decided to make a lab environment in Hyper-V to test things out. This post will explain the most basic portion of that environment.
Back to Index.
Create a private switch in Hyper-V
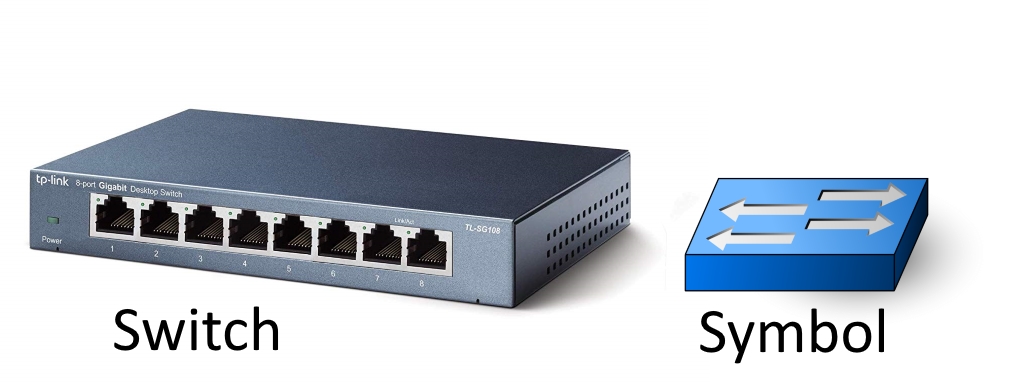
First of all, we need a switch. This is how a switch in real could look like and its symbol in a diagram:
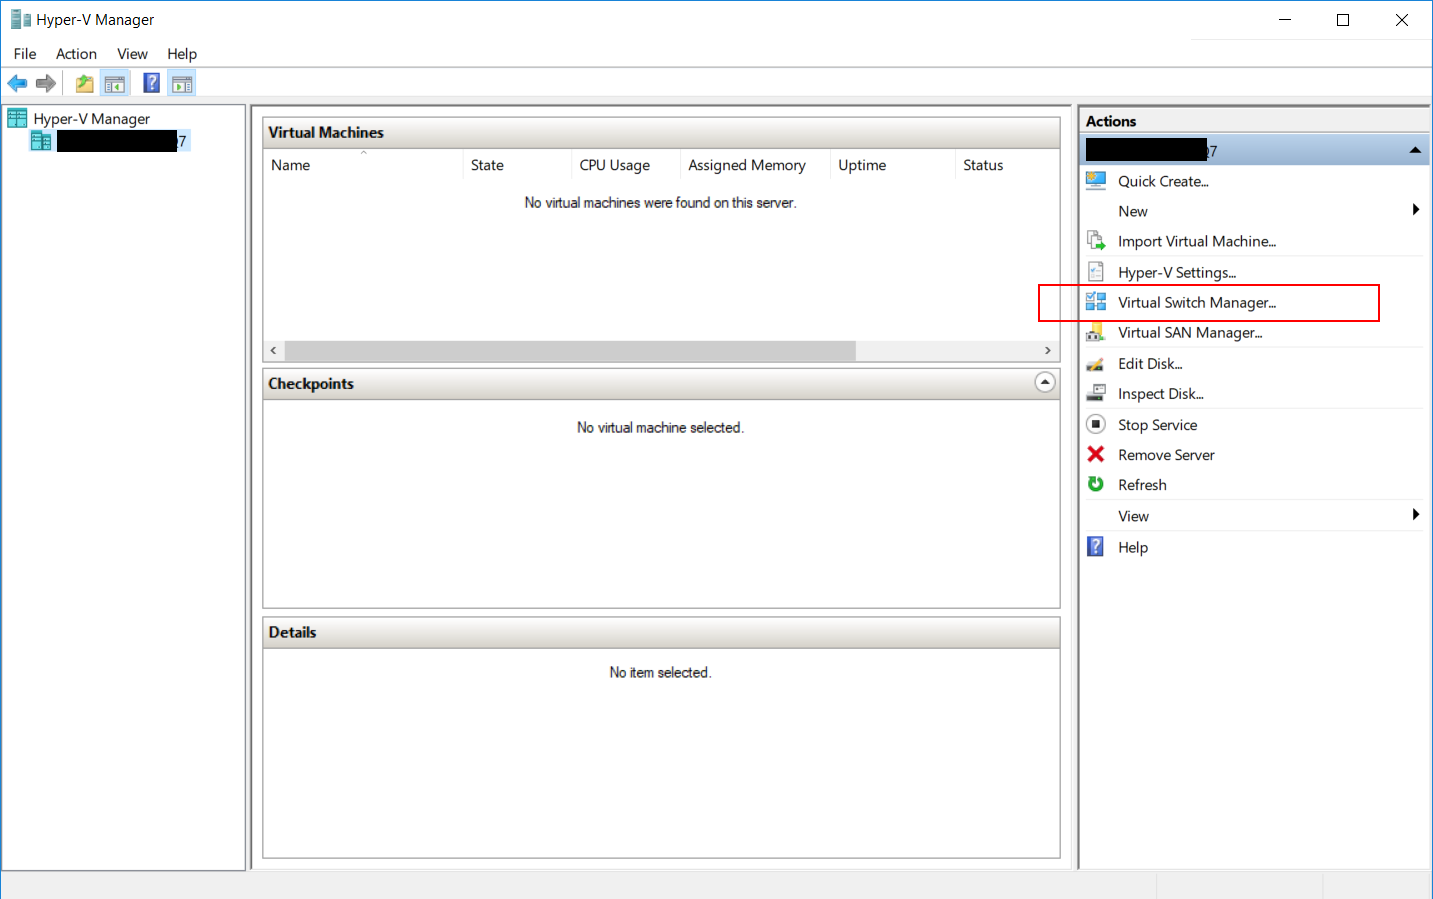
This is how to create a virtual switch in Hyper-V:
Click on virtual switch manager:
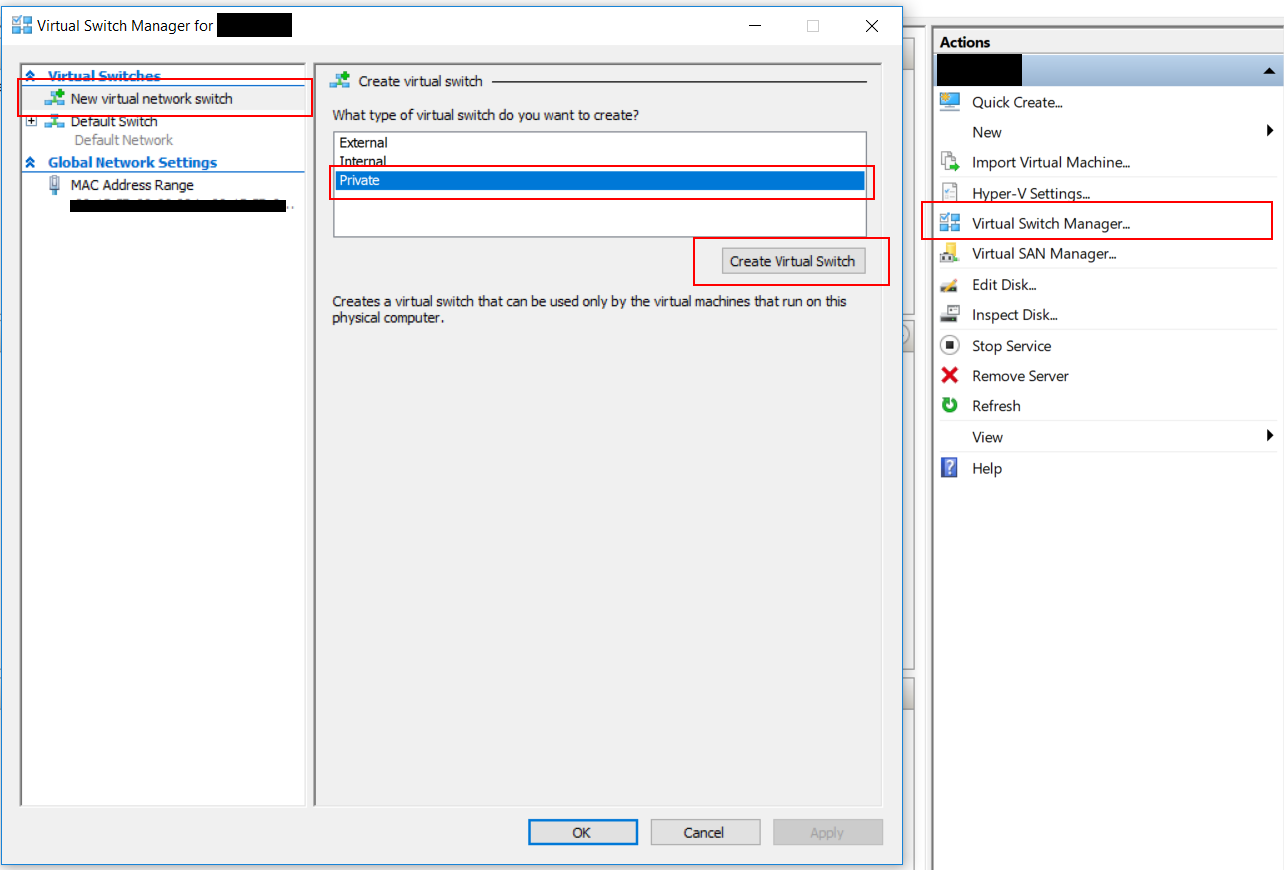
A wizard will pop up. Click New virtual network switch, choose a private switch and click the button Create Virtual Switch.
Now, name your switch and click apply:
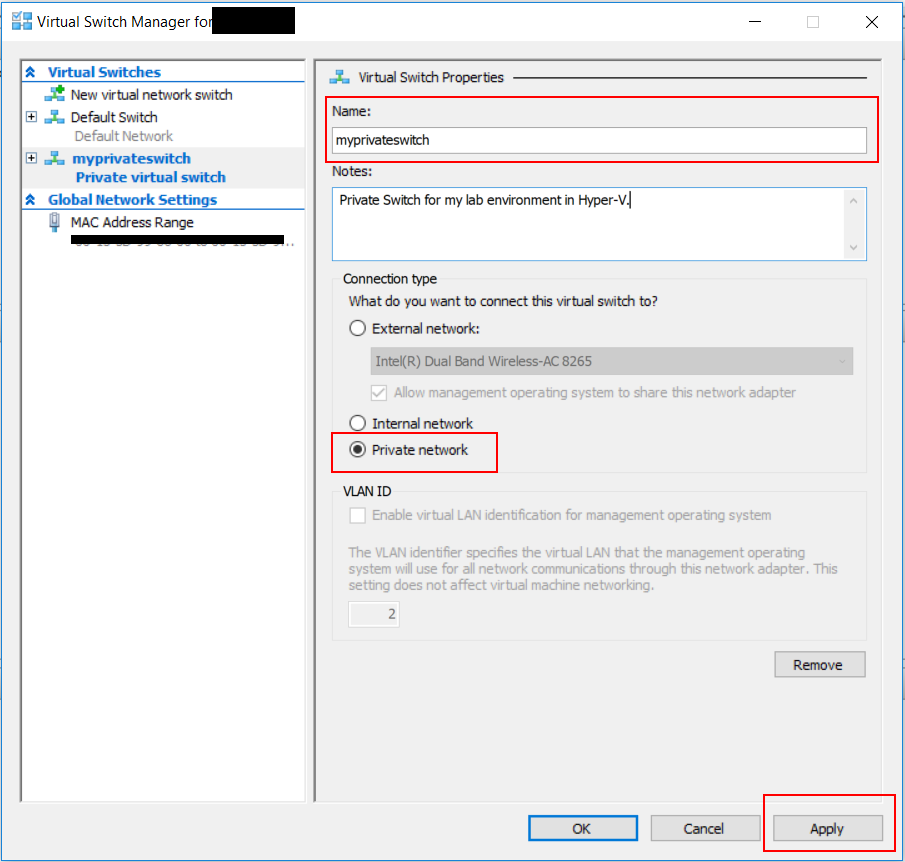
You will now have a private switch. You access and configure it from the same many as you created it in Virtual Switch Manager.
Back to Index.
Create two VMs
To create a network of computers, in our case between servers (nodes), we need at least two of them. Go on and create two VMs with Windows Server 2016 OS (trail version).
You can read more about how to create VMs here:
- A Brief look at Virtualization and Virtual Machines https://www.raspberryfield.life/2019/03/03/a-brief-look-at-virtualization-and-virtual-machines-windows-10-pro/ [2019-03-11]
- Install Windows Server 2016 (Hyper-V) https://www.raspberryfield.life/2019/03/11/install-windows-server-2016-hyper-v/ [2019-03-11]
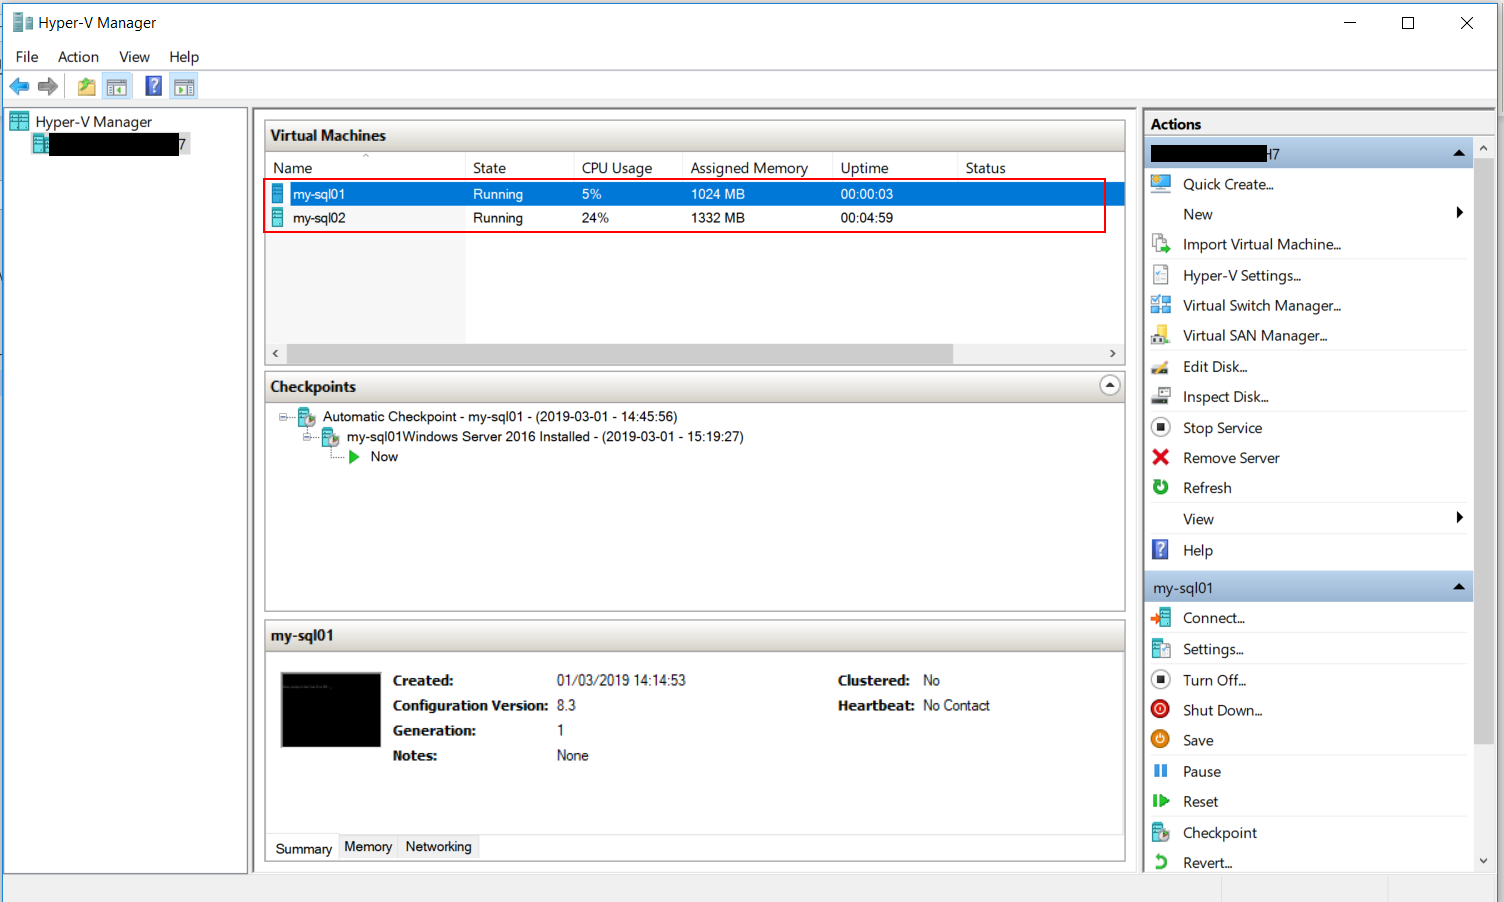
When you are done, you should have two machines up and running in Hyper-V. (Both connected to the same private switch):
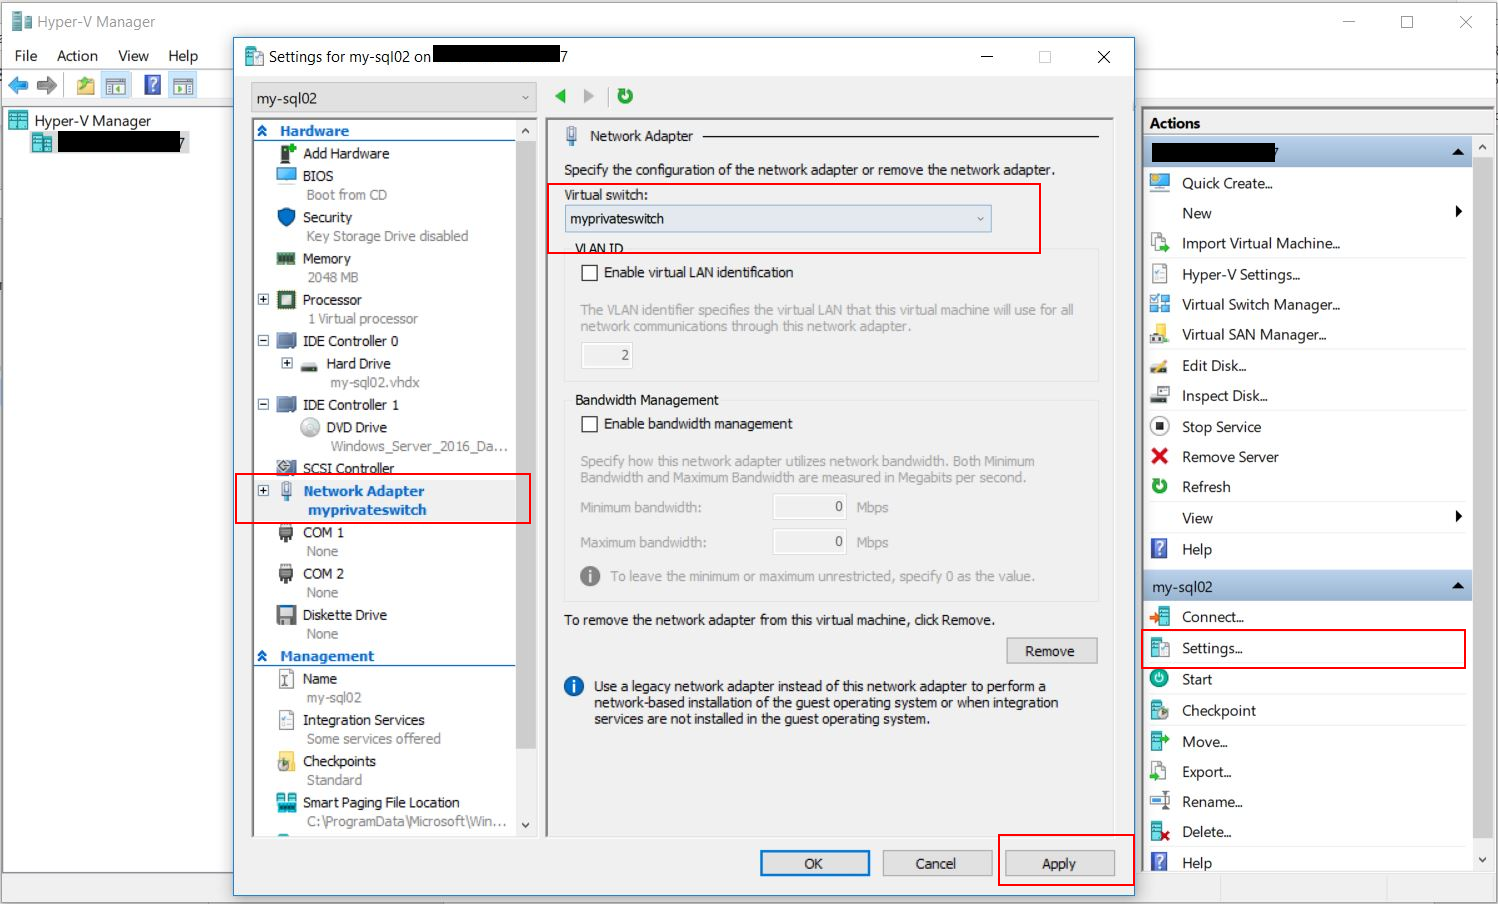
If you forgot to add the switch while you created the VM, you can do it later from the settings menu of a VM:
Back to Index.
Set IP addresses on the two nodes (servers)
Every node on a network needs an IP address, we will be using IPv4 (IPv4 Internet Protocol version 4) to be able to communicate with each other.
We are dealing with a private network here. The standard that simplest fit our needs here says that we can use IPs in the range of 192.168.0.0 to 192.168.255.255.
This will be the IPs for the servers:
| Server name | IP address |
|---|---|
| my-sql01 | 192.168.10.21 |
| my-sql02 | 192.168.10.22 |
(I have just chosen numbers I like in the range described above.)
Info. We will be using a subnet mask 255.255.255.0. This post wont cover how this number is working. A very short description is that the purpose of the subnet mask is to calculate if a given IP is available on the same network or does the computer needs to search outside the network. How this is done won’t be explained here. Just stick with 255.255.255.0 (default value) and everything should be fine.
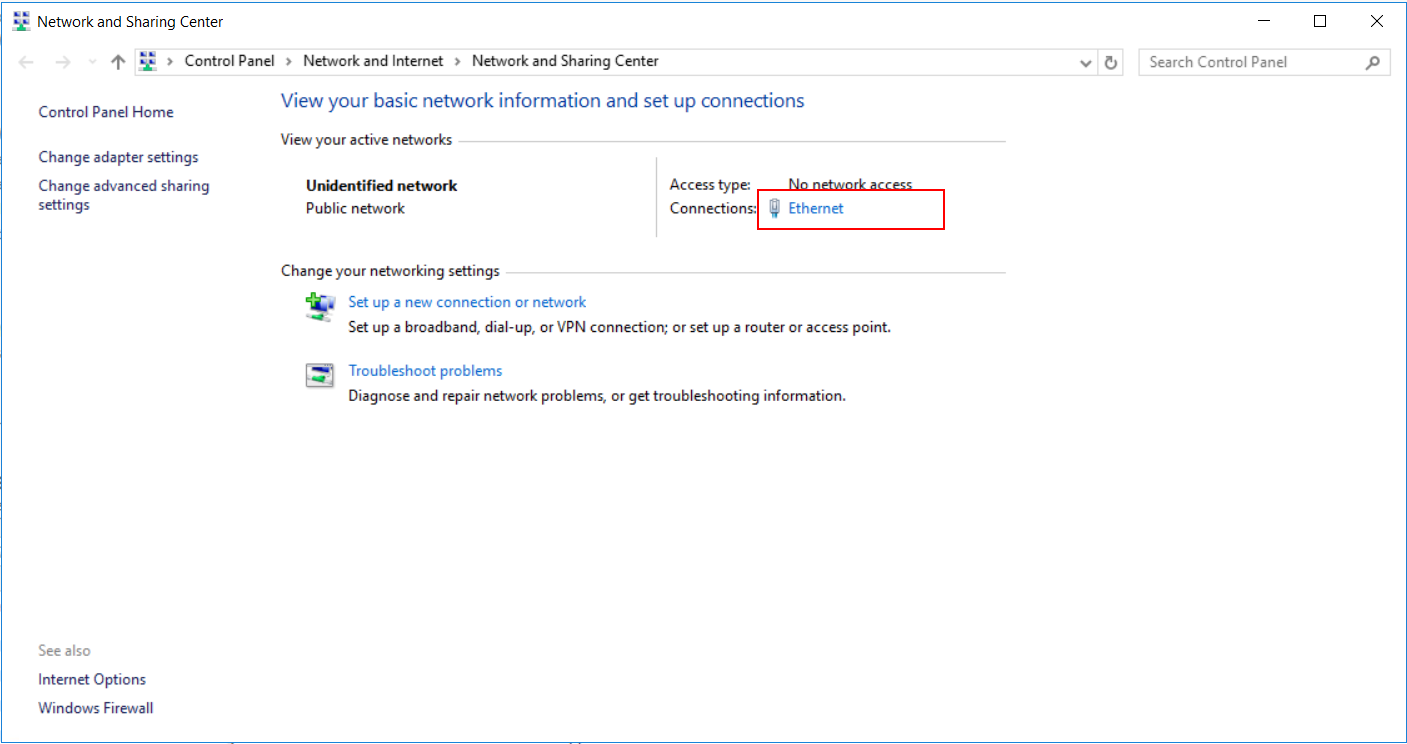
To set an IP open Network and Sharing Center (Start-> Control Panel-> Network and Internet-> Network and Sharing Center) then, click on Ethernet (That is our connection through the private switch):
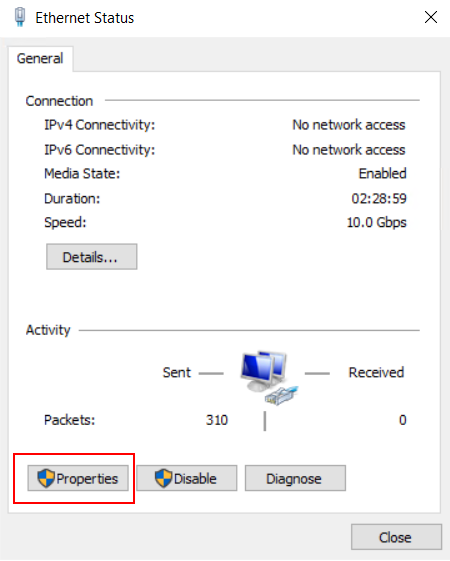
Now, click on properties:
In the window that pops up, click on Internet Protocol version 4 and then, properties:
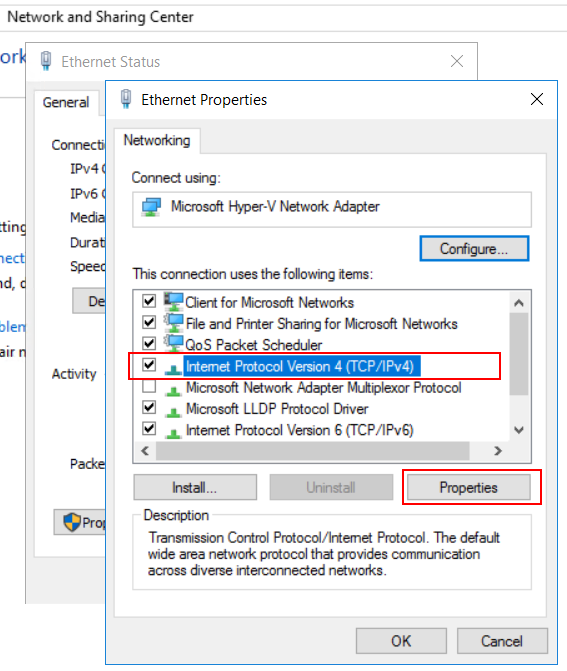
Assign an IP according to the table:
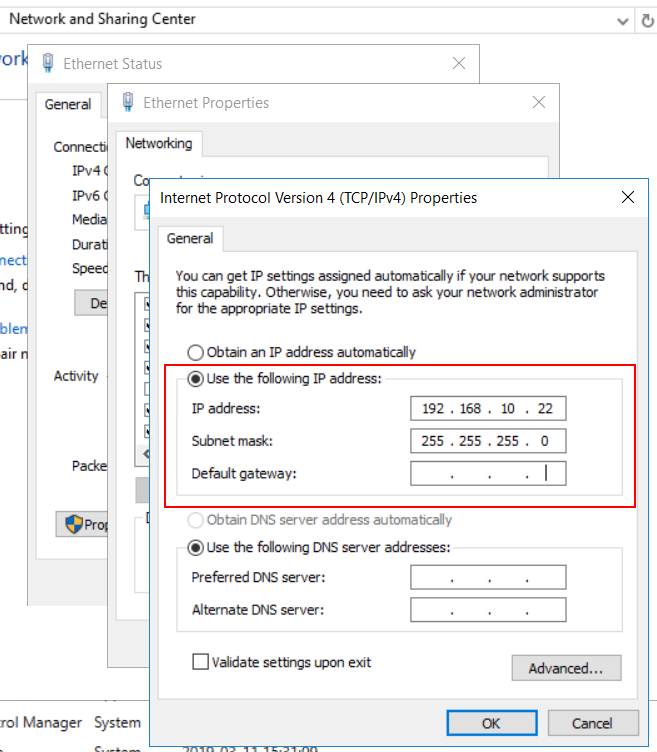
Note. Don’t forget to assign an IP to the other server as well.
After you followed these steps, your two servers will have its own IP address.
Back to Index.
Windows Firewall
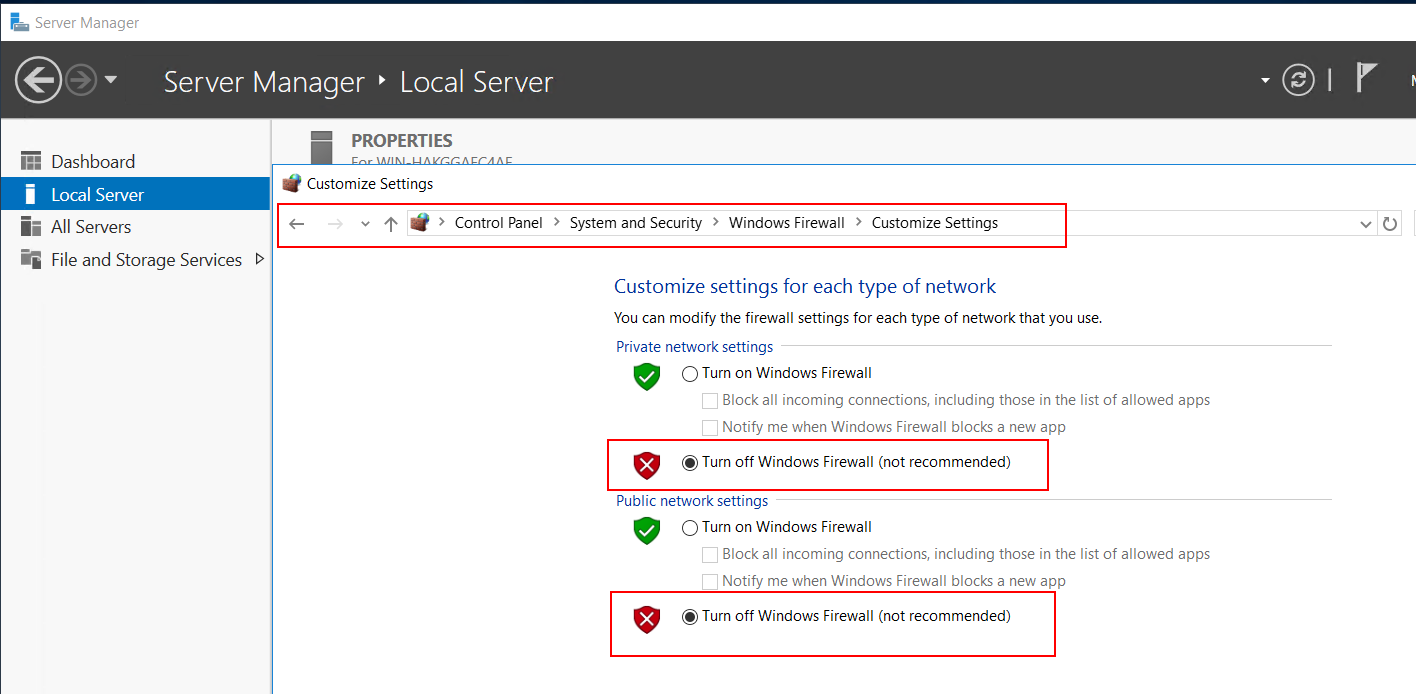
Before we try the communication between the two machines, we must consider windows firewalls settings. Normally in production you should make a firewall rule for the kind of traffic you want to open up through the firewalls. However, this is just a lab environment running in your Hyper-V with no Internet connection. Just make it simple and turn the Windows Firewall off. Then we don’t have to worry or troubleshoot any firewall rules.
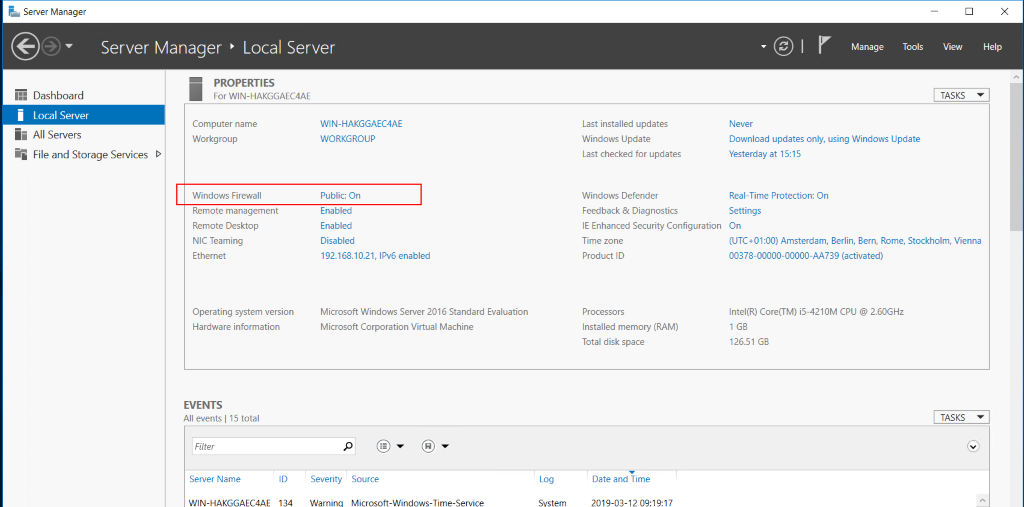
This is how to turn the Firewall off:
Click on Windows Firewall Public: On:
Click on Turn Windows Firewall on or off:
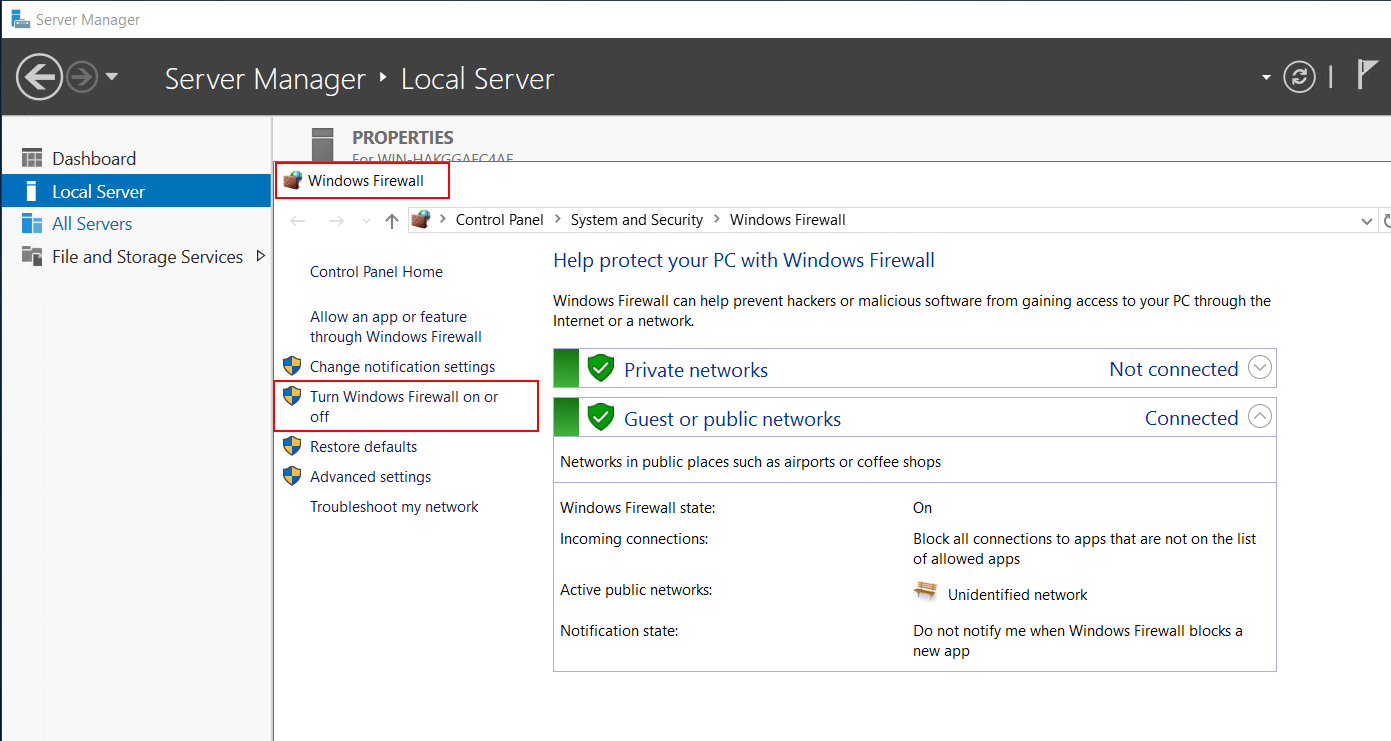
Finally, turn of the Firewall:
Back to Index.
Ping
Ping is an ancient program in computing that dates back to the 80’s. Most computers and OS:s implements ping. The purpose of the program is to see if another computer is available on the network.
Info. The creator of ping named the program after navy sonar system. He thought it sounds ping when they are looking for e.g. submarines. So, looking for computers on a network is an analogy derived from sonar scanning of submarines.
You can use the program from the command line. Start-> Command Prompt:
Just type ping and the IP you want to test (successful ping):
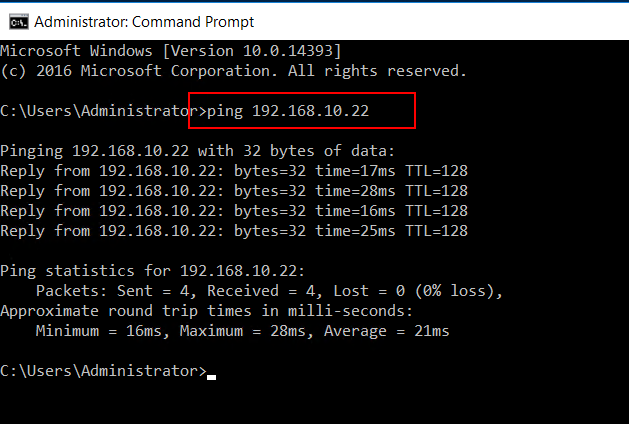
On success, it shows a reply and the response time.
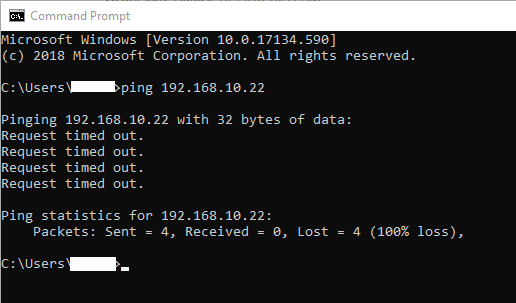
This is how it looks if the test fails:
Back to Index.
Summary
In this post, we have learned how to create a private network in Hyper-V with two servers (nodes). We have assigned IP addresses (IPv4) to them and tested the connection.
References
Wikipedia Private network https://en.wikipedia.org/wiki/Private_network [2019-03-11]
Wikipedia ping (networking utility) https://en.wikipedia.org/wiki/Ping_(networking_utility) [2019-03-12]
Back to Index.
One Response to “Create a LAN between VMs in Hyper-V”
Akhgary
Thanks. It was very helpful for me.