Samba share Raspberry Pi
Want to learn how to share files between your Raspberry Pi and your PC? Read this post!

Index
Introduction
On a network, windows share files between computers and printers via something called the SMB protocol. (Under the hood, SMB uses the NetBIOS API to resolve names.) In this post, I will show you how to install a service on a Linux distro (Raspbian), called SAMBA. This service implements the SMB protocol, so you can share files between your e.g. Raspberry PI and a Windows PC.
Back to Index.
Prerequisites
Read this post:
- https://www.raspberryfield.life/2020/05/12/getting-started-with-raspberry-pi-installing-raspbian/ [2020-05-21]
Back to Index.
Install samba
Info. It can be good to know that under the hood samba uses NetBIOS name resolving to communicate with windows devices. (https://www.raspberryfield.life/2019/03/22/dns-names-vs-netbios-names/)
Always get the update information about your packages, before installing programs via apt:
$ sudo apt update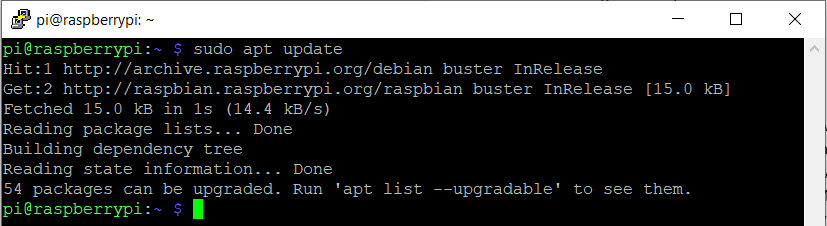
The install command can now use the proper configurations updated by the previous update command.
Run this command to install the parts from the samba software we need:
$ sudo apt install samba samba-common-bin smbclient cifs-utils
The installation will now start.
During the installation, you will get this message:
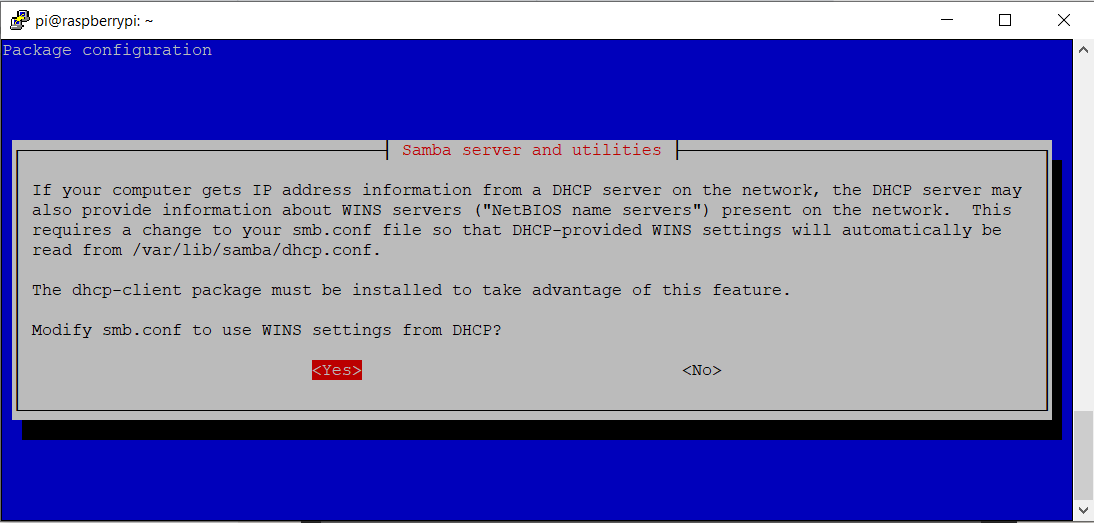
Here you want to choose Yes. It will make configurations easier.
Info. The DHCP server is built into your router. (DHCP stands for Dynamic Host Configuration Protocol.) Your router is responsible to give your connected device an IP address. If you don’t have a DHCP server, you have to manually assign IP addresses to your devices, this is a tedious and error-prone task.
Back to Index.
Create a Share
Now when we have samba installed. We can create a directory (folder) to share.
Move to your user’s home directory by the cd command and make a directory named e.g. shared. You can list the content in a directory with the ls command:
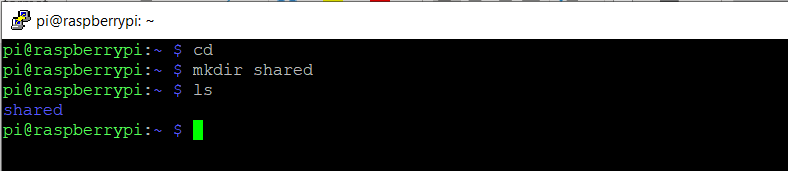
Here you can see that the only item in the home directory of the pi user is a directory named shared.
Next step is to configure the file: /etc/samba/smb.conf. Open it in nano.
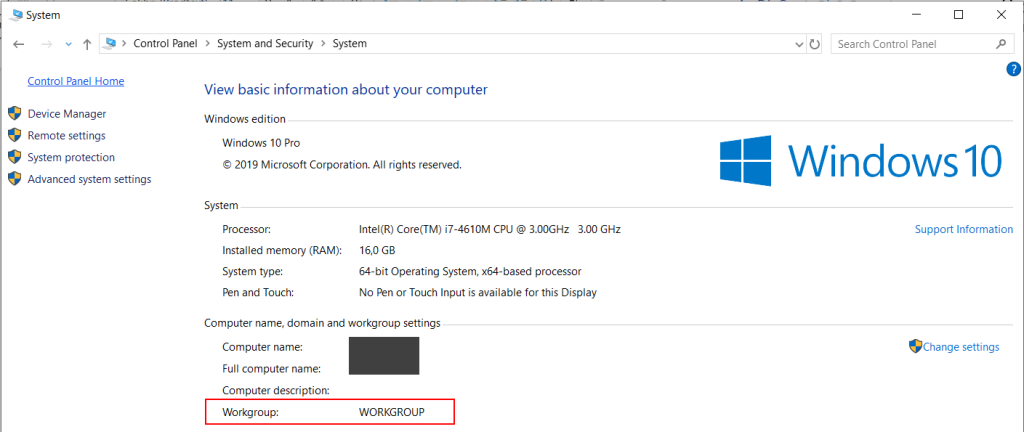
$ sudo nano /etc/samba/smb.confFirst is to change this line to the same workgroup as your PC:
workgroup = <your workgroup name here>
You can find the name of your PC’s workgroup here: Start -> Control panel-> System and Security -> System:
Next is to, in the same file, add this at the end:
/etc/samba/smb.conf
[share]
    path = /home/pi/shared
    read only = no
    public = yes
    writable = yes
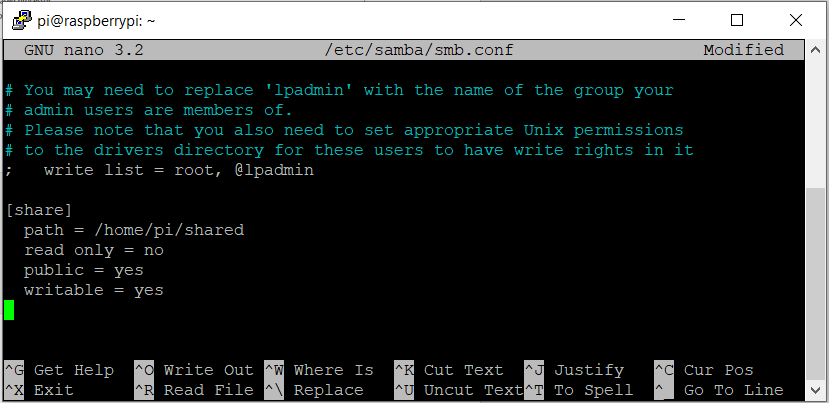
Note! The share name and the shared folder should not be the same, this might cause conflicts.
Save and exit, next is to test the share from your PC!
Back to Index.
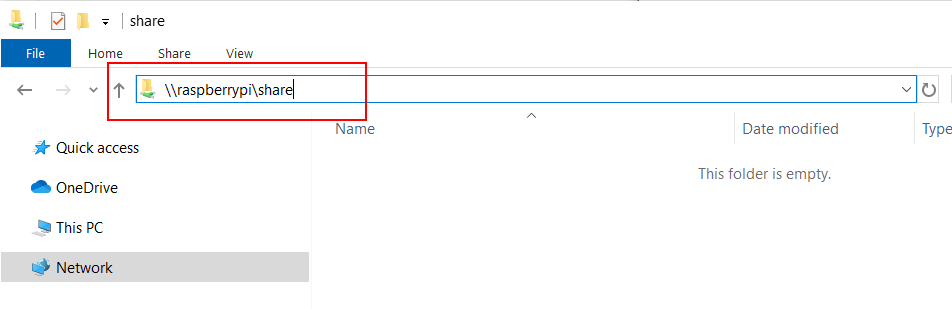
Test the Share
Let’s test the share!
Open the File Explorer on your PC and type in:
\\<hostname or IP>\<name of share>
Put a file in this shared folder from windows and from your Pi:
Note! If you get a permission denied in windows while trying to write to the share, try this: https://unix.stackexchange.com/questions/206309/how-to-create-a-samba-share-that-is-writable-from-windows-without-777-permission [2020-05-22]
Force permission to your Raspberry Pi user:
$ chown -R <user name> </path/to/share>
$ chown -R pi /home/pi/shared
Next, add these lines at the end of your share configuration in /etc/samba/smb.conf:
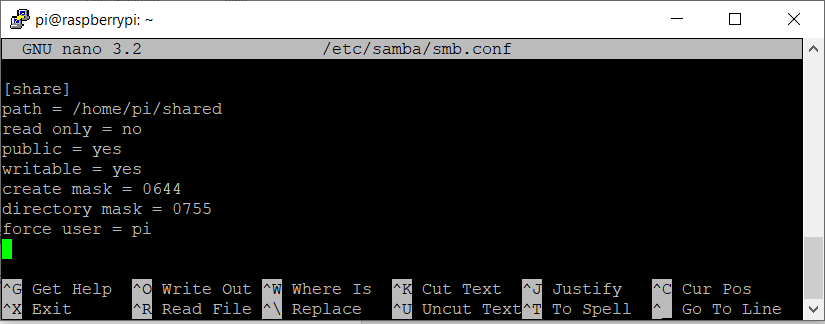
Restart the samba service to force the changes to kick in:

This configuration has forced all connections to use the ‘pi’ user with directory permission 0755(read/write) and file permission 0644 (read/write). Read more about permission in Linux here: http://www.filepermissions.com/ [2020-05-22].
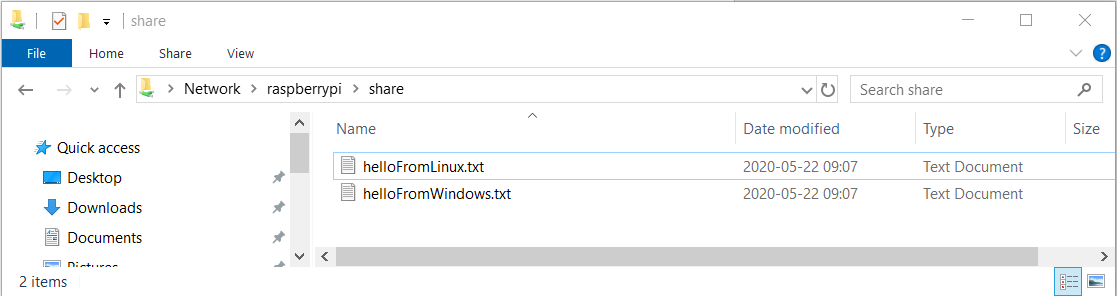
Creating a file from Pi:

In windows, right click in your File Explorer while browsing the share and create a new text file.
Now you can see both files in the share!
Good job! Now you can share files between your Pi and PC!
Back to Index.