Sega Master System Controller
It is a lot of fun to connect an old gaming controller to one of your hobby projects. It gives your project a proper controller to control something, and they add a nostalgic feeling. Done correctly, you can just plug and play them, without damaging or modifying the original hardware.
If you want to try to interface with a gaming controller, Sega Master System is one of the easiest. The reason is that there is no IC (integrated circuit) inside. Just one wire for each button, very simple.
The Controller
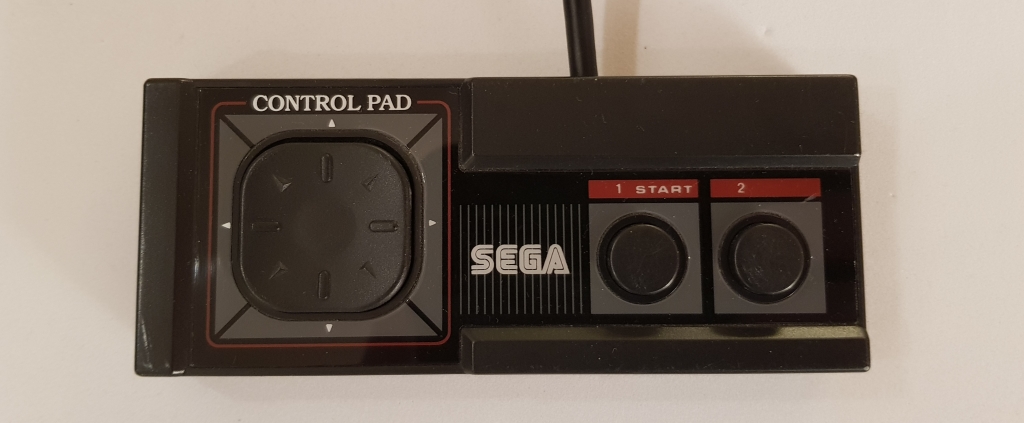
This is how the Sega Master System (SMS) controller looks like:
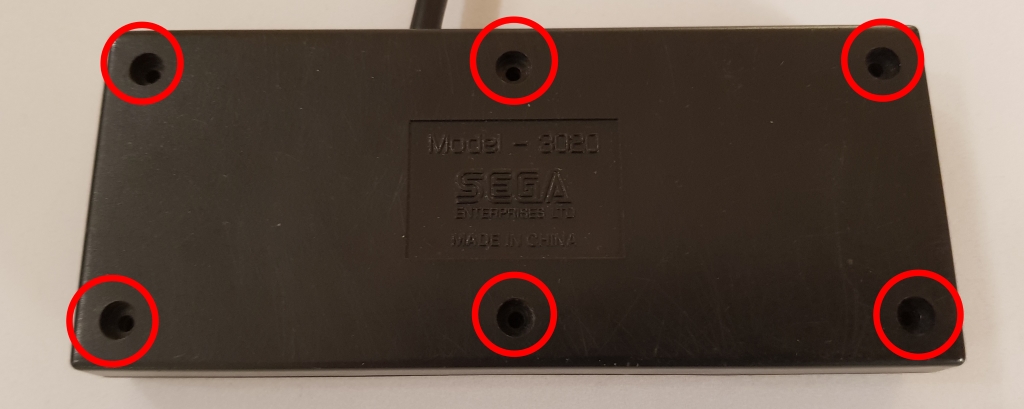
6 screws on the back:
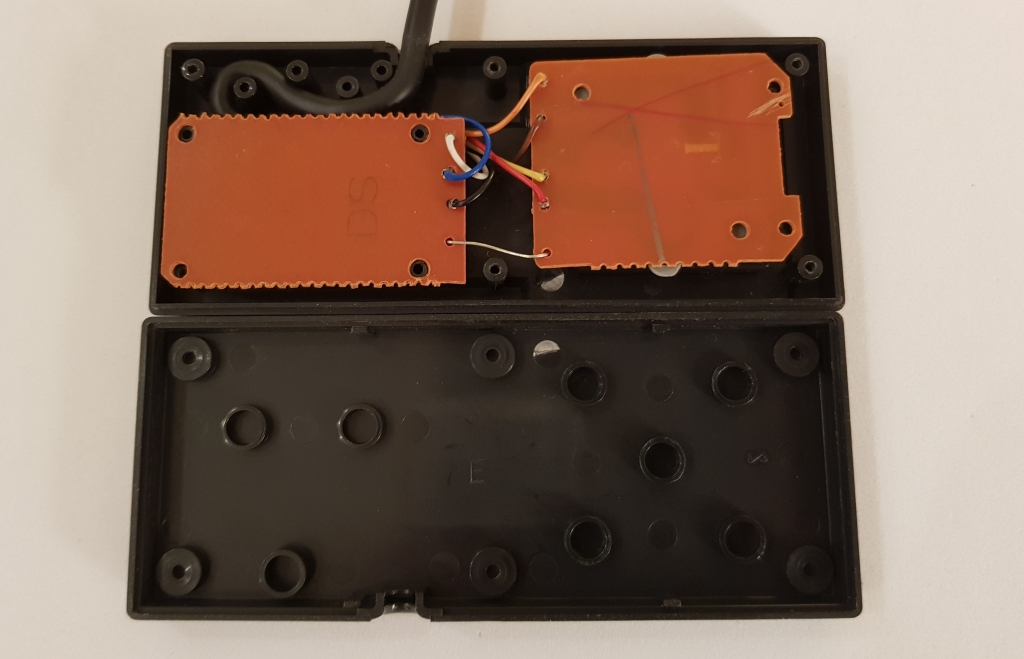
This is how the controller looks like inside:
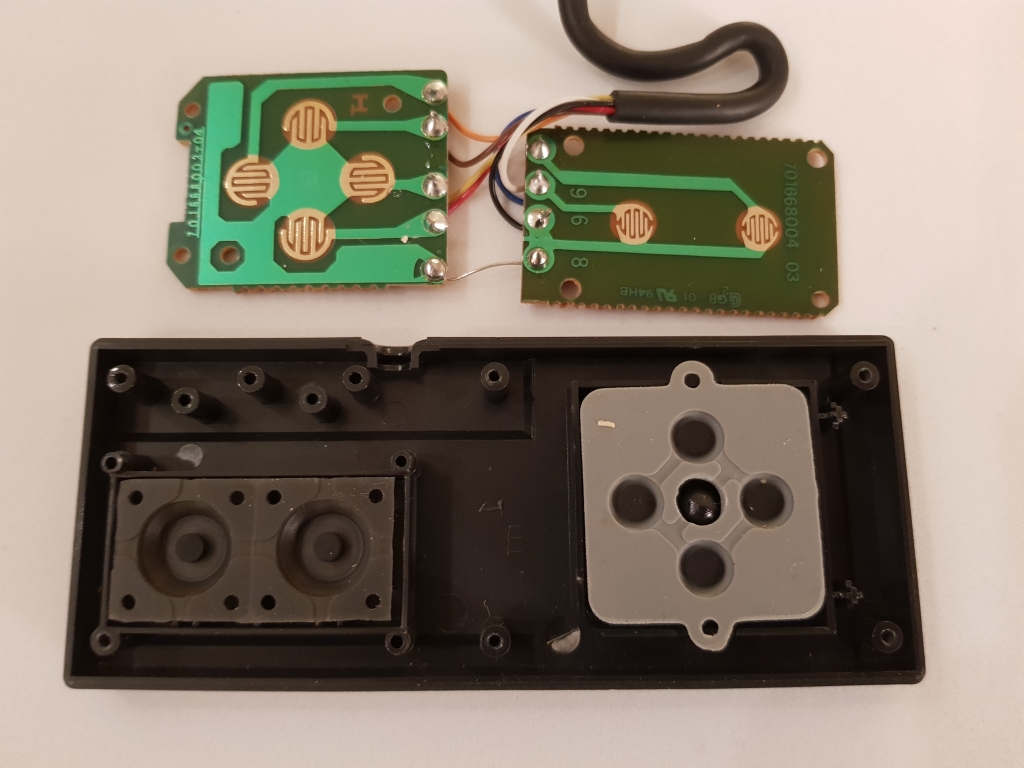
There is no IC inside, when a button is pressed, it is connected to ground:
The Pinout

RS-232 DB9 pinout.
| Pin# | Signal | Colour Code |
|---|---|---|
| 1. | Up | Brown |
| 2. | Down | Red |
| 3. | Left | Orange |
| 4. | Right | Yellow |
| 5. | N/C | N/C |
| 6. | Button 1 (Start) | Blue |
| 7. | Light sensor (Light Phaser only) | ? |
| 8. | GND | Black |
| 9. | Button 2 | White |
Check Continuity
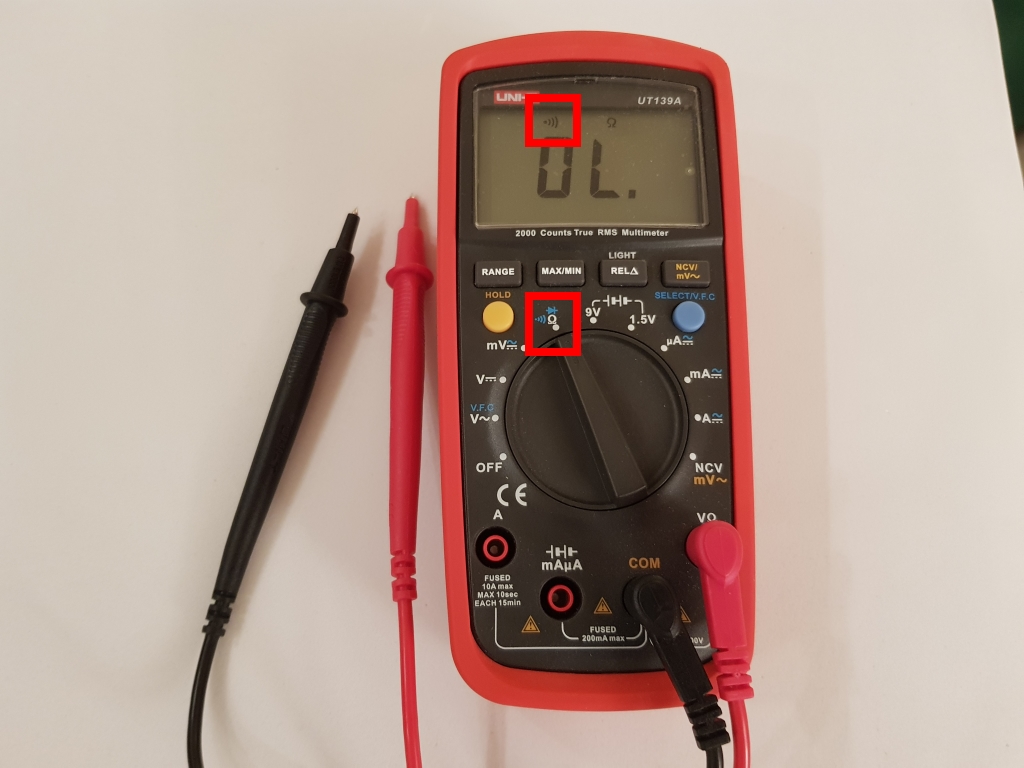
Dealing with cables with many wires, it is a good idea to double check which wire goes where. An easy way to do this, is with the built-in functionality continuing testing in a multimeter. When the positive lead (red) and the negative (black) are connected to the same wire that allows current to flow through, the multimeter will beep.
A small icon (soundwaves) indicates the continuing testing mode:
Interfacing with Arduino
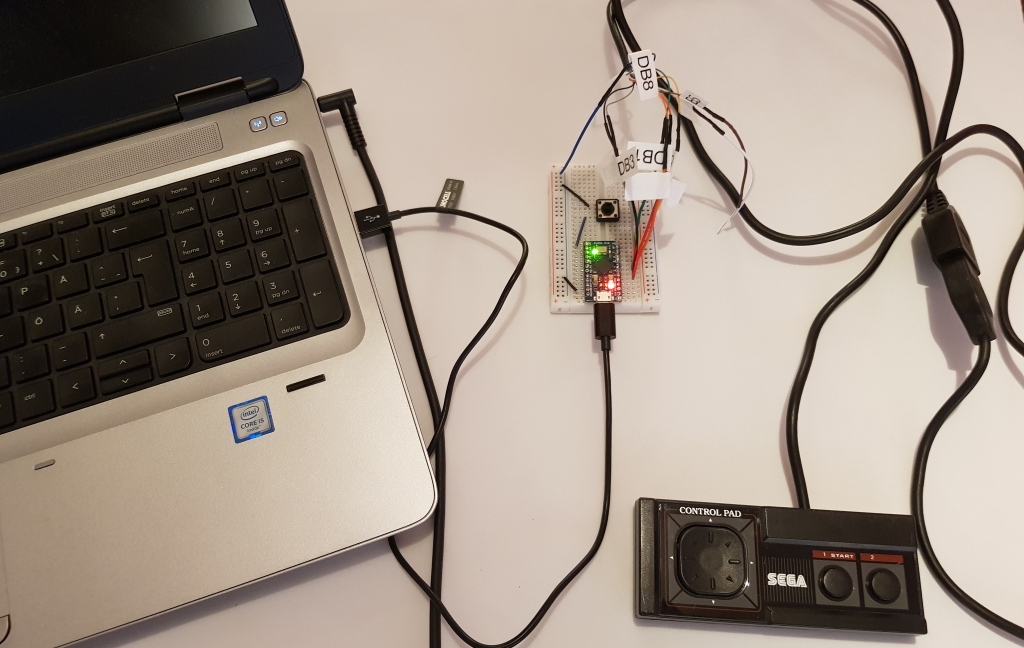
I’m going to use an Arduino pro micro controller to interface the Sega controller. Just like the Arduino Leonardo, the pro micro can out of the box emulate a keyboard when importing the keyboard library. This gives us the opportunity to map keys in a retro game emulator.
Here is the Arduino:

And here is how it is connected:
Note! When you are using the keyboard library, the Arduino will take over the keyboard. If you are writing a code and make a mistake, it might be hard to reset the microcontroller. You should have a physical fail over, like a button. If you press the button, the keyboard will not make use of the keyboard library. This is of course only necessarily during development.
Here is an example of to prevent that you can’t upload new code to the Arduino. A push button is added. If it is pressed, the microcontroller will enter a loop that does nothing. That’s make it possible to change and upload new code. It prevents that any bad written code from the keyboard emulation will be “taking over”:
KeyboardStopButton.ino :
/*Interface with Sega Master System Controller
Raspberryfield.life 2018-11-10*/
#include <Keyboard.h>
const int stopPin = 10;
bool stopButton = false;
void setup() {
  // put your setup code here, to run once:
  pinMode(stopPin, INPUT_PULLUP);//Note! Internal pull-up activated.
}
void loop() {
  //If the stopbutton is pressed (fail over), enter loop.
  //Gives time to re-write the code.
  StopButton();
  Serial.println("Running program...");
  delay(1000);
}//END main loop
//Checks is Stop button is pressed, if so enter a loop that does nothing.
void StopButton(){
  if(digitalRead(stopPin)==LOW){//(Active low)
    stopButton = true;
    }
  while(stopButton){
    Keyboard.releaseAll();
    Serial.println("---STOP Button pressed, program interrupted---");
    delay(1000);
  }
}//END StopButton()
Sega Master System Controller Interface
Here is an example code how to interface with the Sega Master System Controller. It’s far from perfect, but it easy to understand and it works:
SmsControllerEasy.ino :
/*Interface with Sega Master System (Sms) Controller Easy
Raspberryfield.life 2018-11-11*/
#include <Keyboard.h>
const int stopPin = 10;
const int smsUp = 2;
const int smsDown = 3;
const int smsLeft = 4;
const int smsRight = 5;
const int smsButton1 = 6;
const int smsButton2 = 7;
bool stopButton = false;
void setup() {
  // put your setup code here, to run once:
  pinMode(stopPin, INPUT_PULLUP);//Note! Internal pull-up activated.
  pinMode(smsUp, INPUT_PULLUP);
  pinMode(smsDown, INPUT_PULLUP);
  pinMode(smsLeft, INPUT_PULLUP);
  pinMode(smsRight, INPUT_PULLUP);
  pinMode(smsButton1, INPUT_PULLUP);
  pinMode(smsButton2, INPUT_PULLUP);
}
void loop() {
  //If the stopbutton is pressed (fail over), enter loop.
  //Gives time to re-write the code.
  StopButton();
  //Up Butoon
  if(digitalRead(smsUp)==LOW){
    Keyboard.press('u');
    }else{
      Keyboard.release('u');
    }//End Up
  //Down Button
  if(digitalRead(smsDown)==LOW){
    Keyboard.press('d');
    }else{
        Keyboard.release('d');
    }//End Down
  //Left Button
  if(digitalRead(smsLeft)==LOW){
    Keyboard.press('l');
    }else{
        Keyboard.release('l');
    }//End Left
  //Right Button
  if(digitalRead(smsRight)==LOW){
    Keyboard.press('r');
    }else{
        Keyboard.release('r');
    }//End Right
  //Button #1
  if(digitalRead(smsButton1)==LOW){
    Keyboard.press('1');
    }else{
        Keyboard.release('1');
    }//End Button#1
  //Button #2
  if(digitalRead(smsButton2)==LOW){
    Keyboard.press('2');
    }else{
        Keyboard.release('2');
    }//End Button#2
  delay(20);
}//END main loop
//Checks is Stop button is pressed, if so enter a loop that does nothing.
void StopButton(){
  if(digitalRead(stopPin)==LOW){//(Active low)
    stopButton = true;
    }
  while(stopButton){
    Keyboard.releaseAll();
    Serial.println("---STOP Button pressed, program interrupted---");
    delay(1000);
  }
}//END StopButton()
The easy code example is very repetitive. When can easily shrink the amount of code with for-loops. Here is another example using for-loops to avoid repetitive code:
SmsControllerForLoop.ino :
/*Interface with Sega Master System (Sms) Controller
Raspberryfield.life 2018-11-11*/
#include <Keyboard.h>
const int stopPin = 10;
const int smsUp = 2;
const int smsDown = 3;
const int smsLeft = 4;
const int smsRight = 5;
const int smsButton1 = 6;
const int smsButton2 = 7;
bool stopButton = false;
const int arrayLength = 6;
int pinButtons[arrayLength] = {smsUp, smsDown, smsLeft, smsRight, smsButton1, smsButton2};
char commands[] = {'u', 'd', 'l', 'r', '1', '2'};
void setup() {
  // put your setup code here, to run once:
  pinMode(stopPin, INPUT_PULLUP);//Note! Internal pull-up activated.
  for(int i = 0; i < arrayLength; i++){
    pinMode(pinButtons[i], INPUT_PULLUP);
  }
}
void loop() {
  //If the stopbutton is pressed (fail over), enter loop.
  //Gives time to re-write the code.
  StopButton();
  //check all the buttons
  for(int i = 0; i < arrayLength; i++){
    if(digitalRead(pinButtons[i])==LOW){
      Keyboard.press(commands[i]);
    }else{
      Keyboard.release(commands[i]);
    }
  }
  delay(20);
}//END main loop
//Checks is Stop button is pressed, if so enter a loop that does nothing.
void StopButton(){
  if(digitalRead(stopPin)==LOW){//(Active low)
    stopButton = true;
    }
  while(stopButton){
    Keyboard.releaseAll();
    Serial.println("---STOP Button pressed, program interrupted---");
    delay(1000);
  }
}//END StopButton()
The code is not perfect, but still easy to understand and it works fine. But it makes unnecessarily functions calls to Keyboard.press() and Keyboard.release() each loop. I leave it up to you to improve the code further. This post is intended for beginners and I think there is already a lot here. If you want suggestions to further improve the code, I have some useful tips in this blogpost interfacing a NES Controller. But that’s all for now!
References
- PINOUTS.RUSegaMaster System (SMS) and MegaDrive joystick pinout http://pinouts.ru/Game/sega_ms_joy_pinout.shtml [2018-11-06]
One Response to “Sega Master System Controller”
test
Sega <3