Getting started with Home Assistant Core – Installing
This is my notes about how I installed Home assistant Core on a Raspberry Pi 3. Things are changing extremely fast in this community driven open source world of home automation. I don’t expect this to be relevant for very long…
Index
- Introduction
- Prerequisites
- Install Home Assistant Core
- Onboarding
- Make Home Assistant run automatically
- Conclusion
- References
Introduction
Home assistant (https://www.home-assistant.io/) is a hub where you can integrate all sorts of devices, services and sensors, etc. It is community driven and free for use. I can highly recommend this software! Great documentation and community!
Set your creativity in motion with Home assistant. You can do so many kinds of integrations, automation logic and data visualisations!
Info. As of today, there are two main tracks to choose when installing Home Assistant.
- Download a prepared image with Home Assistant already installed. This is best for beginners or users that want a more graphical experience when configuring things etc.
- Start from a Raspbian Lite image (nothing preinstalled) and work your way upwards. Be prepared to spend a lot of time with ssh to configure and set up things. This is called Home Assistant Core and will be covered in this article. You will have full control in this setting, but it comes with a cost of less interactive experience.
I will write a few posts about this software. This article – the first one, will be about how to install it (Core version). Mark that this is how I did it, according to the documentation, there are several other ways, check them!
Note. It is recommended to make this installation only on a Raspbian Lite image.
The official documentation covers two steps, when installing it under a virtual python environment:
- The installation. https://www.home-assistant.io/docs/installation/raspberry-pi/
- Run Home Assistant as a service: https://community.home-assistant.io/t/autostart-using-systemd/199497
These guides are great but might be hard to read for beginners, even if the suggested setup is good. I will make it slightly different. I will run Home Assistant under the pi user and make the configurations little bit simpler.
You can see this as a light version of the official documentation.
Back to Index.
Prerequisites
I did this setup headless via ssh (no monitor, mouse, etc.). You should be very convenient to work with Raspberry Pis remotely. Read this blog post:
Back to Index.
Install Home Assistant Core
First, update the system:
$ sudo apt-get update
$ sudo apt-get upgrade -y
Install dependencies:
$ sudo apt-get install python3 python3-dev python3-venv python3-pip libffi-dev libssl-dev autoconf
Go to the right directory for the installation:
$ cd /srv/
Make a directory for the python virtual environment:
$ sudo mkdir homeassistant
Change ownership to pi user and pi group (default otherwise is ‘root’ user under /srv):
$ chown pi:pi /srv/homeassistant
Info. See ownership of files and directories with $ ls -l
Now, create a python virtual environment:
Info. Python virtual environment is an isolated environment with its own set of binaries and dependencies. Projects running in a virtual environment will not interfere with the standard execution and sets of python on your computer.
Note. Don’t use ‘sudo’ in python virtual environment, I think this command might overwrite standard python files, outside the venv (virtual environment) and that defeats the purpose of an isolated environment.
$ python3 -m venv .
Note. Don’t miss the dot after ‘venv’, meaning ‘here’.
Activate the virtual environment:
$ source bin/activate
Note. See how the terminal changes after you activated the python virtual environment:
(homeassistant) <your user e.g. pi>@raspberrypi:/srv/homeassistant $

(That is good, makes it clearer that you are in a virtual environment.)
In this environment, we need a python package. Install it with this command:
$ python3 -m pip install wheel
Finally, we can install Home Assistant:
$ pip3 install homeassistant
When the installation is done, start Home Assistant:
$ hass
Note. The installation and the start-up can take several minutes the first time. Start-up will be much faster after the first time.
When it is up and running you should see something like this:

After the start up finished, you can try to reach the web GUI with one of the following formats:
- http://<ipaddress>:8123
- http://<netBIOS>:8123
- http://<mDNS>:8123
Upgrading Home Assistant:
See the official documentation for more about upgrading etc:
https://www.home-assistant.io/docs/installation/raspberry-pi/ [2020-06-13]
Stop Home Assistant from terminal:
Stop Home Assistant with Ctrl + C :
To close the virtual python environment, type: deactivate.

Info. Later in this post, I will show how to run home assistant automatically on boot.
Back to Index.
Onboarding
Home Assistant’s GUI is web based, and you access it with a browser. (The installation comes with a webserver).
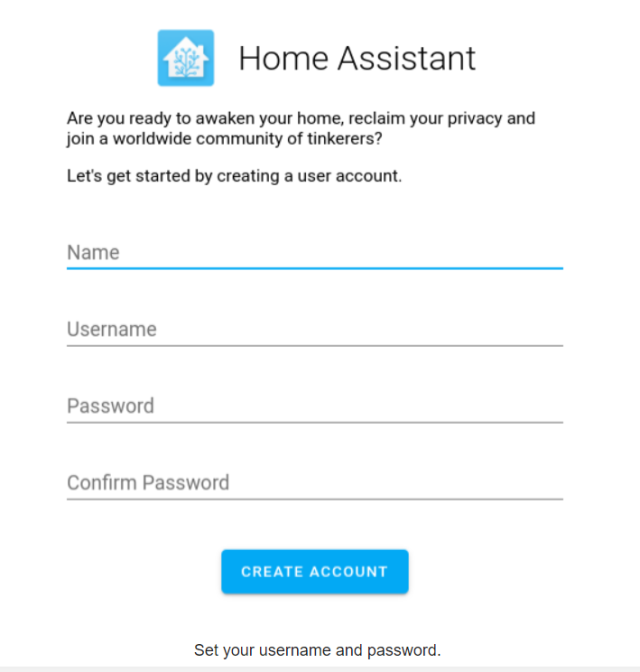
First time you login to Home Assistant, you must set up an account:
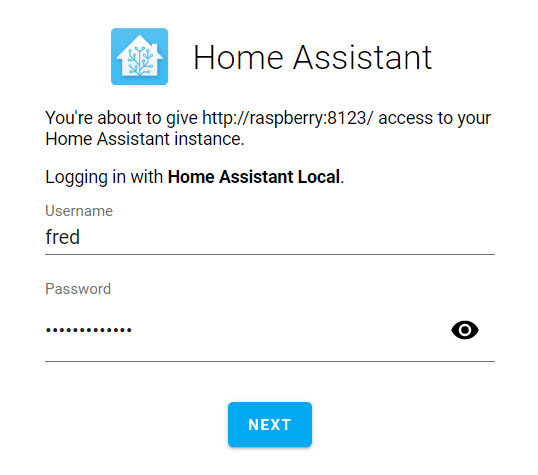
Next time you login in, you will login with your account:
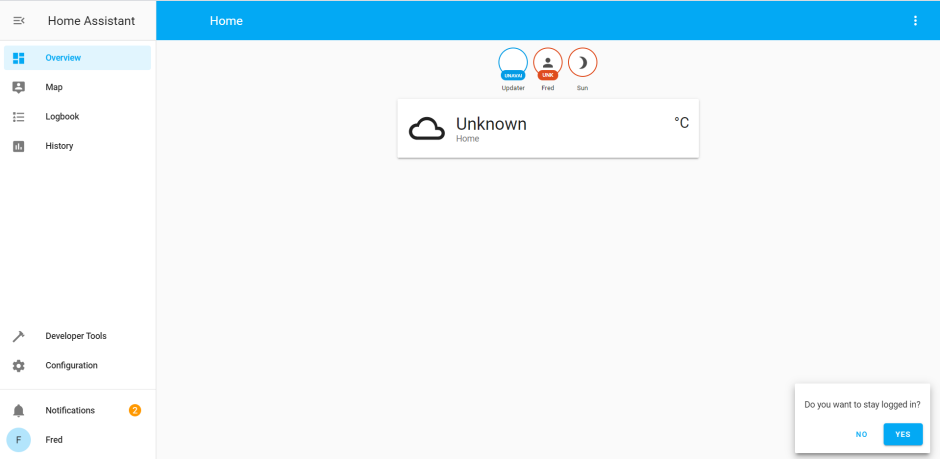
This is how the main page look like:
Back to Index.
Make Home Assistant run automatically
If we want home assistant to start automatically on boot, we need to make some configurations.
First, we need to create a service file to control Home Assistant.
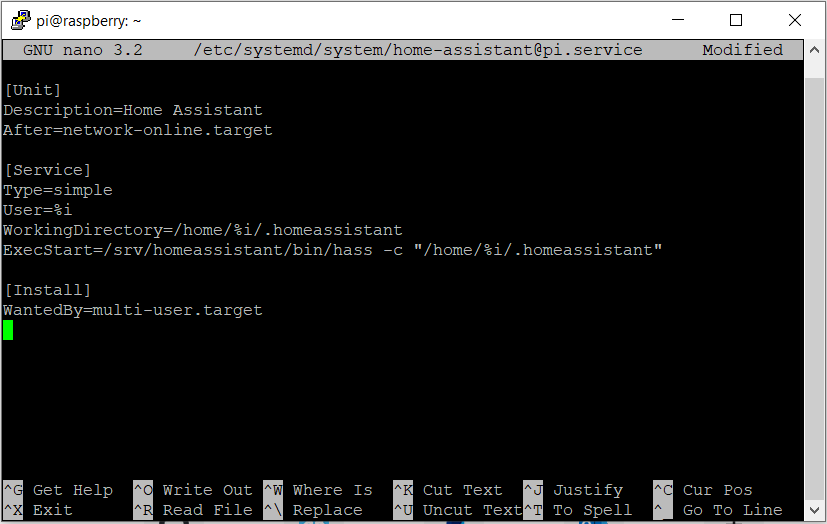
Create/edit it here: /etc/systemd/system/home-assistant@<YOUR_USER>.service
$ sudo nano /etc/systemd/system/home-assistant@pi.service
Enter these into the file:
Note. The settings here are case sensitive.
/etc/systemd/system/home-assistant@pi.service
[Unit]
Description=Home Assistant
After=network-online.target
[Service]
Type=simple
User=%i
WorkingDirectory=/home/%i/.homeassistant
ExecStart=/srv/homeassistant/bin/hass -c "/home/%i/.homeassistant"

[Install]
WantedBy=multi-user.target
Info. %i is the parameter set by running the service. @pi will substitute %i with just ‘pi’.
‘After=network-online.target’ means that the service will start after network connection is established.
ExecStart is the line that will start Home Assistant with the path to the config file.
Read more here about hass (Home Assistant) options: https://www.home-assistant.io/docs/tools/hass/
You need to reload systemd to make the daemon aware of the new configuration:
$ sudo systemctl –system daemon-reload
To have Home Assistant start automatically at boot, enable the service:
$ sudo systemctl enable home-assistant@<YOUR_USER>.service
Info. To disable the automatic start, use this command.
$ sudo systemctl disable home-assistant@<YOUR_USER>.service
To start Home Assistant now, use this command.
$ sudo systemctl start home-assistant@<YOUR_USER>.service
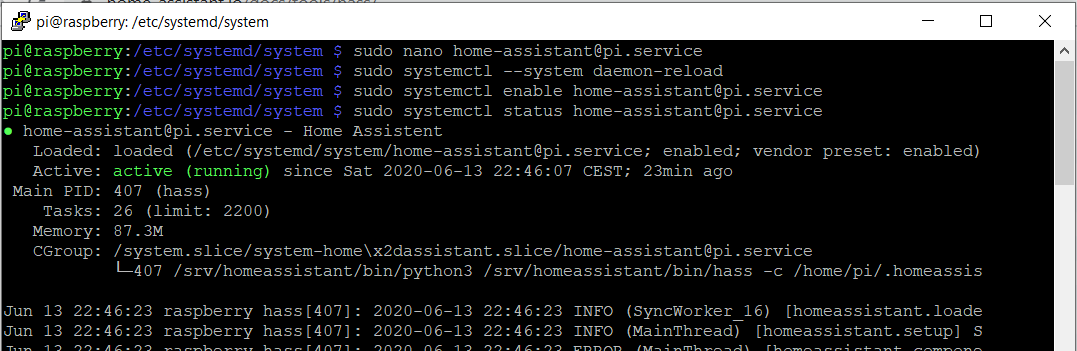
You can check the status with:
$ systemctl status home-assistant@ha.service
Info. Tips about logging (for troubleshooting):
To get Home Assistant’s logging output, you can use ‘journalctl’.
$ sudo journalctl -f -u home-assistant@<YOUR_USER>
The log can be big and scroll quickly, you can select to view only the error lines:
$ sudo journalctl -f -u home-assistant@YOUR_USER | grep -i ‘error’
When working on Home Assistant, you can restart the system and then watch the log output by combining the above commands using ‘&&:
$ sudo systemctl restart home-assistant@<YOUR_USER> && sudo journalctl -f -u home-assistant@<YOUR_USER>
sudo systemctl restart home-assistant@<YOUR_USER> && sudo journalctl -f -u home-assistant@<YOUR_USER>
You can list services with this command:
$ systemctl list-units –type=service
Back to Index.
Conclusion
In this post we looked at how to install Home Assistant on a Raspberry Pi. The installation was made in a virtual python environment, so we don’t interfere with other python binaries. We also looked at how to run home assistant as a service.
Back to Index.
References
- https://www.home-assistant.io/docs/installation/raspberry-pi/ [2020-06-13]
- https://community.home-assistant.io/t/autostart-using-systemd/199497 [2020-06-13]
- https://www.raspberrypi.org/documentation/linux/usage/systemd.md [2020-06-13]
- https://www.home-assistant.io/docs/tools/hass/ [2020-06-13]
Back to Index.