Brief look at Active Directory and Domain Controller
In this post we will look at Windows specific things as Active Directory (AD) and Domain Controller (DC). These are techniques to group windows machines together, so you can manage them centrally. For instance, you don’t have to run around in the office with a disk to install software, one by one on the computers.
There are lot of advantages with AD and DC, we will only look briefly in how to set them up in a lab environment in Hyper-V on virtual machines (VMs).
Info. This post is tagged with “my notebook”. That means, that the purpose of the post is mainly for me to remember something I did. The information here might be incomplete, hard for others to read or contain faults and misconceptions. I’ve chosen to publish my notes, please help me improve them by feedback in the comments section. I hope someone will gain something from these kinds of notes.
Important! I highly recommend that you start from a fresh image of Windows Server 2016. The first thing you will do is to add the AD role from server manager. That will start a wizard, let it automatically add the DNS role. Once, I tried to add the DNS first manually and the lockup zones. After that I added AD role and promoted the server to DC. This caused a lot of unexpected problems. I reinstalled the server and started with the AD the next time, things got easier.
TL;DR
- Create a Windows 2016 Server and add the role/feature Active Directory Domain Service.
- Promote this server to a Domain Controller.
- Add a User in the Active Directory Users and Computers.
- Join PCs on your network to the Domain.
Index
- Prerequisites
- Setup in Hyper-V
- Change Name of Server
- Allow NetBIOS over IPv4
- Add Active Directory (AD) Server Role
- Promote the Server to a Domain Controller
- Active Directory Users and Computers
- Add a Computer to the Domain
- Summary
- Troubleshooting
- References
Prerequisites
This post builds upon previous posts. If things in this post are hard to understand or not clear enough I suggest you read these post:
- About DNS: https://www.raspberryfield.life/2019/03/16/dns-server-in-local-network-hyper-v/ [2019-03-23]
- About DNS and NetBIOS names: https://www.raspberryfield.life/2019/03/22/dns-names-vs-netbios-names/ [2019-03-23]
Back to Index.
Setup in Hyper-V
This is my setup in Hyper-V:

About the servers:
| Server Name | IP Address |
|---|---|
| my-dc01 | 192.168.10.1 |
| my-sql01 | 192.168.10.21 |
| my-sql02 | 192.168.10.22 |
Back to Index.
Change Name of Server
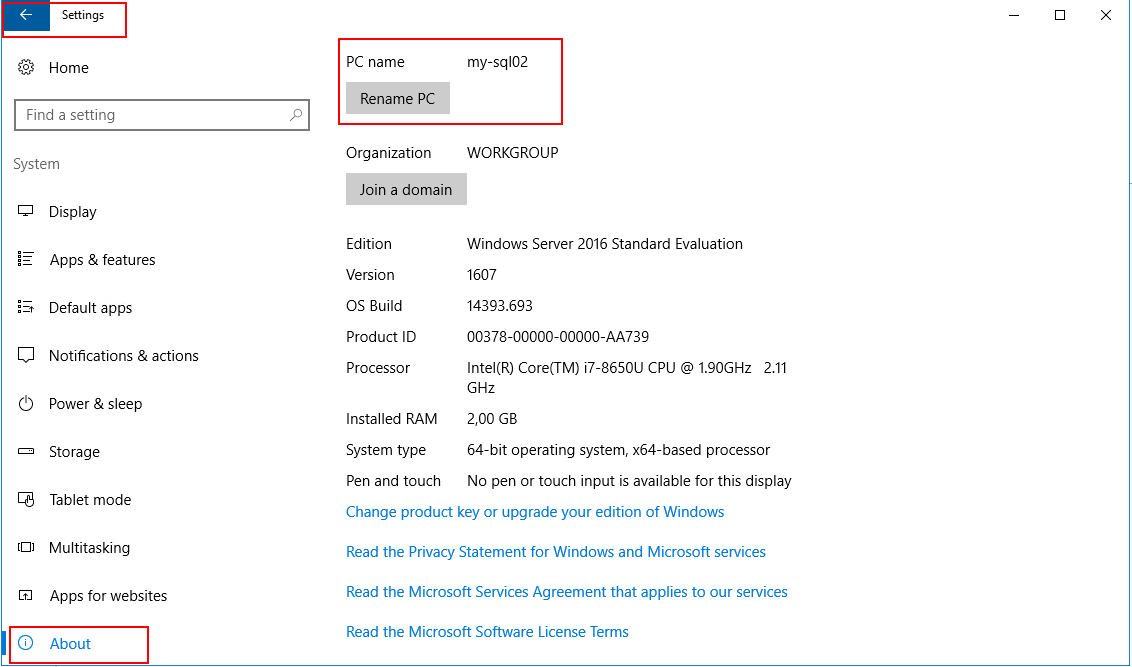
When you create a server in Hyper-V and install a trail Windows Server OS you will get a computer name something like this: WIN-KA3RFL7J3LG.
To change the computer name: Start-> Settings-> About-> Rename PC:
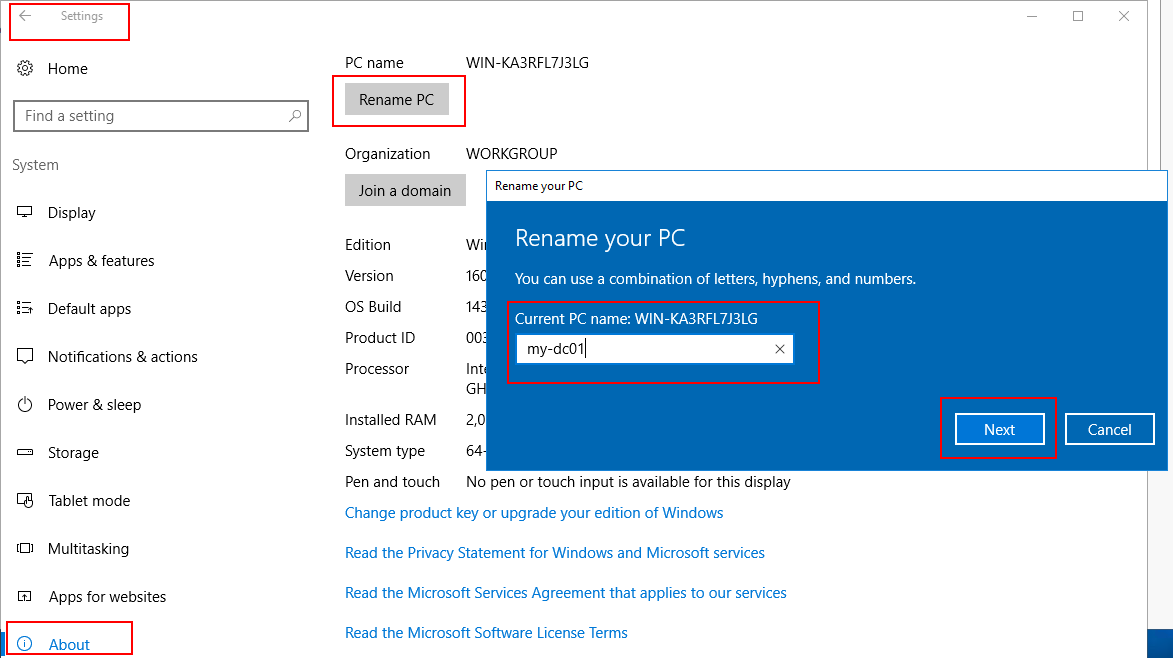
Changes will prompt you to restart the computer.
Back to Index.
Allow NetBIOS over IPv4
In this lab we are using static IP addresses. Some Windows technologies communicates with something called NetBIOS. This must be activated manually to work: Network and Sharing Center-> Ethernet (myprivateswitch)-> Properties-> Internet Protocol Version 4 (TCP/IPv4)-> Advanced-> WINS-> Enable NetBIOS over TCP/IP-> OK:
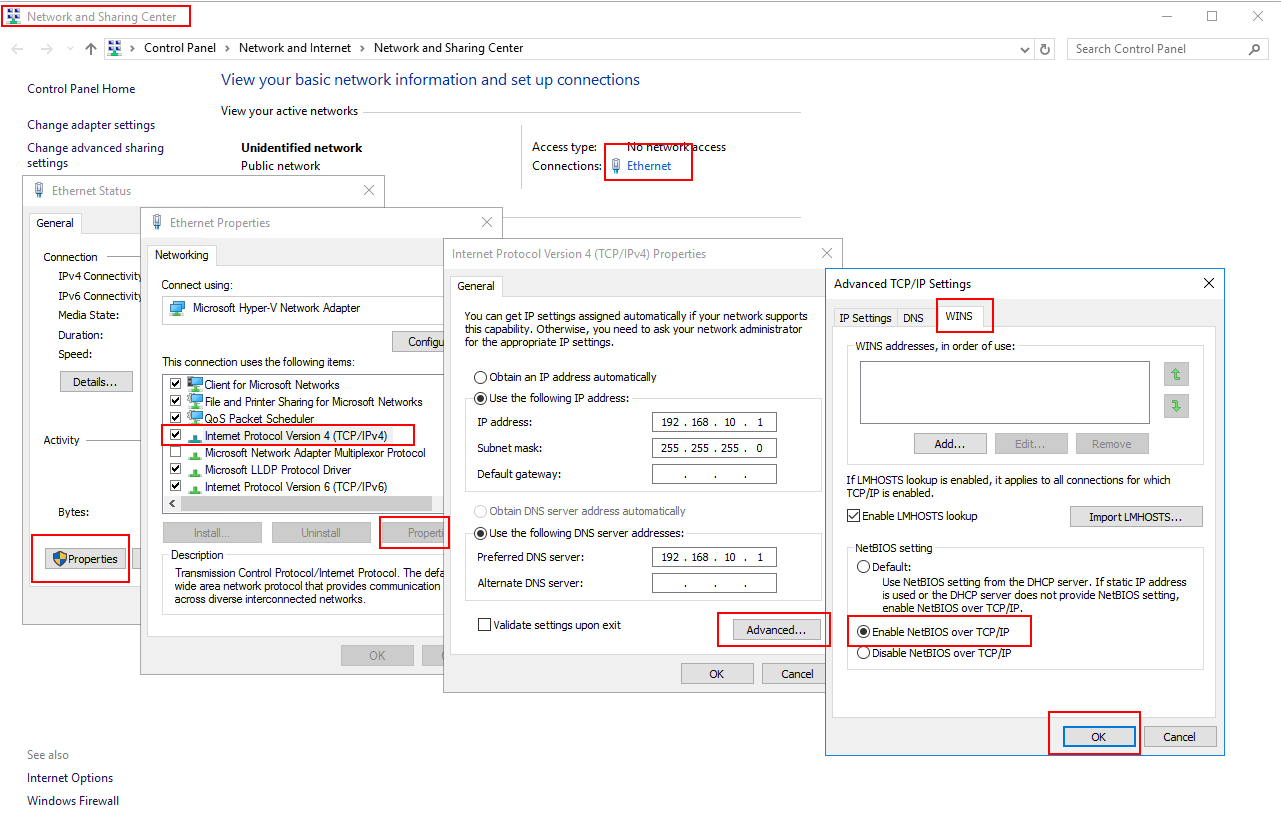
Do this for all the computers on the network.
Note! Also uncheck Internet Protocol Version 6 (TCP/IPv6) we don’t need it because we are using IPv4. You can do this in the Ethernet Properties dialog window.
Back to Index.
Add Active Directory (AD) Server Role
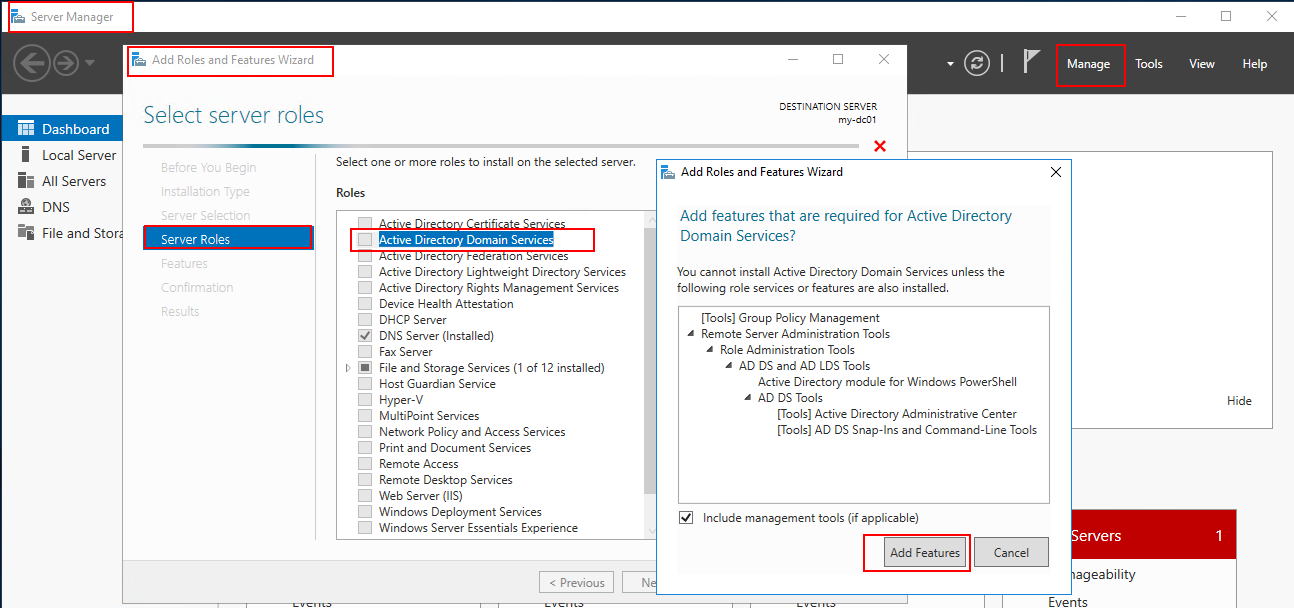
We need to activate the AD Server Role in Add Roles and Features: Server Manager-> Manage-> Add Roles and Features-> Server Role-> Active Directory Domain Service-> Add Features-> Install:
Info. Note that:
- In a production environment you need more than one server (DC) with the AD feature installed (and prompted to domain controller).
- A DNS server need to be installed on the network, if not you will be prompted to install it on the current server while adding the AD role/feature. (My recommendation that you don’t manually install a DNS server, go with the AD wizard.)
Back to Index.
Promote the Server to a Domain Controller
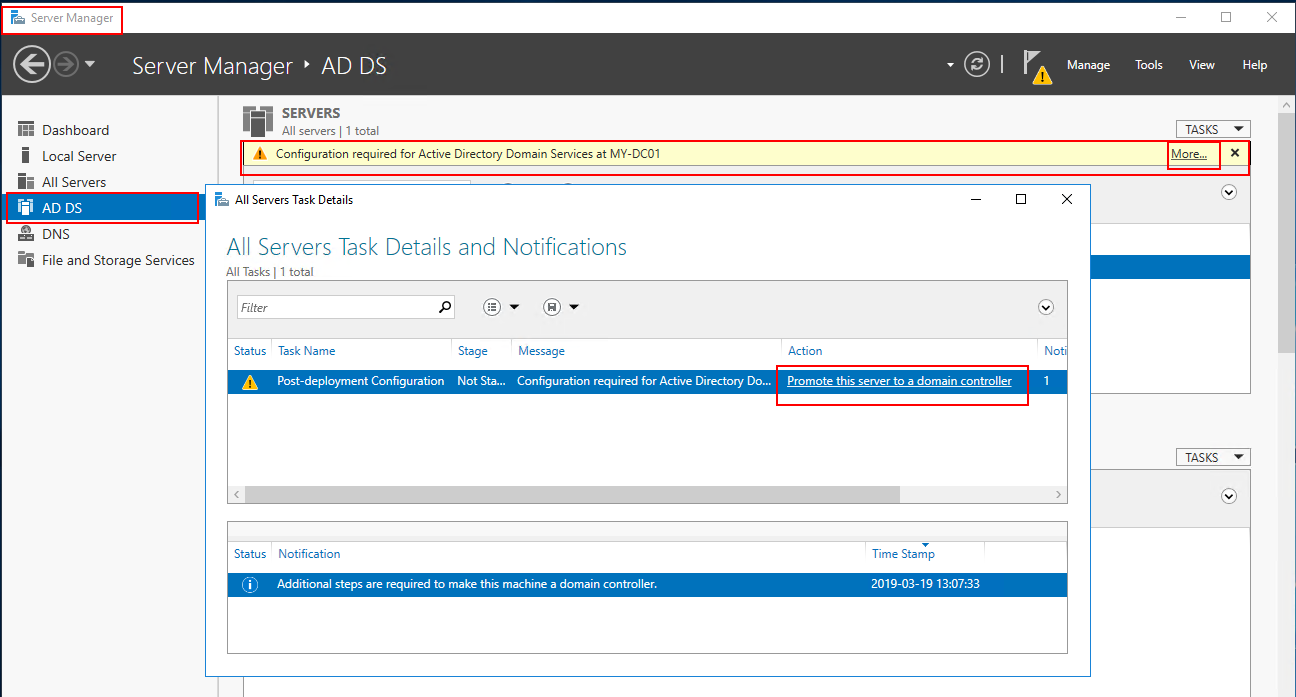
After the installation of the AD Service you can promote the Server to a Domain Controller. A Domain Controller is the Server where the AD is installed.
Server Manager-> AD DS-> Configuration required for Active Directory Domain Service at…-> More…-> Promote this server to a domain controller:
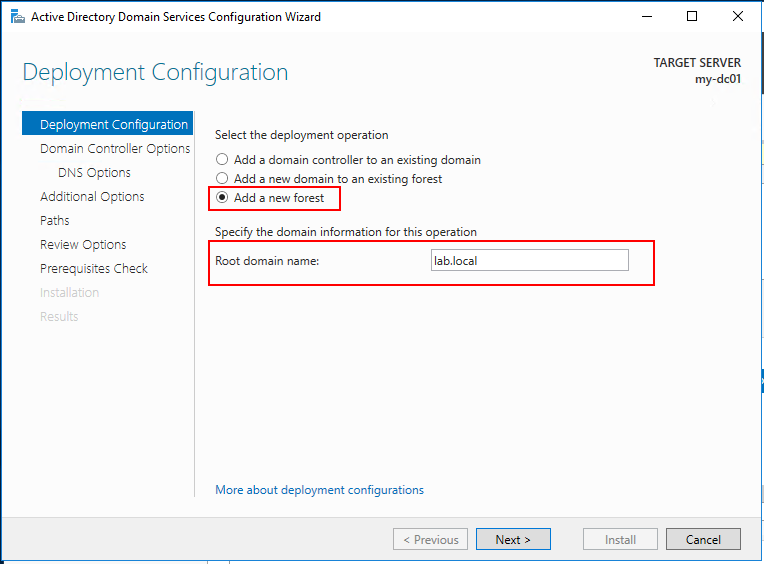
Now a wizard will open. In Deployment configuration, chose Add a new forest (Forest is the name of the root directory in AD) then type your domain name:
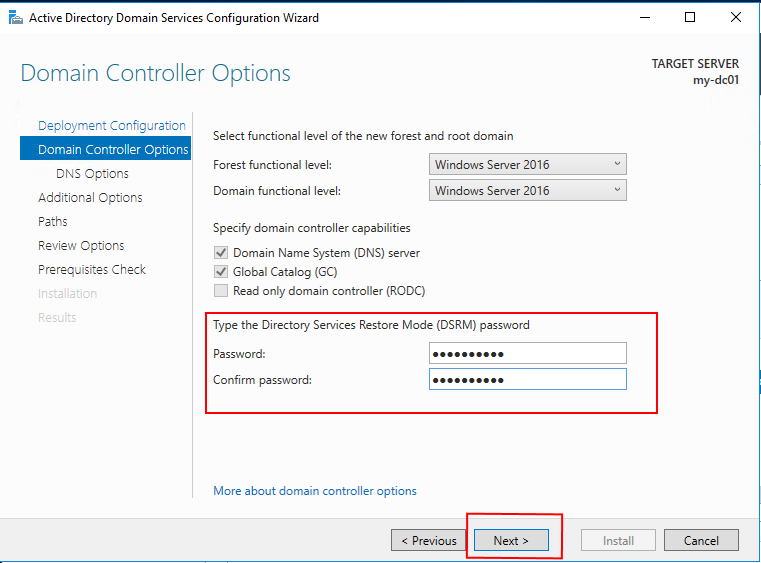
Now, chose a password:
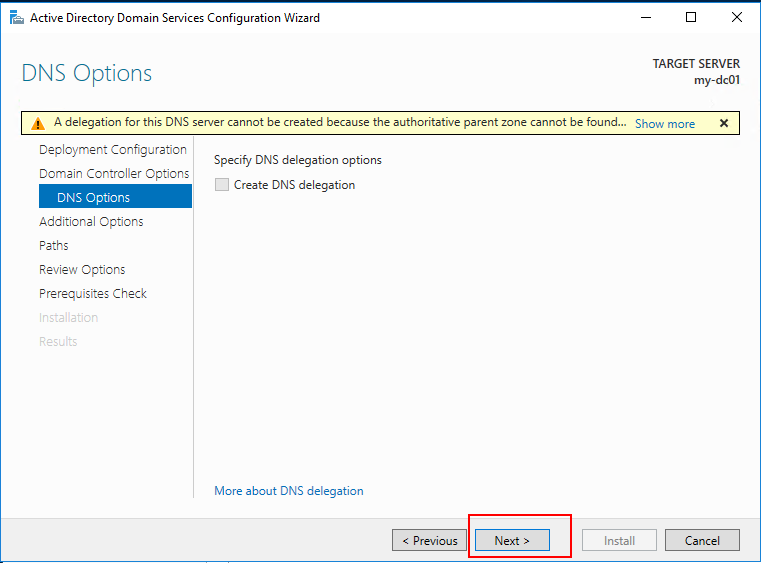
Don’t worry about this warning (see, references). In our small lab environment, we don’t need this delegation.
Wait for the wizard to find the NetBIOS domain name:
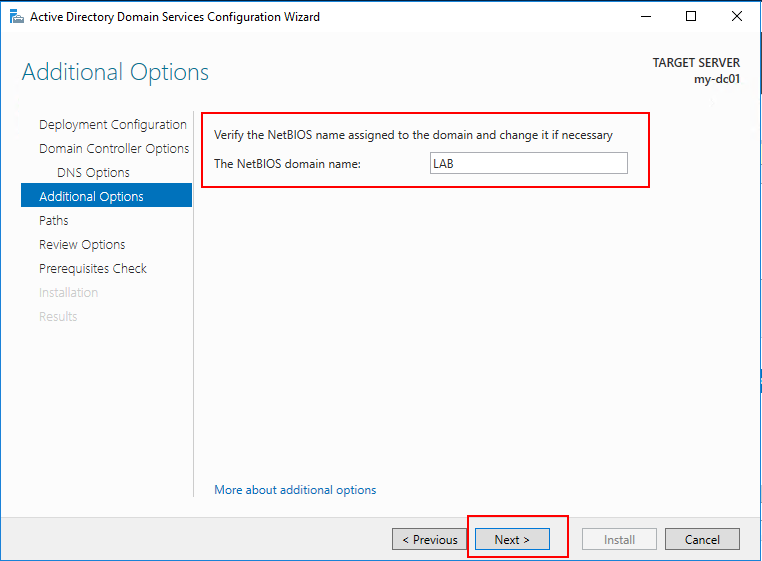
Just leave the default values:
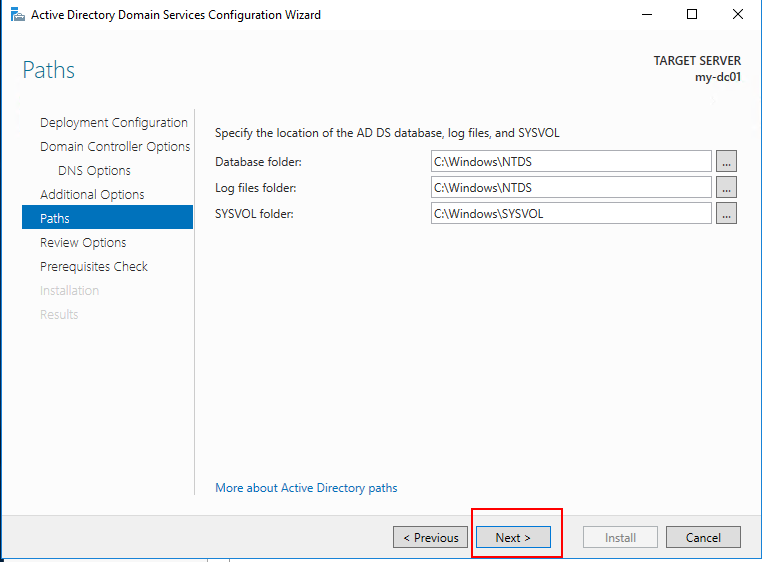
Leave the defaults here as well:
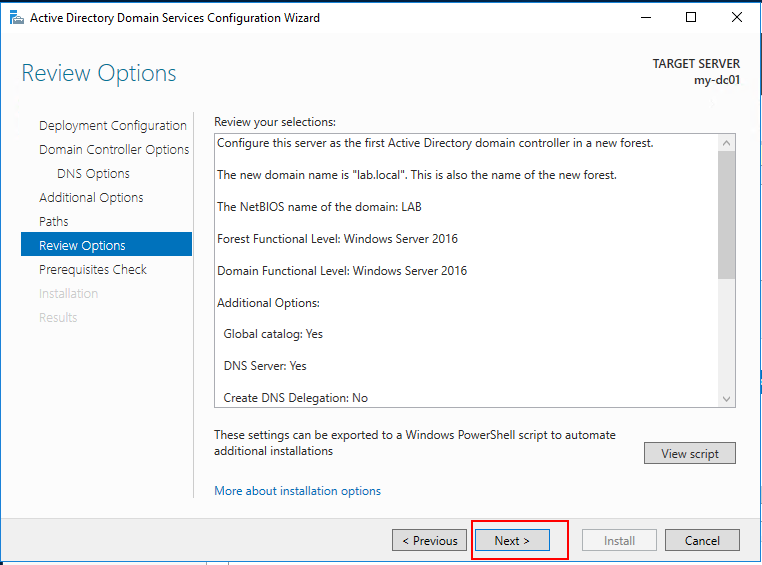
Check that prerequisites check passes:
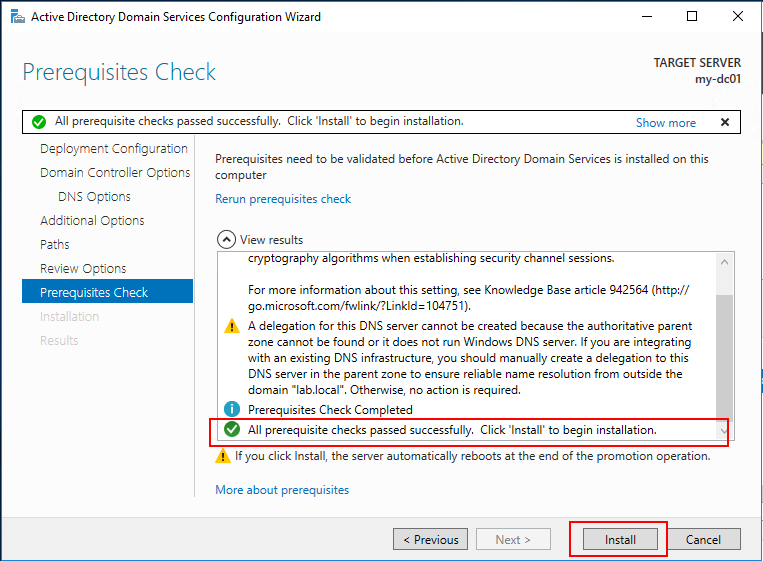
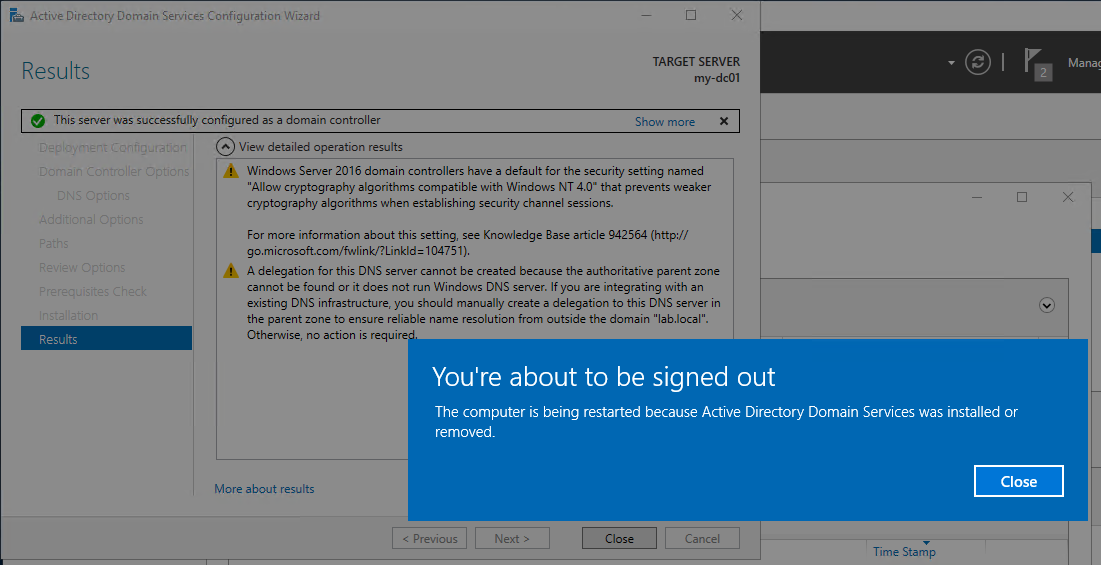
Now the installation will start:
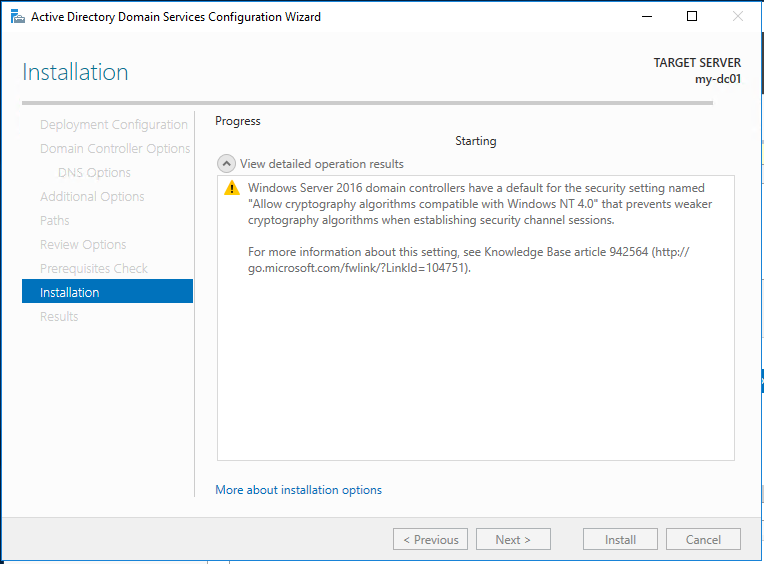
When the installation is complete, the computer will reboot, and it will take some time to start up again. Have patience:
Back to Index.
Active Directory Users and Computers
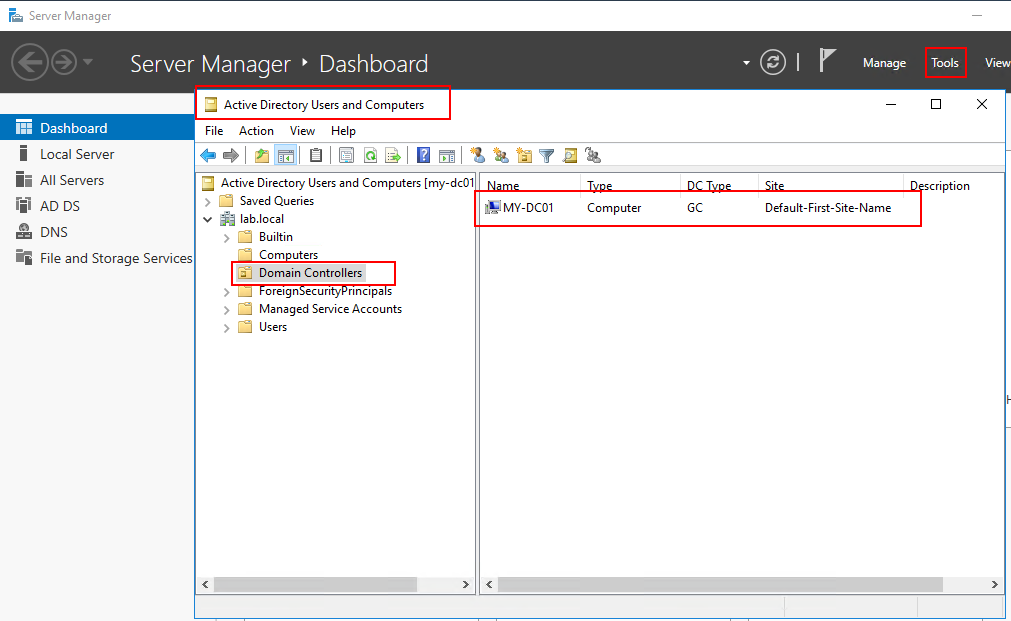
Now you can administrate users and computers in your domain from the AD. Open Active Directory Users and Computers from Server Manager-> Tools:
Here you can see which computer the Domain Controller is.
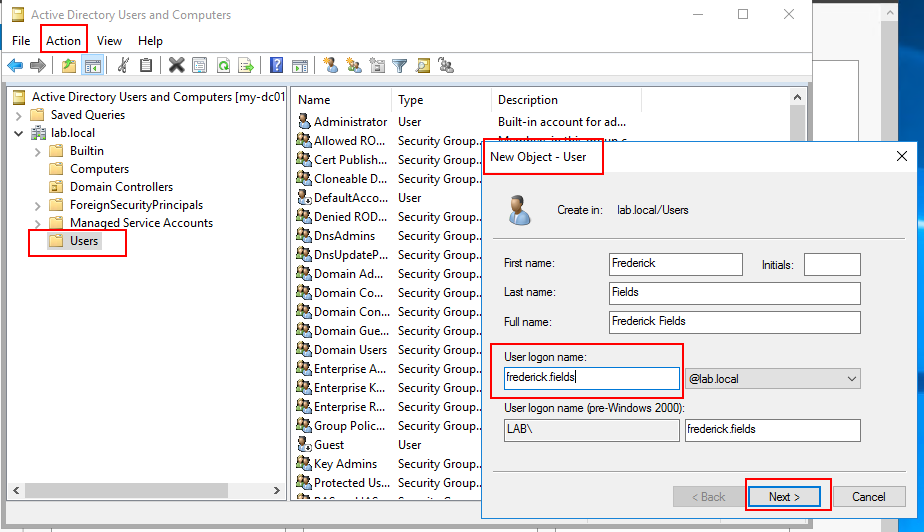
Get familiarized with the Active Directory by adding a user:
Here I give my user a lot of access by assigning it to member of security groups:
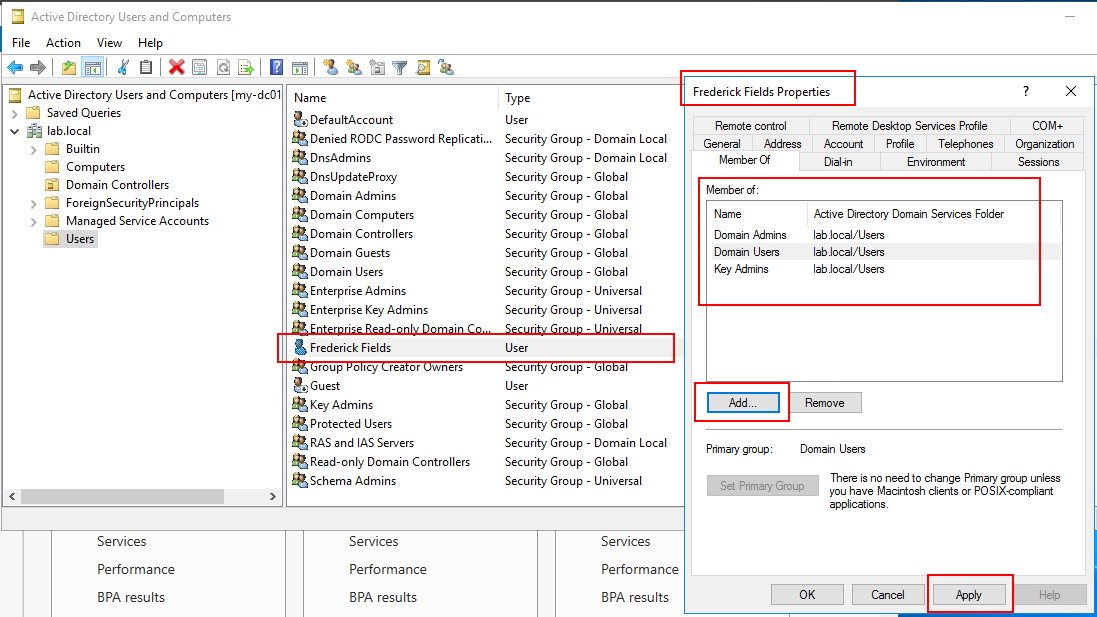
Now you have a user in the AD /Domain with high privileges.
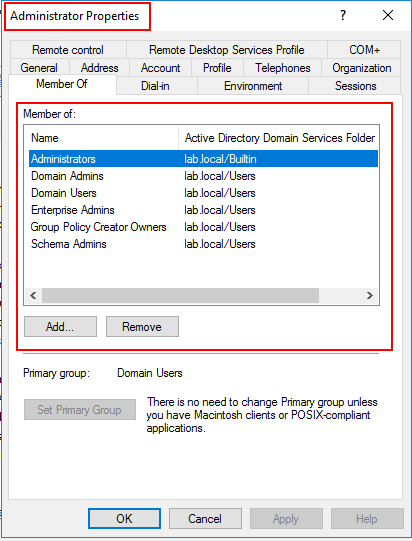
Tip! If you want to create a user with the same privileges as the build in Administrator account, look in the properties for that account and which group it is member of:
Back to Index.
Add a Computer to the Domain
Before you join a computer to the domain, here is a checklist:
- Make sure you allowed NetBIOS over TCP/IP if you are using static IP addresses.
- Make sure the computer has the name you want (see image below).
- Make sure to uncheck IPv6 because we are using IPv4 in this tutorial.
How to change a computer name (restart required):
Start-> Settings-> System-> About-> Rename PC (restart required):
When you have the computer name you want, you can choose to join a domain from the same menu as above:
Start-> Settings-> System-> About-> Join a domain:
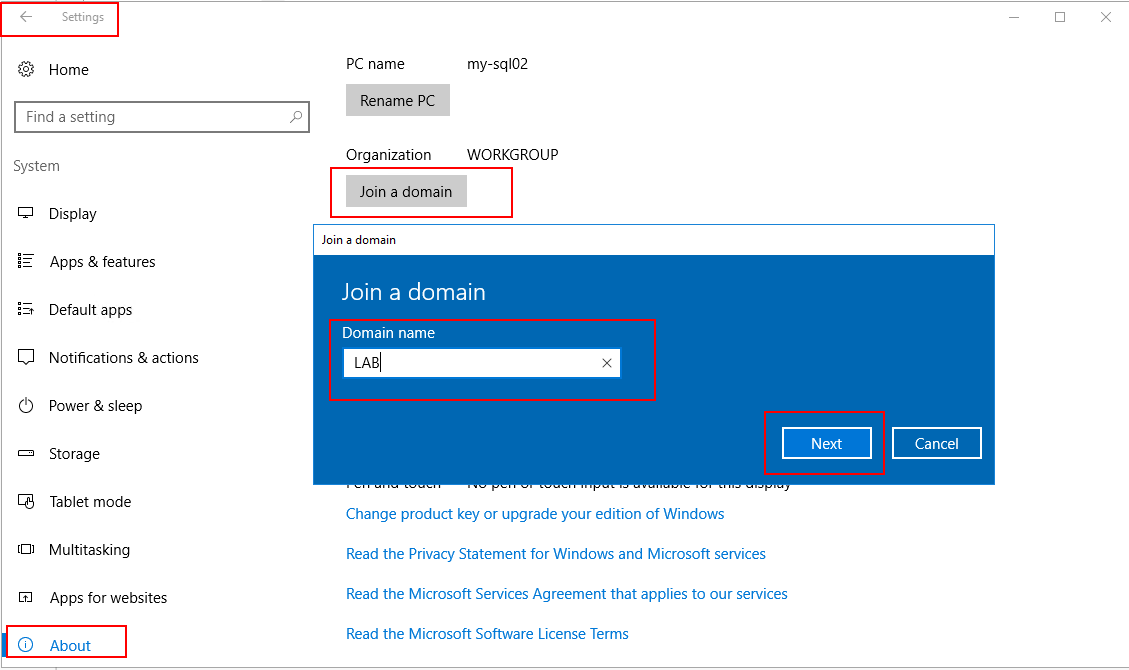
Use an account that you have registered in the AD with domain privileges, or use the Administrator account. Sometimes you might need to type like this domain name\account name e.g. LAB\frederick.fields.

Next step about information of the computer’s user, I choose Administrator account.
Now you need to restart the computer.
When you have restarted the computer. Go into Active Directory Users and Computers on your domain controller and in the computer folder you can see that the computer has been added:
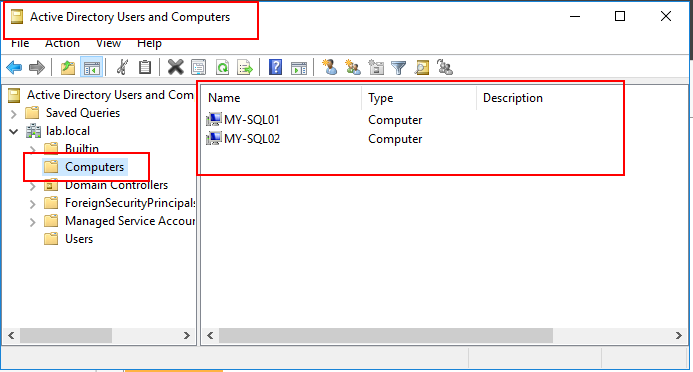
Note. Joining a domain, the computer will also be added in the DNS in the forward look up zone. You must manually add a reversed zone if you need that.
Back to Index.
Summary
In this post we briefly look at how to set up a domain for windows servers. We added an Active Directory and promoted the server to a domain controller and made other PCs join that domain.
Back to Index.
Troubleshooting
First time I did this I didn’t unchecked IPv6 in Ethernet Properties. After I installed The AD, promoted the server to a Domain Controller and added a computer to the domain I wanted to check connectivity and DNS. I got this answer (::1:) :
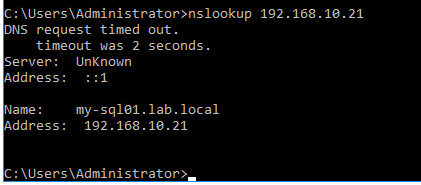
Turn of IPv6 and it should be fine.
Back to Index.
References
PeteNetLive, Windows – A Delegation For This DNS Server Cannot Be Created https://www.petenetlive.com/KB/Article/0001287 [2019-03-19]
Back to Index.