Shared Storage with iSCSI
In this post we will look at how we can create a shared storage between two Windows 2016 Servers in Hyper-V. A shared storage is required if we want to cluster the servers (nodes).
TL;DR
- Create a server with iSCSI target feature.
- Create virtual disk and iSCSI target.
- List iSCSI initiator.
- Connect to a target from another server (iSCSI initiator).
- Use Disk Management.
- Initialize and format the disk(s).
Index
- Prerequisites
- Setup in Hyper-V
- About iSCSI
- Add iSCSI Target Feature
- Create iSCSI storage (virtual disk)
- Access iSCSI storage (with iSCSI initiator)
- Format Storage
- Share Formatted Storage
- Summary
- References
Prerequisites
This post builds upon several earlier posts. You should have knowledge about: Virtualization in Hyper-V, basic network (LAN), DNS server, AD and Domain Controller.
If you find things too hard or unclear in this post, you can look at the previous ones:
- About AD and Domain Controller: https://www.raspberryfield.life/2019/03/23/brief-look-at-active-directory-and-domain-controller/ [2019-03-25]
- About DNS: https://www.raspberryfield.life/2019/03/16/dns-server-in-local-network-hyper-v/ [2019-03-25]
- About LAN: https://www.raspberryfield.life/2019/03/16/dns-server-in-local-network-hyper-v/ [2019-03-25]
And if those posts are also too hard to grasp, follow the link in the prerequisites in each post and find your way backwards.
Back to Index.
Setup in Hyper-V
This is my setup in Hyper-V:
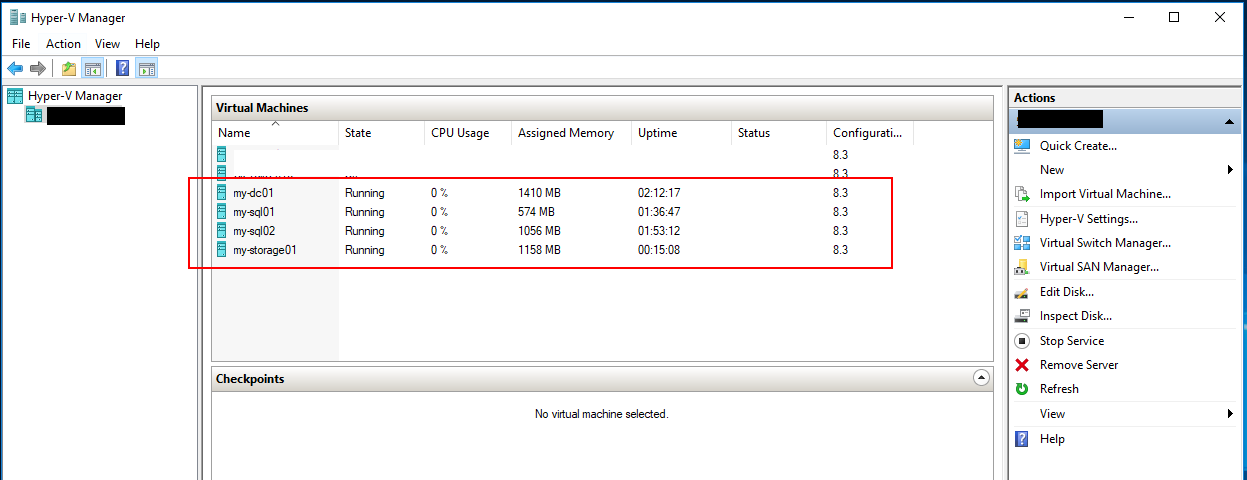
| Server Name | IP Address | Roles/Features |
|---|---|---|
| my-dc01 | 192.168.10.1 | DC, AD, DNS |
| my-sql01 | 192.168.10.21 | |
| my-sql02 | 192.168.10.22 | |
| my-storage01 | 192.168.10.31 | iSCSI target |
Note! You could use your DC server as storage server also, to save disk space and number of servers in Hyper-V.
Info. Here is a checklist for installing and adding a new server to the setup in my lab environment in Hyper-V:
- Install the same version of Windows 2016 Server OS (evaluation version) as the others.
- Turn off Windows Firewall (don’t need it in this lab environment).
- Allow remote desktop access.
- Set IPv4 address and disable IPv6.
- Enable NetBIOS.
- Rename your computer.
- Add PC to domain.
- Register server in DNS (automatically via DC/AD).
- Make regularly checkpoints of the VM.
Back to Index.
About iSCSI
iSCSI – Internet Small Computer Systems Interface
iSCSI is a technology for remotely attach, read/write to a storage. It is preinstalled in all modern Windows OSs. It is very convenient to work with, because when you add a storage with iSCSI it will make the store look like a local drive, not like a mapped network drive. See link in the references for a more in-depth explanation.
Two key points about iSCSI:
- The server that provides storage with iSCSI is called the iSCSI Target.
- The client that attach to the storage with iSCSI is called the iSCSI initiator.
Back to Index.
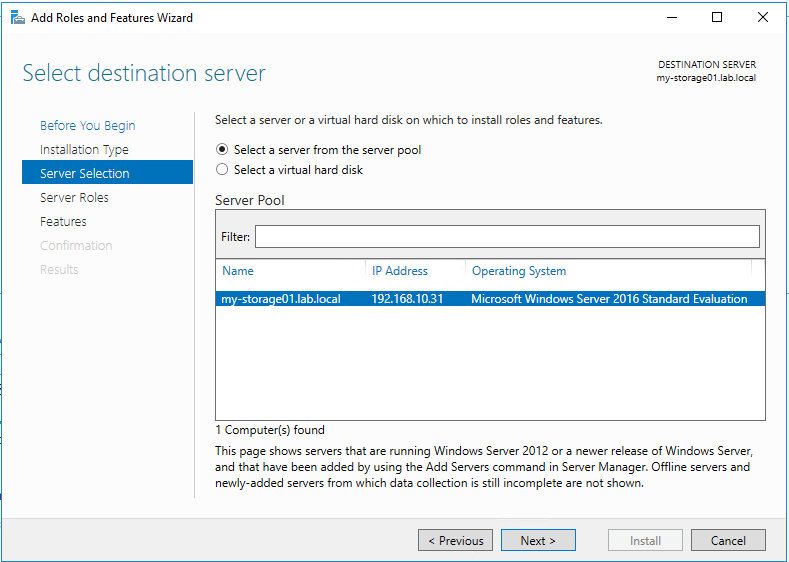
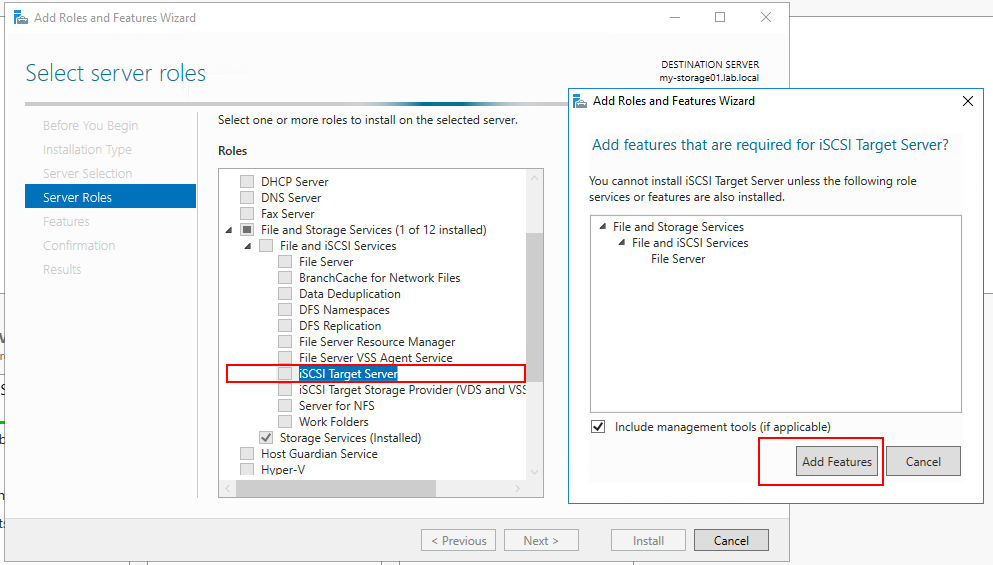
Add iSCSI Target Feature
First, you need to install a feature on the storage server (my-storage01):
Chose iSCSI Target Server:
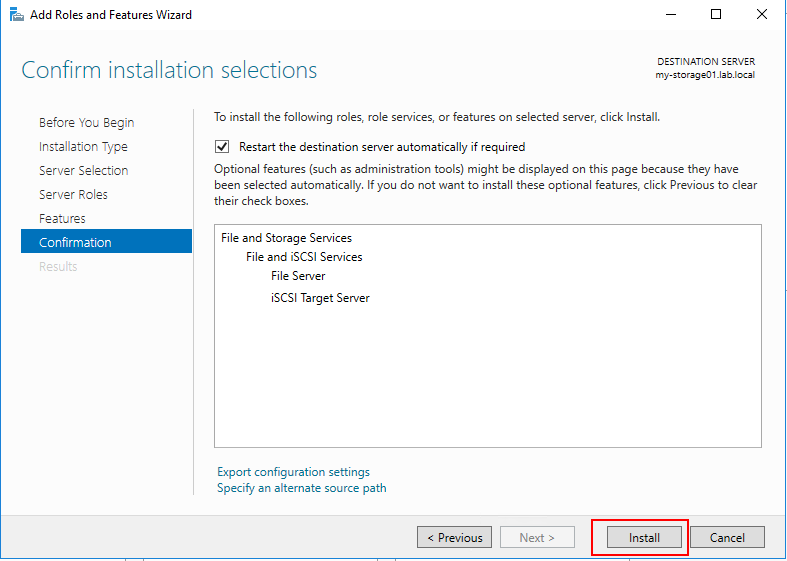
Install the feature:
Back to Index.
Create iSCSI storage (virtual disk)
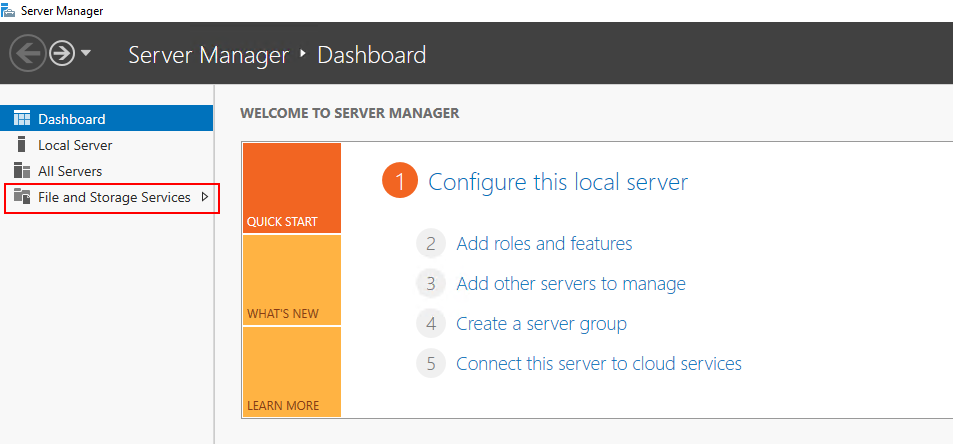
After you added the iSCSI feature, go back to Server Manager. Click on File and Storage Services:
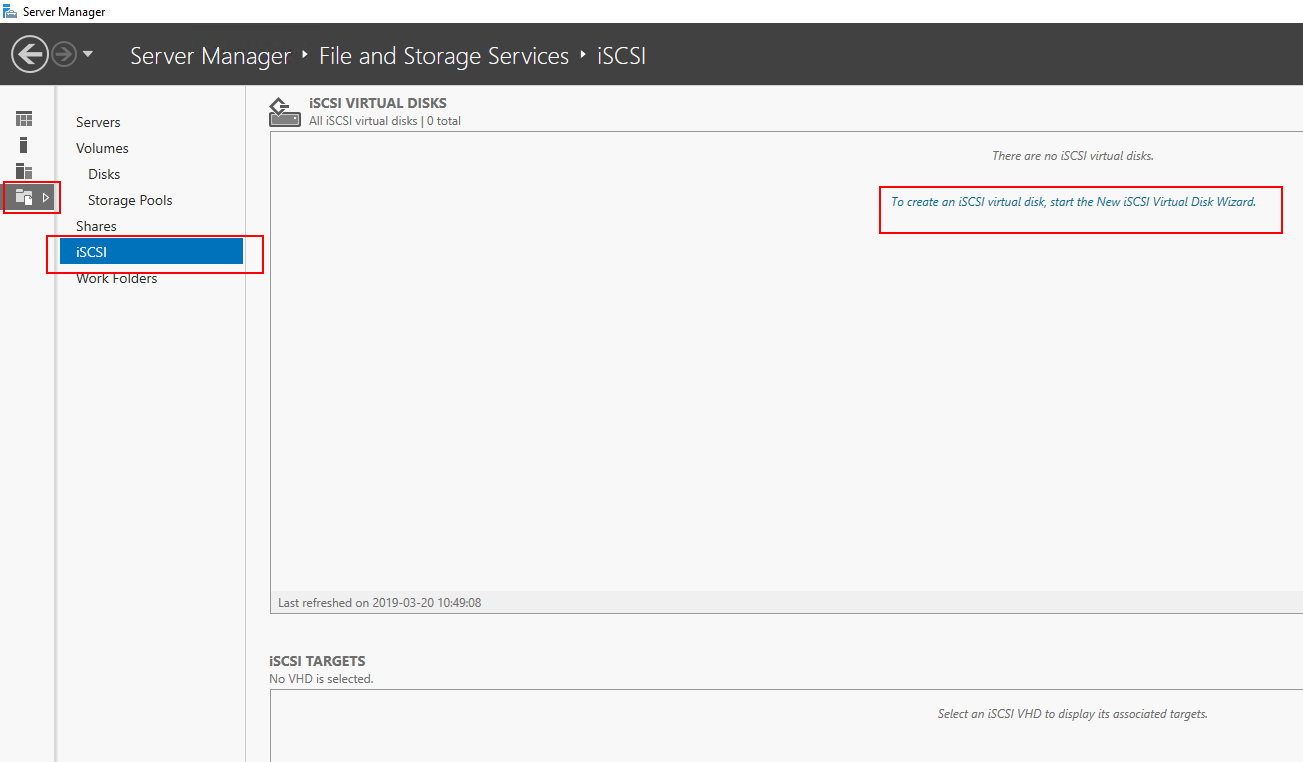
Click on: To create an iSCSI virtual disk, start the New iSCSI Virtual Disk Wizard:
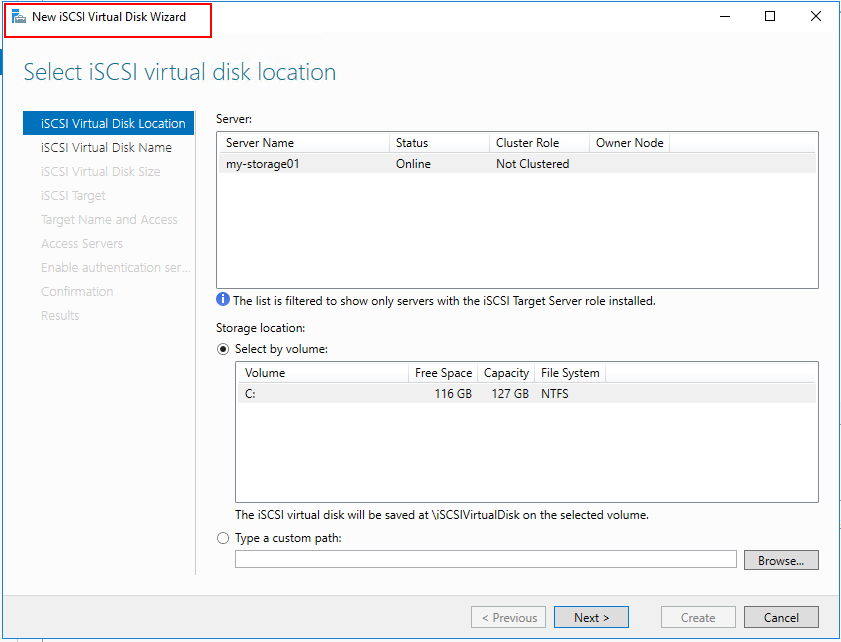
A wizard to create the iSCSI disk will start:
Choose a disk name:
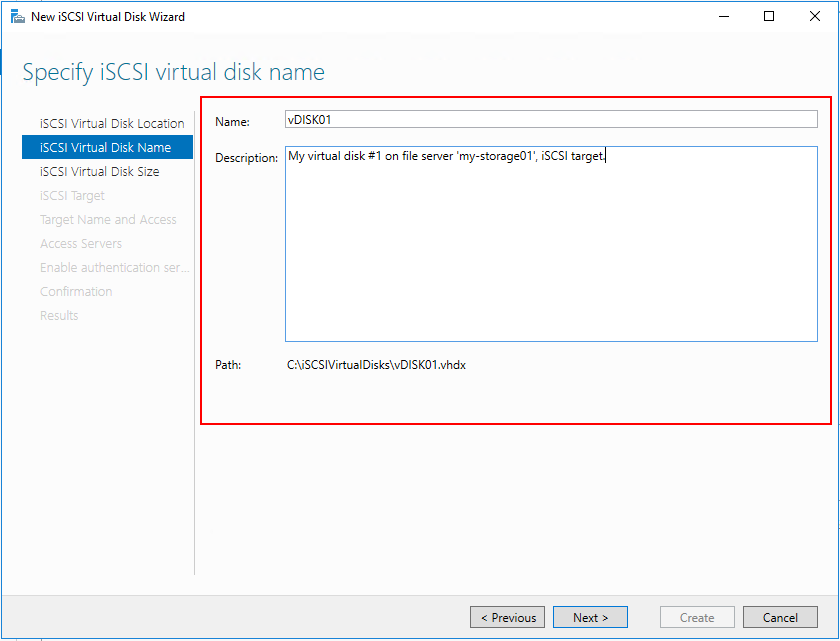
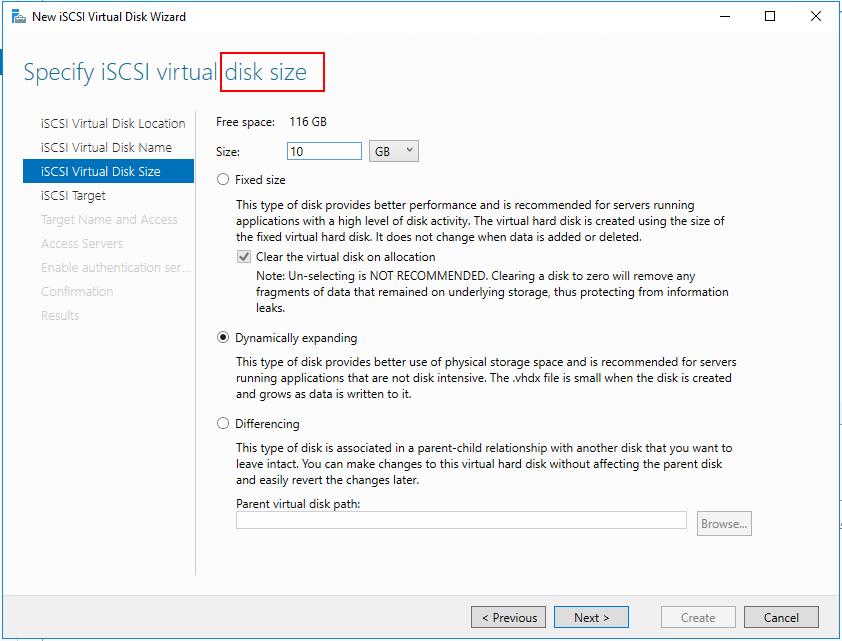
In this tutorial I will only be creating two disk:
- vDisk01 – 10GB
- vDisk02 – 20GB
This is the first disk to be created:
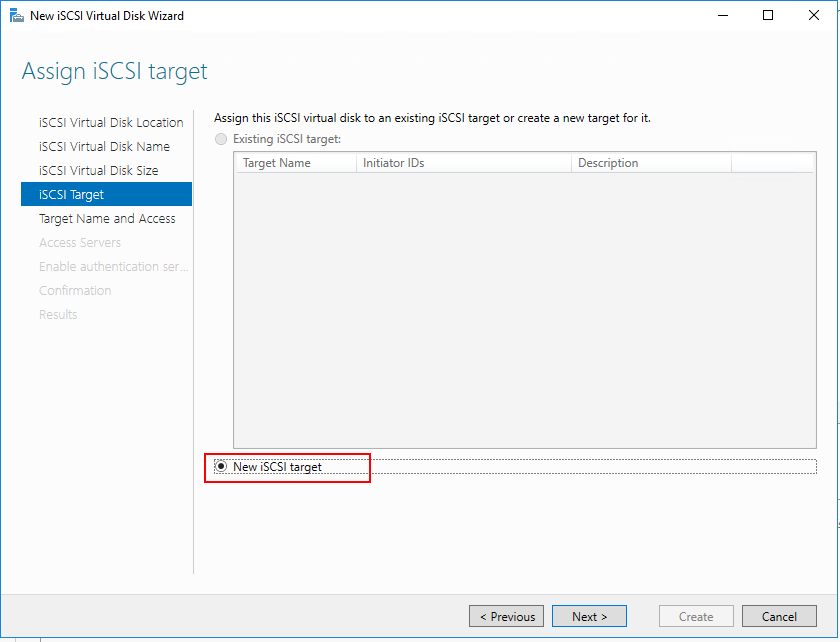
We don’t have a iscsi target yet, so we will create one now. Target is like a container on the file server that holds the virtual disks.
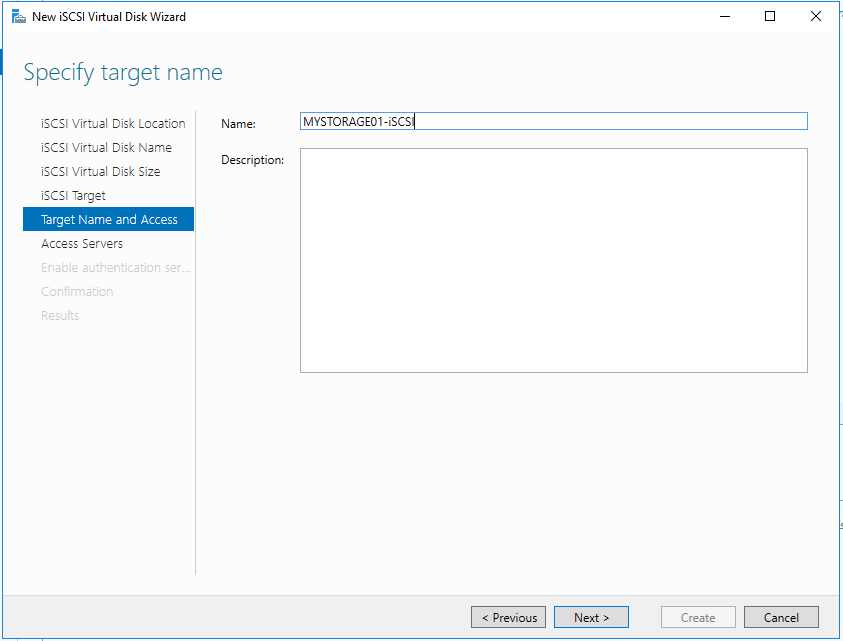
Name the target.
Note! Afterward, I’m not satisfied with this name. Name it something like sql-iSCSI-target depending on the purpose of the storage.
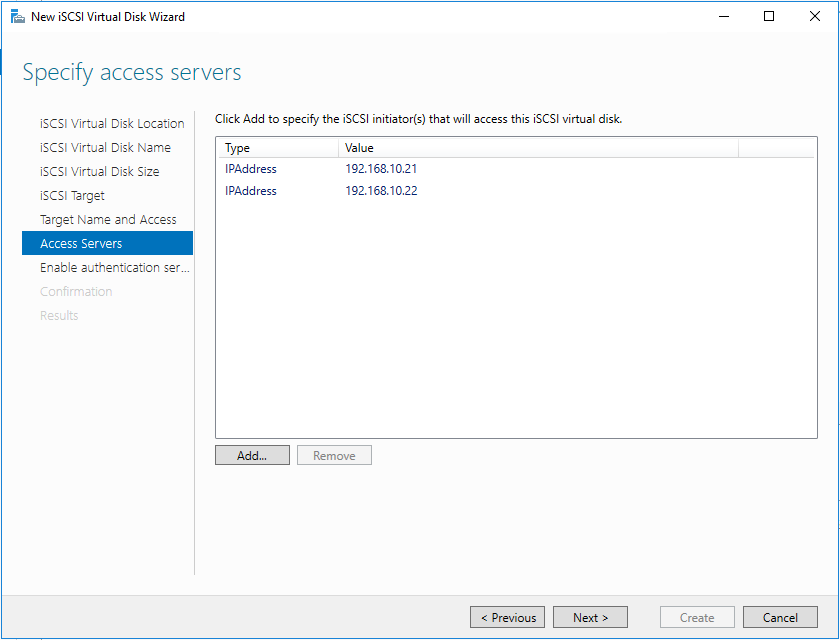
Now, chose which servers that can access the target/storage. (Access server – iSCSI initiators):
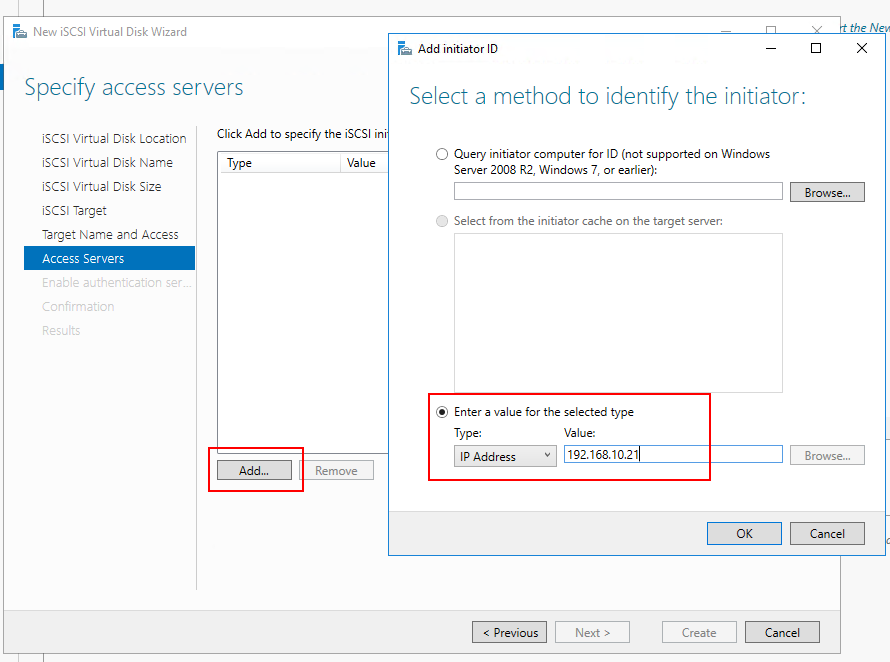
My access servers:
Next step, you can enable authentication. I don’t choose this level of security in a lab environment. Just adds extra layers of troubleshooting if needed.

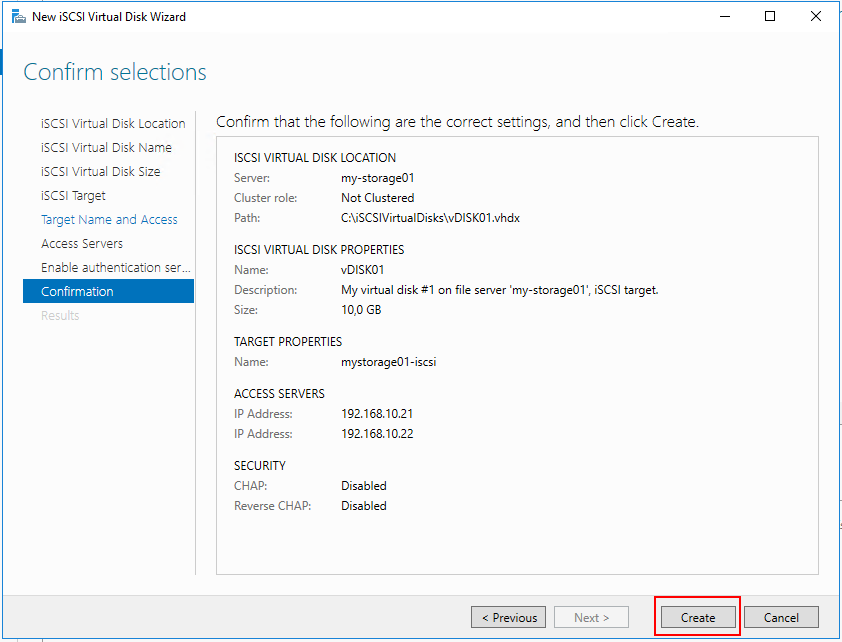
Now, look through the confirmation windows and create the target and disk:
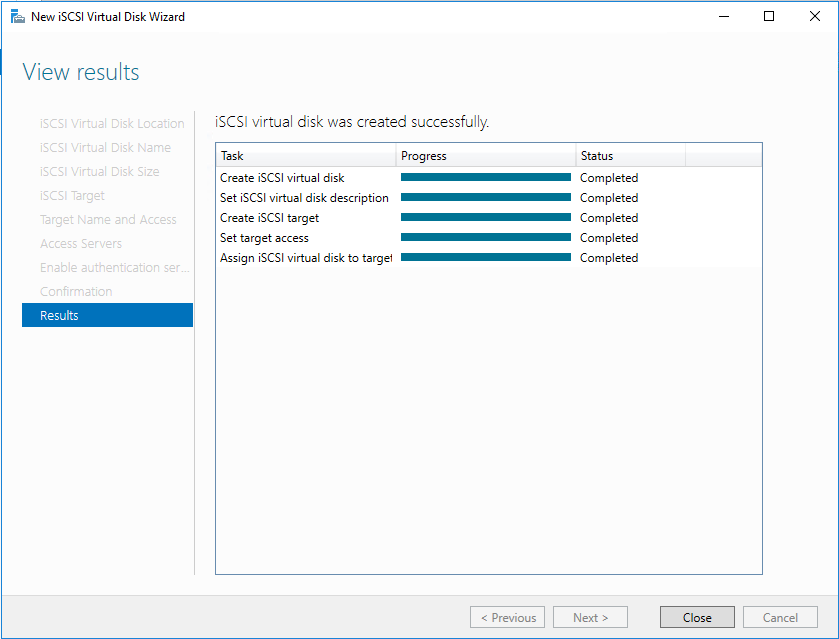
Installation in progress:
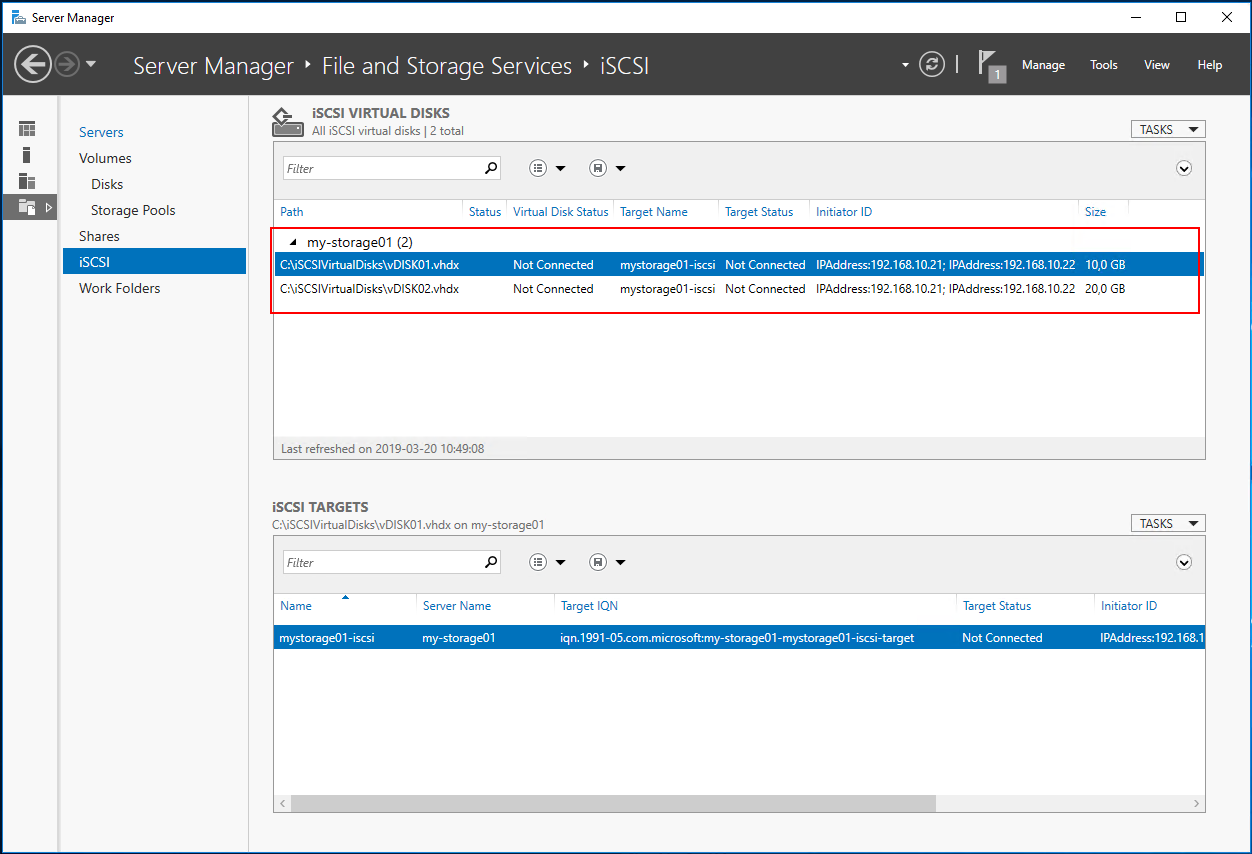
After the installation, you can go back to server manager and see that both the virtual disk and the target has been added:

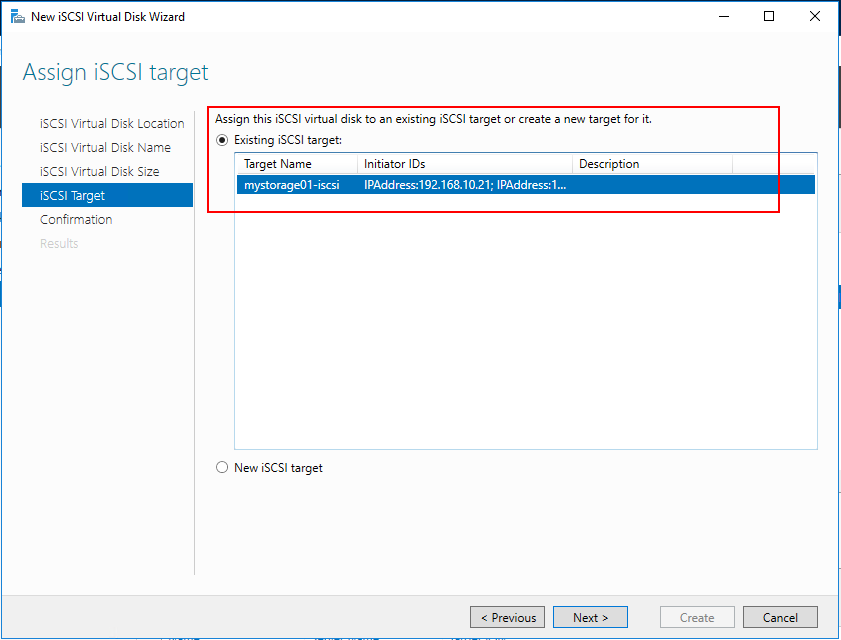
Now, create the second disk vDisk02 with 20GB. Right click in the pane under your virtual disk and start the New iSCSI Virtual Disk Wizard again.
This time, you have created a iSCSI target so choose it:
And once completed and created the second disk, it will show up in the iSCSI Virtual Disk menu:
Back to Index.
Access iSCSI storage (with iSCSI initiator)
Now, we will map the newly created virtual disk to another server. The server that will access the iSCSI storage (target) is called an iSCSI initiator. When we are done, the remote disks will look and behave as local disks on the server.
Start by logging in to one of your servers that will access the storage. I will start from my server my-sql01.
On my-sql01, go to server manager:
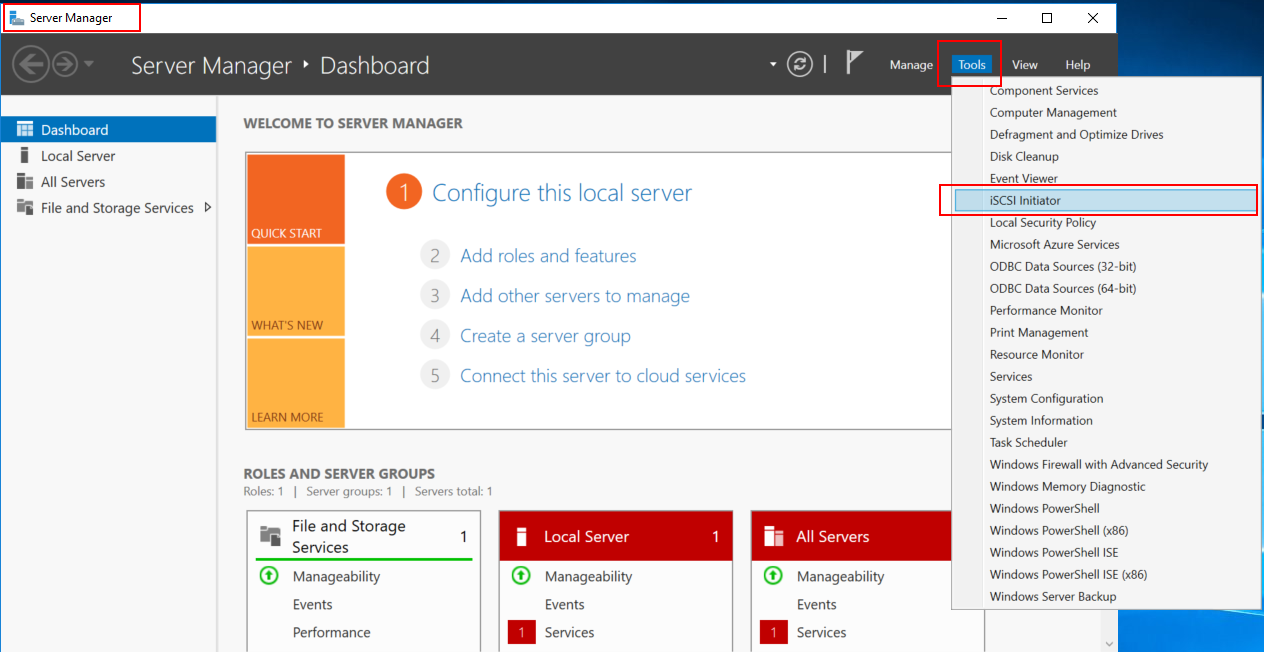
A wizard will start (if asked for a service to be started, click yes):
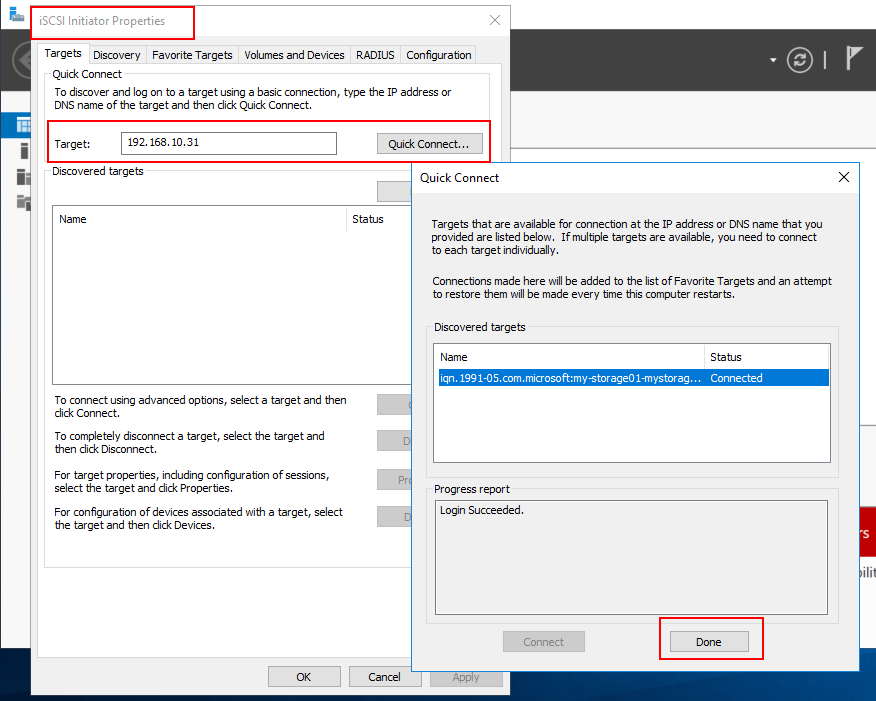
Choose to Quick Connect to your file server:
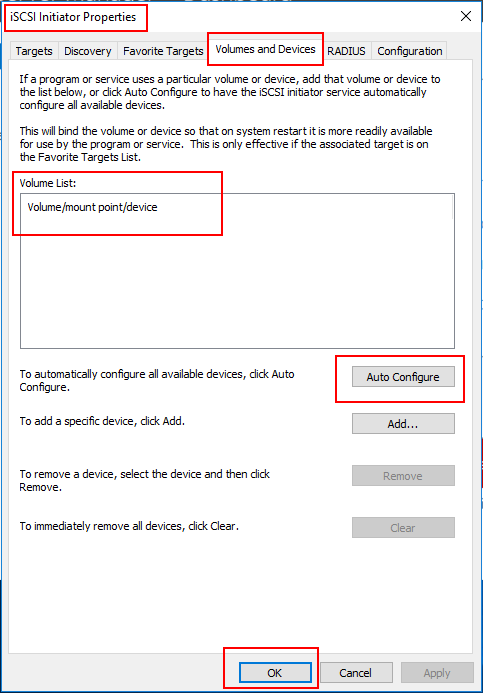
After you connected to a iscsi target, choose to auto config (this will add all possible drives from the target):
Back to Index.
Format Storage
After you have accessed the storage, we need to configurate the drives.
Open Disk Management by right click start button and choose it (or tools from Server Manager).
Here you can see the two disks from our file server:

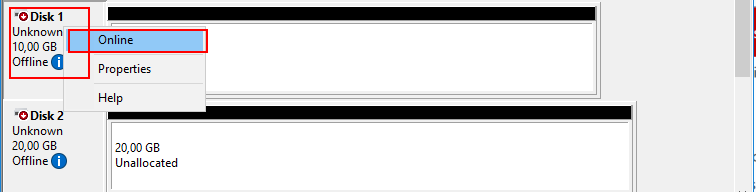
Right click Disk 1 and bring it online:
Right click again and initialize the disk:
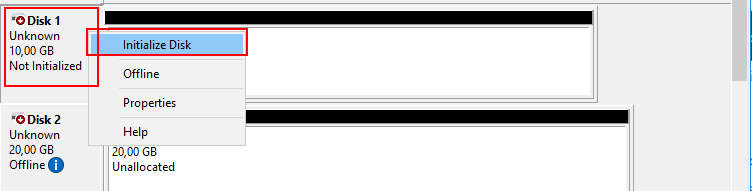
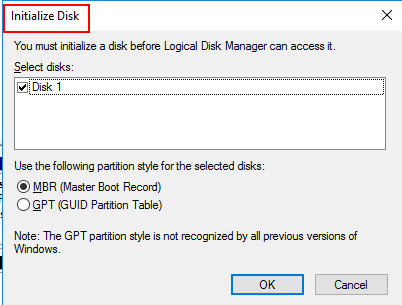
Chose default settings in the popup:
After the disk is online and initialize, right click on the right pane and choose New Simple Volume…
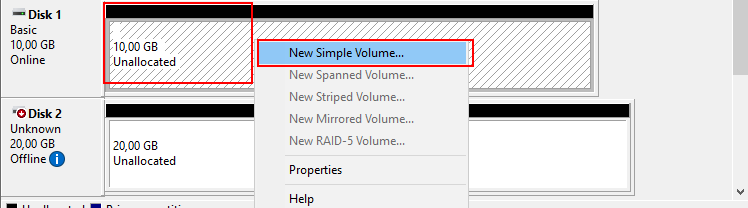
A wizard will start:
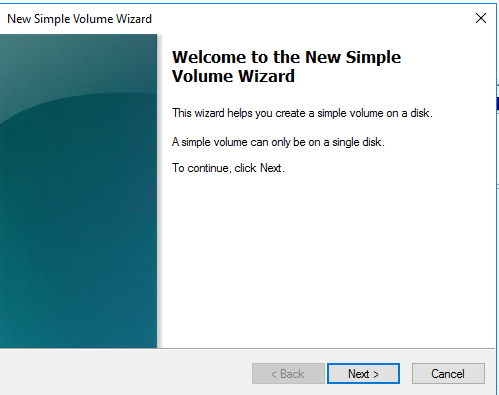
This table presents all choices in the different steps:
| Welcome to the… | next |
| Specify Volume Size | Max possible (my case 10237MB) |
| Assign the following drive letter | E (may chose E to Z) |
| Format Partition | File system: NTFS; Allocation unit size: Default; Volume label: Quorum; Perform a quick format (yes) |
| Complete the wizard… | Finish |
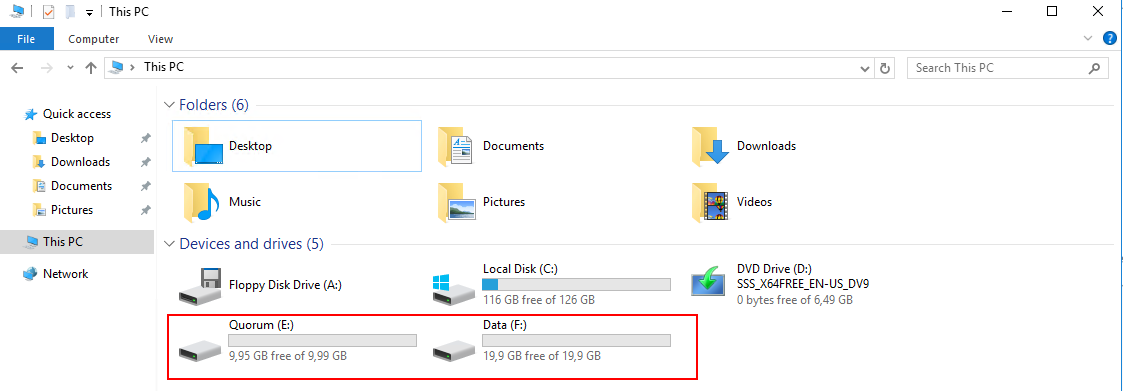
Now, repeat the steps above for the second drive. The second drive I labeled Data and assigned it to Drive letter F.
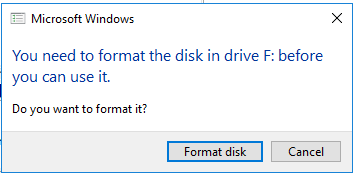
Info. You can ignore the warnings about the disk has to be formatted, you just did it in the wizard when you created the simple volume.
Note! I labeled the 10GB disk (E) Quorum and the 20GB disk (F) Data.
Once you have brought the disks online, initialized them and formatted them. They will show up under This PC:
Back to Index.
Share Formatted Storage
In the previous heading we looked at how to connect and format disks in a iSCSI target. We can do this on a second server as well. Note, that the server must be in the list of access server (iSCSI initiators) in the iSCSI target configuration.
If we want to create a Windows cluster, it is required that the servers shares the same storage.
Now we will go into the second server, my-sql02, and access the same target and the same disks:
In iSCSI Initiator:
- Open iSCSI initiator, from Server Manager.
- Quick connect to your iSCSI target.
- Go to tab Volumes and Devices and Auto Configure.
In Disk Management:
- Bring the Disks online.
- This time you don’t have to initialize or format the disks, we did that from the first server previously.
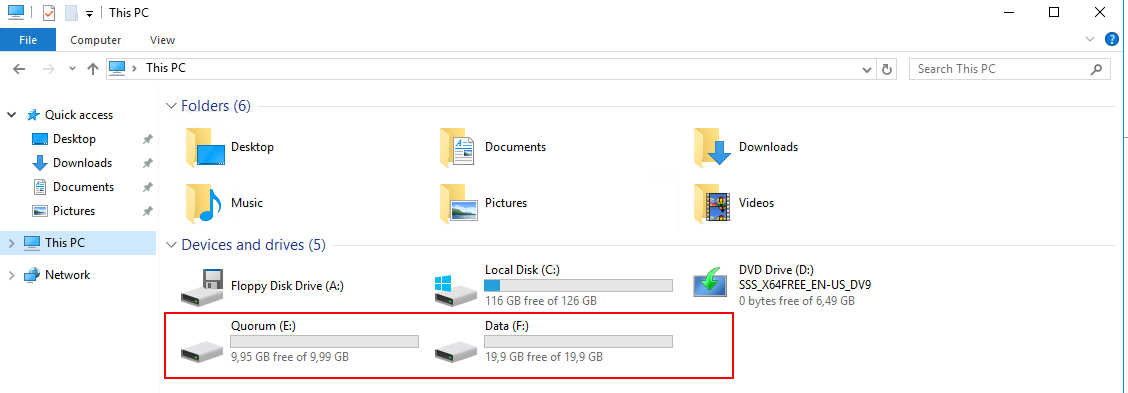
Now you should be able to see the same disks from your second server:
Back to Index.
Summary
In this post we have looked at how to create a shared storage with virtual disks and a technique called iSCSI.
We formatted the disks and accessed them from two different servers. This is paramount step is we ever want to cluster the servers. Clustered servers need to read and write to the same storage.
Back to Index.
References
SPANdotCOM (2017), What is ISCSI? And why is it mentioned in NAS all the time https://www.youtube.com/watch?v=b09zGPCEw_M [2019-03-20]
MSFT WebCast (2017), 20. Configuring iSCSI Storage Target Server in Windows server 2016 https://www.youtube.com/watch?v=8Y8vy01JozE [2019-03-25]
Adnan Cartwright (2014), Introduction to Failover Cluster in Windows Server 2012 R2 https://www.youtube.com/watch?v=BmPUAbTCKvA [2019-03-25]
Back to Index.