Create a Windows Failover Cluster
This post describes how to create a Failover Cluster with two Windows Server 2016 virtual machines in Hyper-V (Lab environment).
Info. This post is tagged with “my notebook”. That means, that the purpose of the post is mainly for me to remember something I did. The information here might be incomplete, hard for others to read or contain faults and misconceptions. I’ve chosen to publish my notes, please help me improve them by feedback in the comments section. I hope someone will gain something from these kinds of notes.
TL;DR
- Go through the prerequisites /checklist for Failover Cluster.
- Install Failover Cluster Feature on all servers that will be clustered.
- Run Validation Configuration from Failover Cluster Manager
- Create Cluster
- Make sure all nodes and disks are online.
Index
- Prerequisites
- Briefly About Failover Clusters
- My setup in Hyper-V
- Checklist before Cluster Servers
- Install Failover Cluster Feature
- Failover Cluster Validation Test
- Create Failover Cluster
- Review the Failover Cluster
- Summary
- Troubleshoot
- References
Prerequisites
This post build upon several other posts. If you find things too hard or unclear here, you can read this post:
- Shared Storage with iSCSI
- Active Directory (AD) and Domain Controller (DC)
- LAN Hyper-V Windows Server 2016
If the previous post is also too hard or unclear, follow the links in the Prerequisites heading and move your way backwards in this series of posts.
Back to Index.
Briefly About Failover Clusters
Failover Cluster is a feature build into the Windows Server OSs. With the right prerequisites met, you can cluster two or more Windows Servers together. With this action you are trying to achieve something called High Availability in your setup. It basically means that if one server goes down, the other server will take over and the system running on the servers will still be available. You are trying to avoid single point of failures.
When talking about servers in a cluster, the servers are referred as nodes.
Common cluster setup.
- Active-Active cluster – That means that all nodes are running/ are online and they share the work.
- Active-Passive cluster – If one server goes offline, another server will recognize this unwanted behavior. The second server (node) will go online and takeover the failed servers work.
The cluster nodes read and writes to the same storage, they share the same storage.
Back to Index.
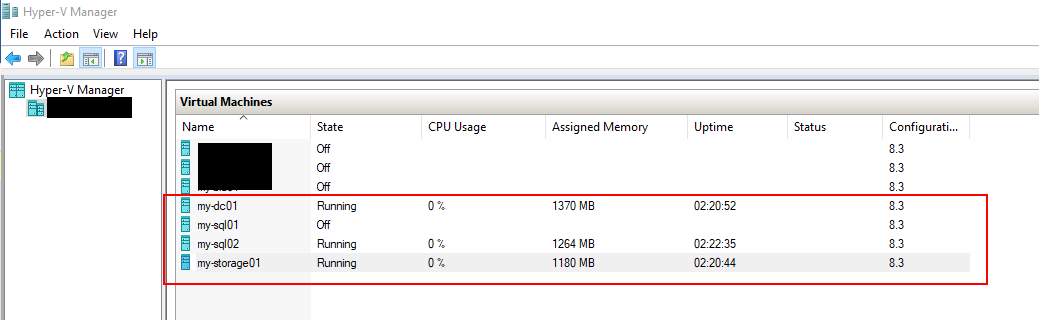
My setup in Hyper-V
In the previous posts, I made several Virtual Machines (VMs) in Hyper-V. This post will continue from that setup.
Info. All servers have the same OS and update, Windows Server 2016. They are joined in the domain lab.com.
| Server Name | IP Address | Role/Feature |
|---|---|---|
| my-dc01 | 192.168.10.1 | AD, DC, DNS |
| my-storage01 | 192.168.10.31 | iSCSI target, file server |
| my-sql01 (node1) | 192.168.10.21 | Failover Clustering |
| my-sql02 (node2) | 192.168.10.22 | Failover Clustering |
During the tutorial we will assign this to the Windows Failover Cluster:
| Cluster Name | Cluster IP |
|---|---|
| my-winclu01 | 192.168.10.20 |
Note! When I first wrote this post, I used ‘my-sqlclu01’ as the Windows Failover Cluster name, this became confusing once I installed the SQL-cluster. The name of the Windows Failover cLuster should be my-winclu01 or full FQDN: my-winclu01.lab.com. If you see ‘my-sqlclu01’ in this post, I simply missed to change the name.
Info. Yes, on the network the cluster will have its own name and IP address to communicate. The nodes (server) will still have their individual names and IPs.
Setup in Hyper-V:
Back to Index.
Checklist before Cluster Servers
Make sure you have this before you try to cluster the servers:
- Same OS and update on the servers.
- If you use IPv4 with static IPs, enable NetBIOS over IPv4 and disable IPv6.
- The servers must be joined in the same domain and Active Directory.
- Servers must share same storage. Storage must be configured on both servers.
Info. The previous post in this series explains how to do the points above.
Network configuration (reminder):
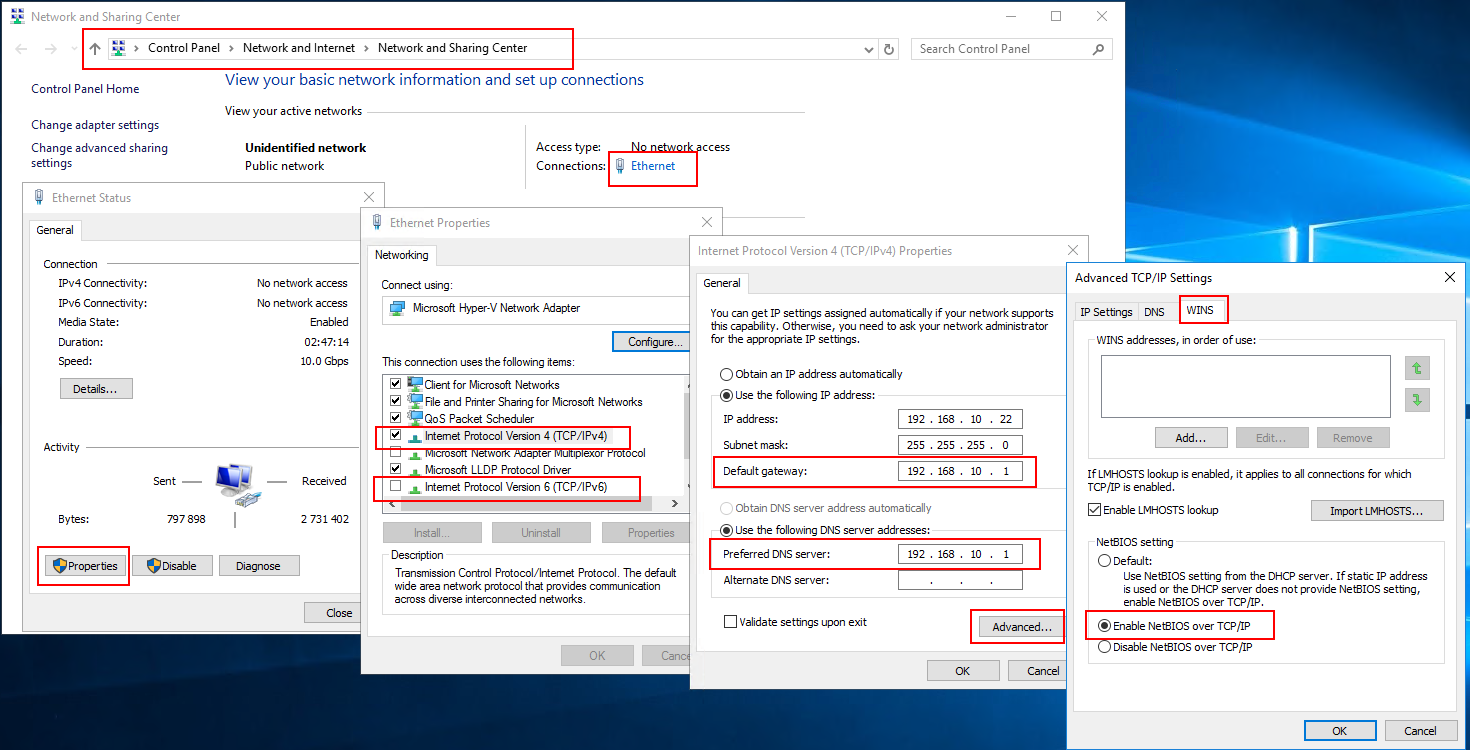
Note. Add a gateway IP even if we don’t need one in our lab environment. The gateway IP must be there to pass the Failover Cluster Validation.
Note. All servers in this lab environment have the Windows Firewall turned off, for simplicity sake.
Info. Here is a post that describes how to add a disk to an already configured Windows Failover Cluster: https://www.raspberryfield.life/2019/04/15/add-shared-storage-to-failover-cluster-iscsi-vhdx/ [201-04-15]
Back to Index.
Install Failover Cluster Feature
Both servers that are going to be clustered must each have the Failover Cluster feature:
Server Manager-> Manage-> Add roles and features-> Feature-> Failover Cluster-> Install:
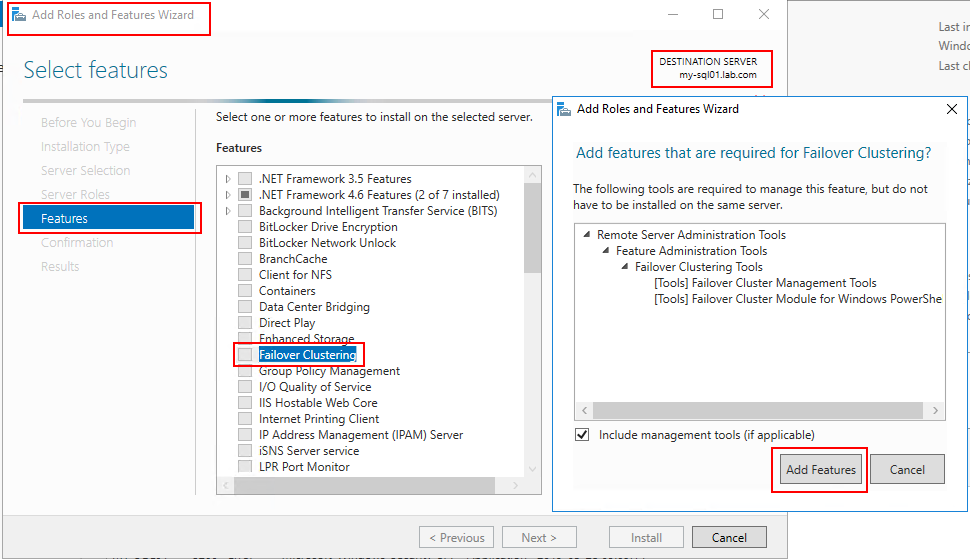
I do this for both of my servers:
- my-sql01.lab.com
- my-sql02.lab.com
Back to Index.
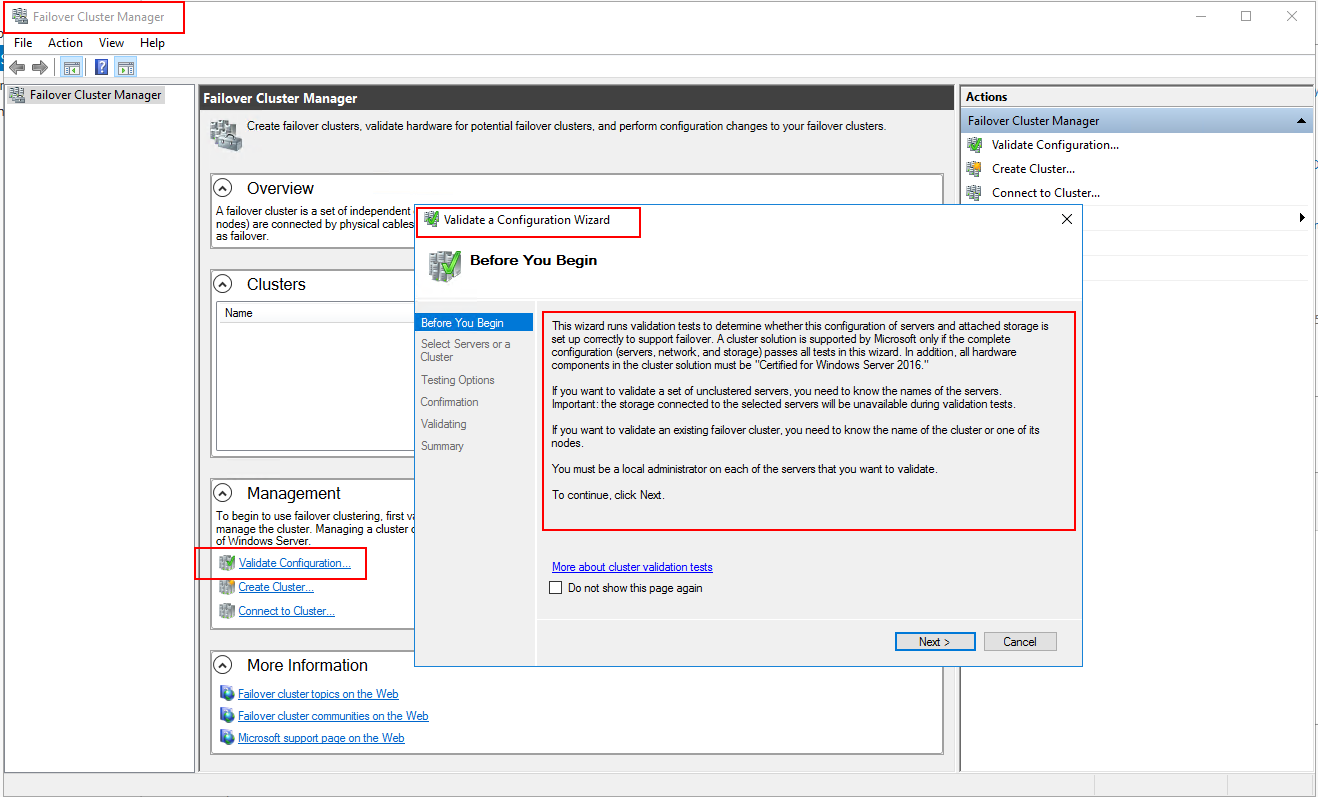
Failover Cluster Validation Test
Before we cluster the two servers (nodes). We must ensure that they pass the Validation Configuration Test.
Info. The test is being done from my-sql01.lab.com.
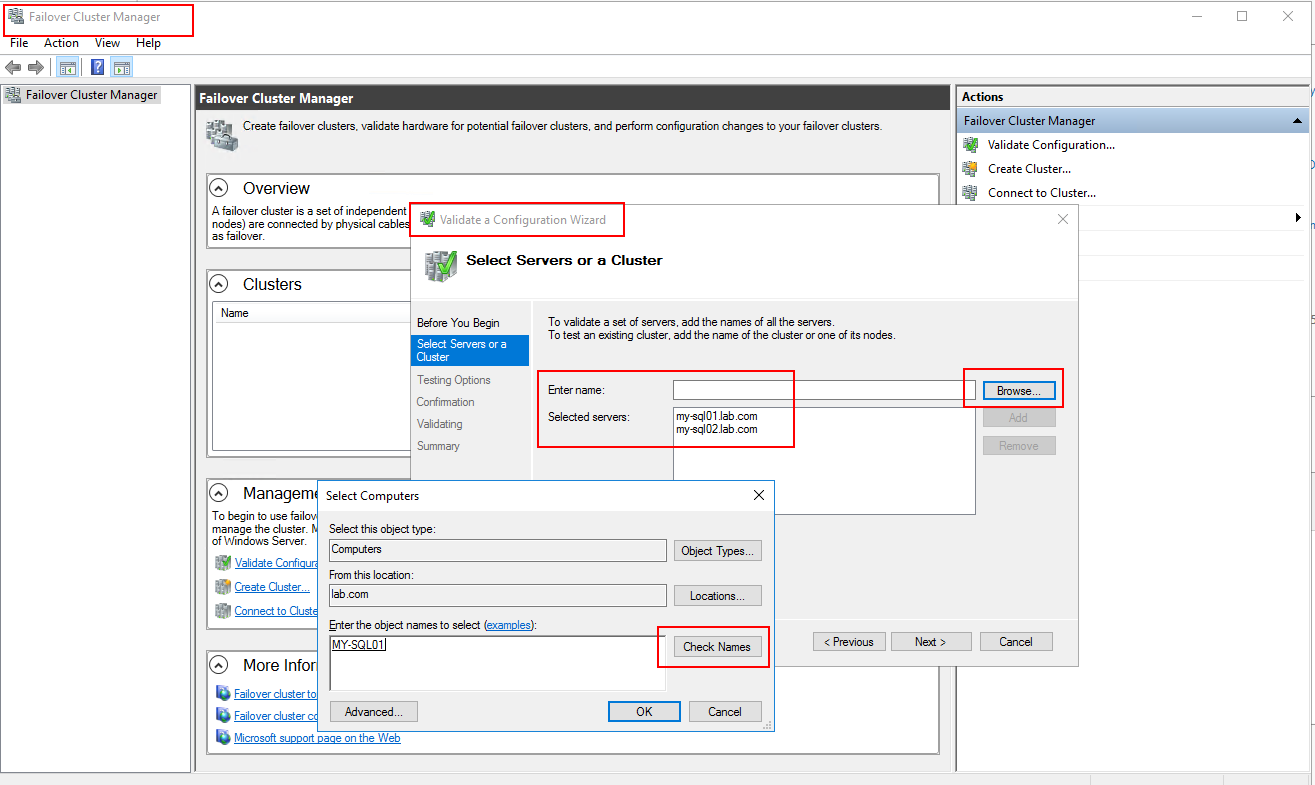
Server Manager-> Tools-> Failover Cluster Manager-> Validation Configuration…:
Choose servers to test for clustering:
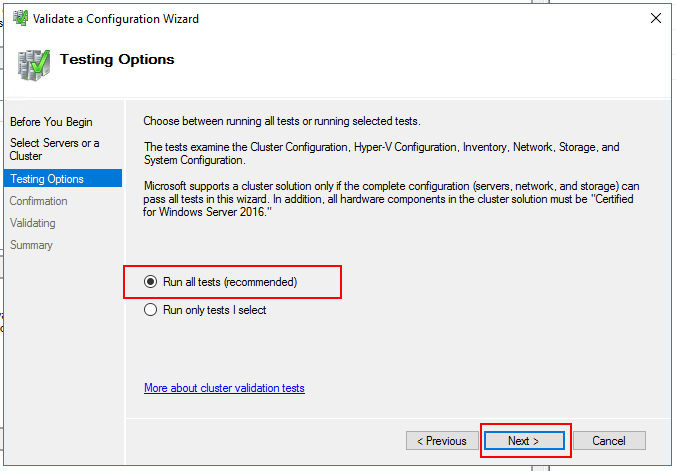
Choose all tests:
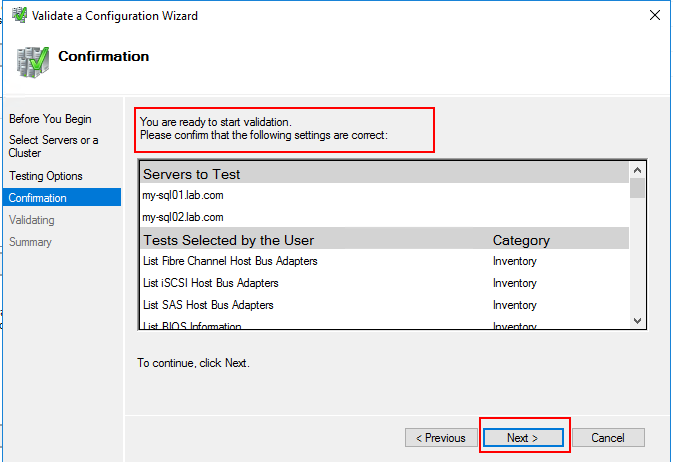
Confirmation:
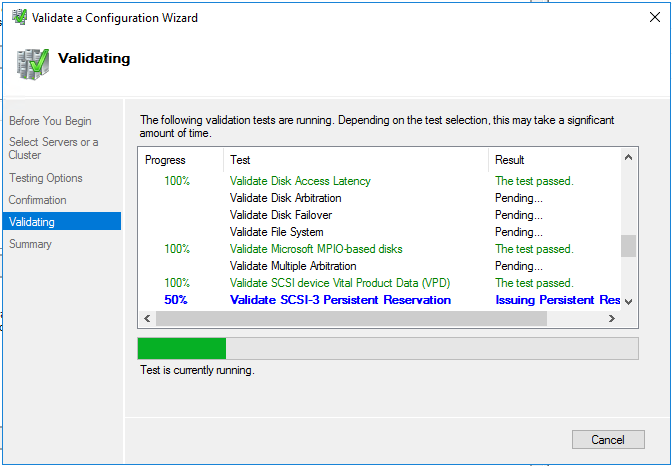
Test will start:
If the test gives warnings, check the Report:
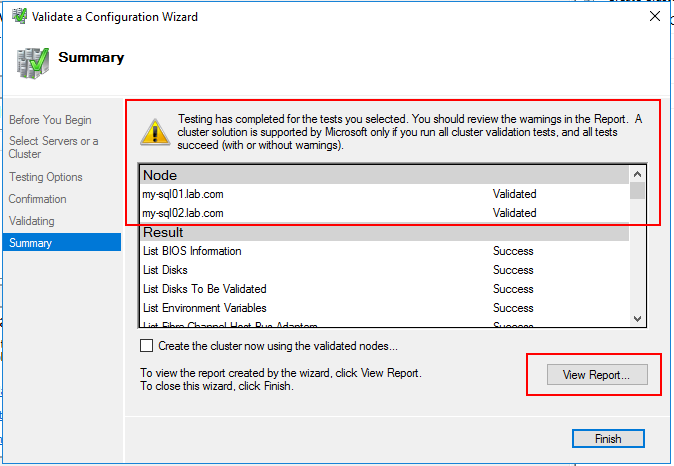
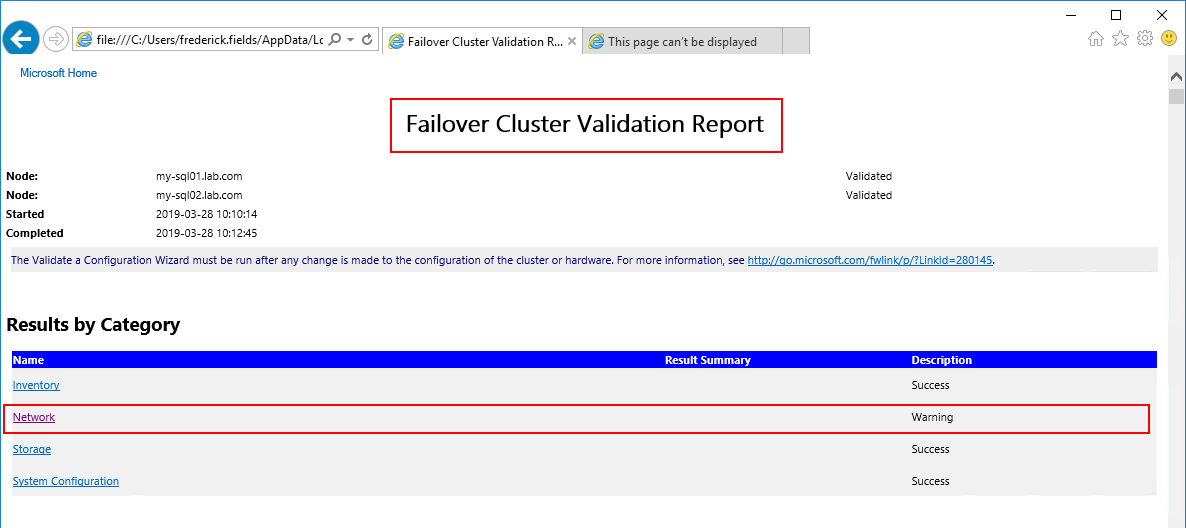
The report is a set of HTML pages. Here you can see that the test reported one warning:
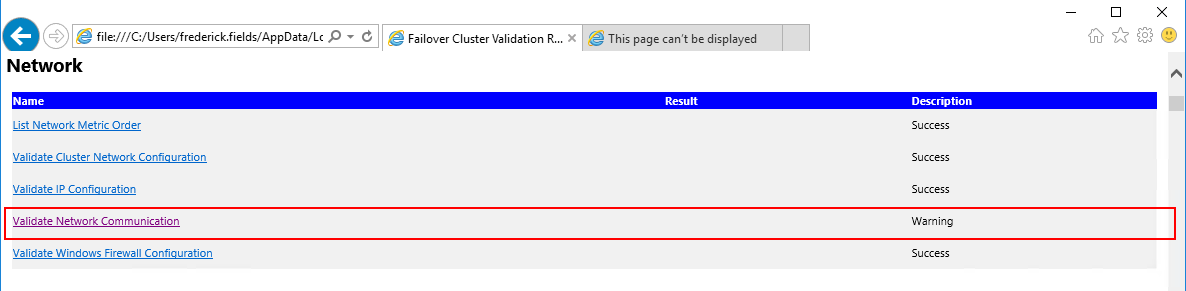
Click on the Network link:
Next, click on Validate Network Communication:
Now you can see the Warnings reported:
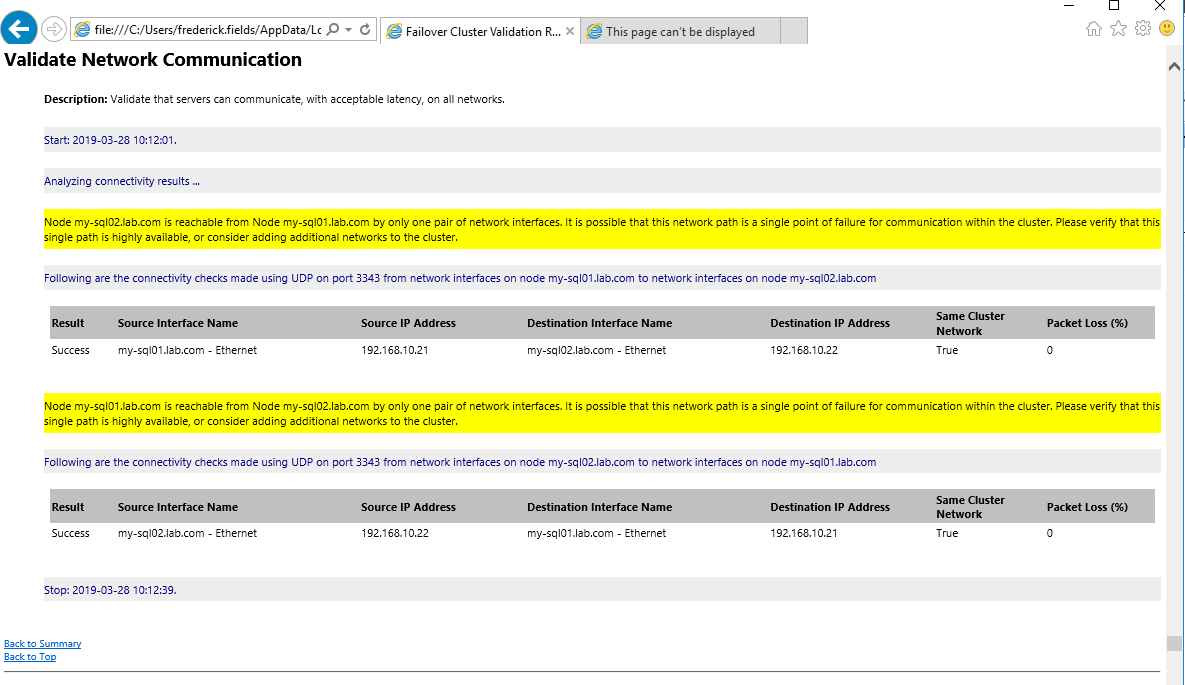
Info. The Warnings are about that there are no multiple ways of communication between the servers. They are only connected to one private switch in Hyper-V. For my lab environment, I don’t want to add extra complexity by settings up other paths to communicate between the servers. I will simply ignore these warnings. As long as the servers are validated, the cluster can be created, even if there are these kinds of warnings.
Now when you have reviewed what the warnings are about, made your decision how to fix them or simply ignore them. Head back to the Failover Cluster Wizard:
Check Create the cluster now using the validated nodes… and click Finish:
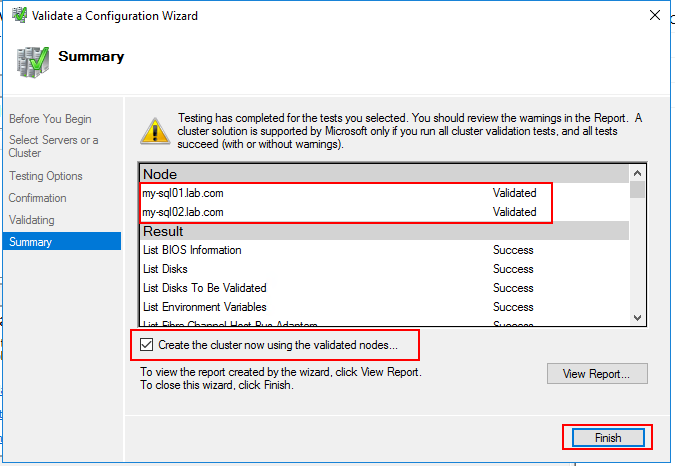
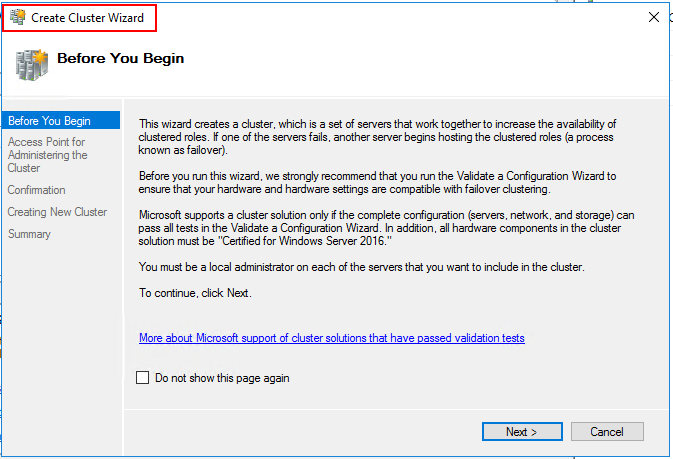
The wizard Create Cluster Wizard will start, see next section.
Back to Index.
Create Failover Cluster
After the servers passed the validation test, it is time to create the cluster:
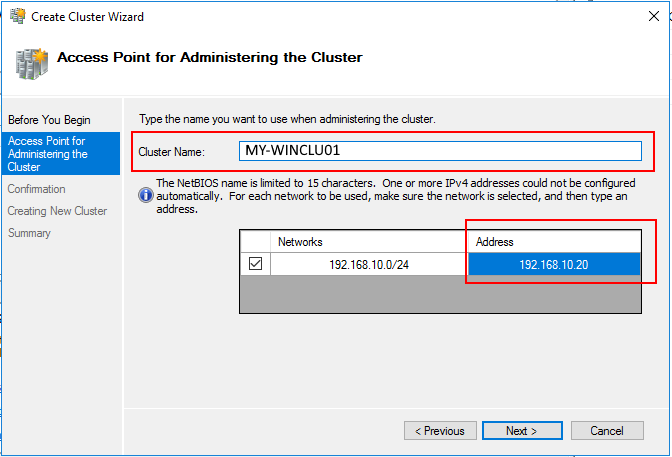
Assign cluster name (NetBIOS), by tradition NetBIOS names are written with capital letters. Yes, the cluster needs its own name and IP to communicate on the network:
Confirmation:
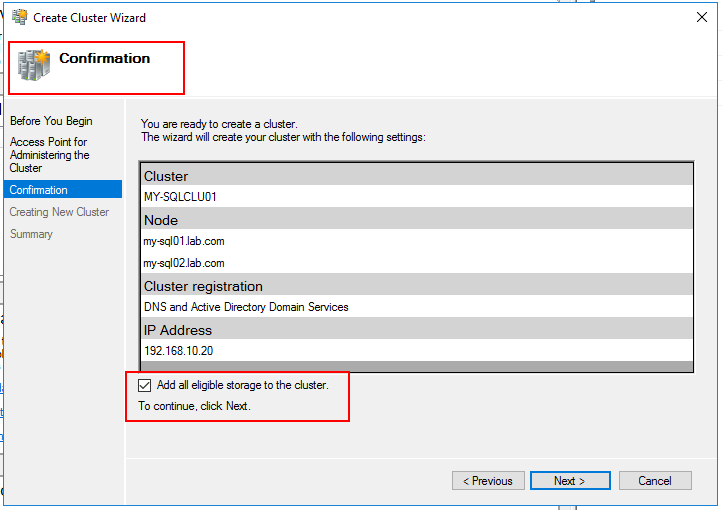
Creation of cluster will begin:
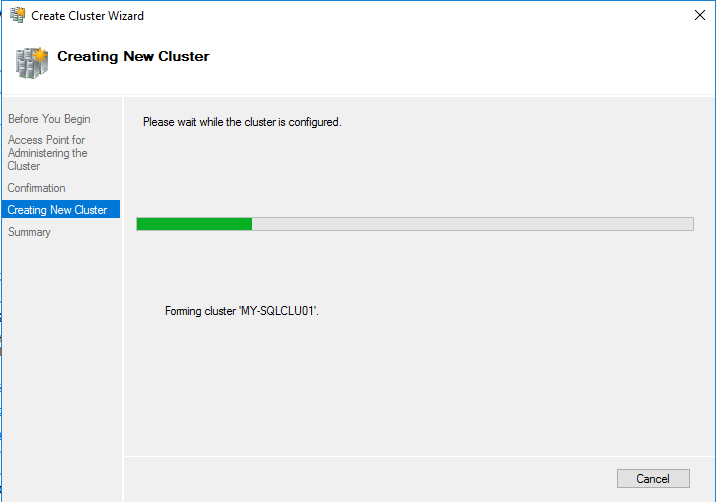
Note! This is an older image, should be Forming cluster ‘MY-WINCLU01’.
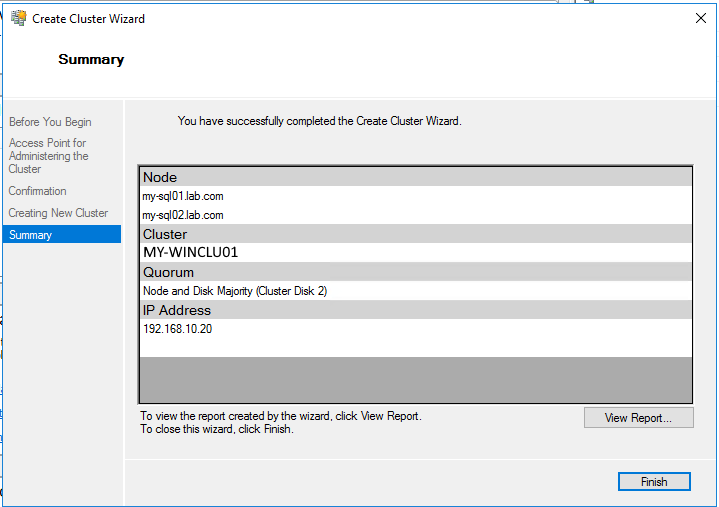
Finish the wizard and create the cluster:
Back to Index.
Review the Failover Cluster
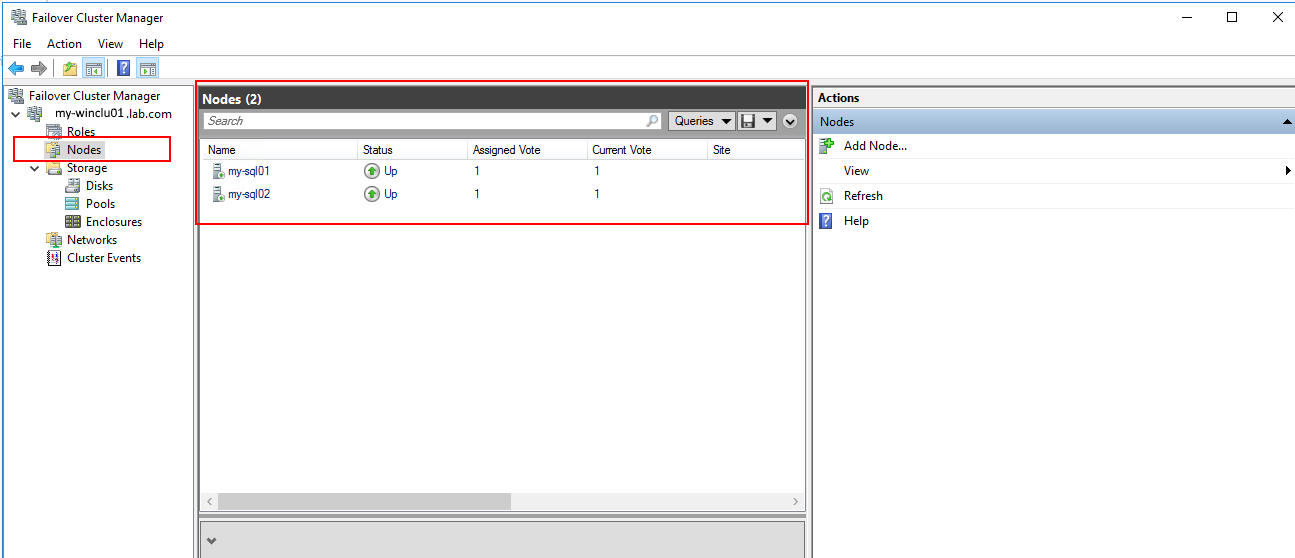
Now when you have created the cluster. Go back to Failover Cluster Manager and refresh the window.
You can now see that the two servers (nodes) are in a cluster:
Also, see that the disks are online:
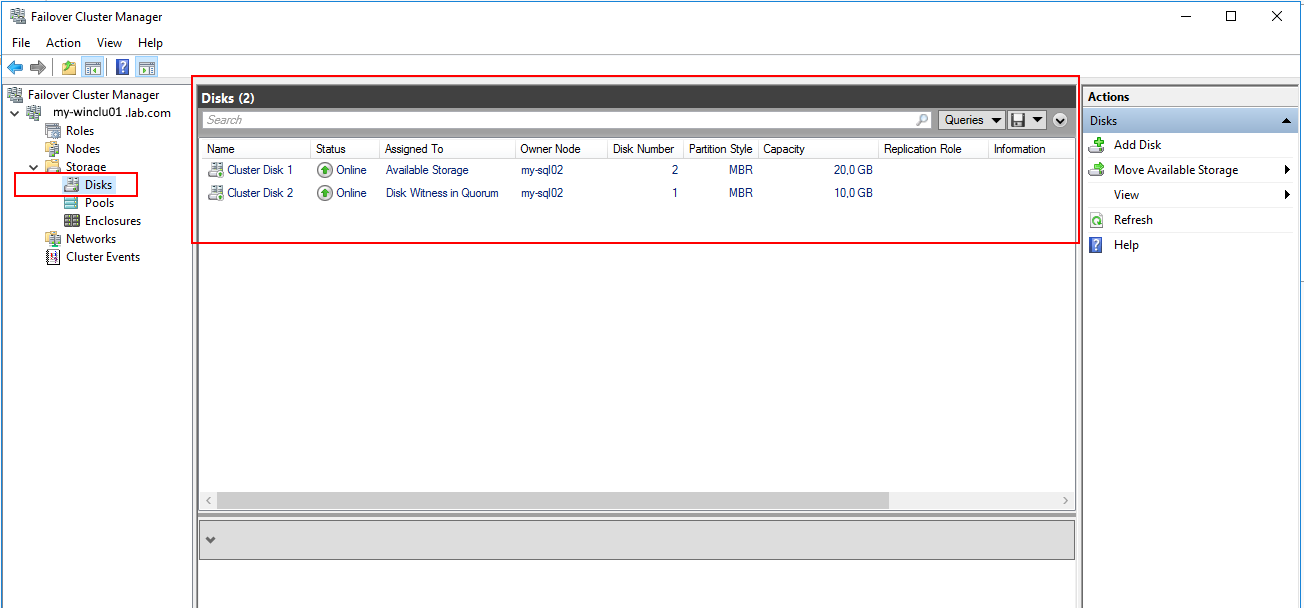
Info.
- One disk (Cluster Disk 2) is the Witness Quorum Disk, shortly this disk keeps the data for the cluster function itself.
- Cluster Disk 1 in our case is the actual data disk. When we install SQL server, it will write to this disk.
Back to Index.
Summary
Failover cluster is a feature in Windows Servers. It makes it possible to achieve High Availability of certain installations, e.g. a SQL Server. If one server fails, the other one will take over.
Info. All server in a Windows Failover Cluster are active-Passive???
Back to Index.
Troubleshoot
- Trouble with the disks CHKDSK Scan Needed: https://www.urtech.ca/2016/02/solved-failover-cluster-chkdsk-scan-needed-on-volume-how-to/ [2019-03-28] Set disk in maintenance mode (failover cluster), Bring them offline and repair them.
Back to Index.
References
Adnan Cartwright (2014), Introduction to Failover Cluster in Windows Server 2012 R2 https://www.youtube.com/watch?v=BmPUAbTCKvA [2019-03-25]
Back to Index.