DS18B20 Temperature Probe – Raspberry Pi
Let’s read the temperature with a DS18B20 Temperature Probe, connected to a Raspberry Pi!
Index
- Introduction
- Prerequisites
- Hardware
- Setup
- Software Approach
- Using ‘w1thermsensor’ python library
- Conclusion
- Resources
Introduction
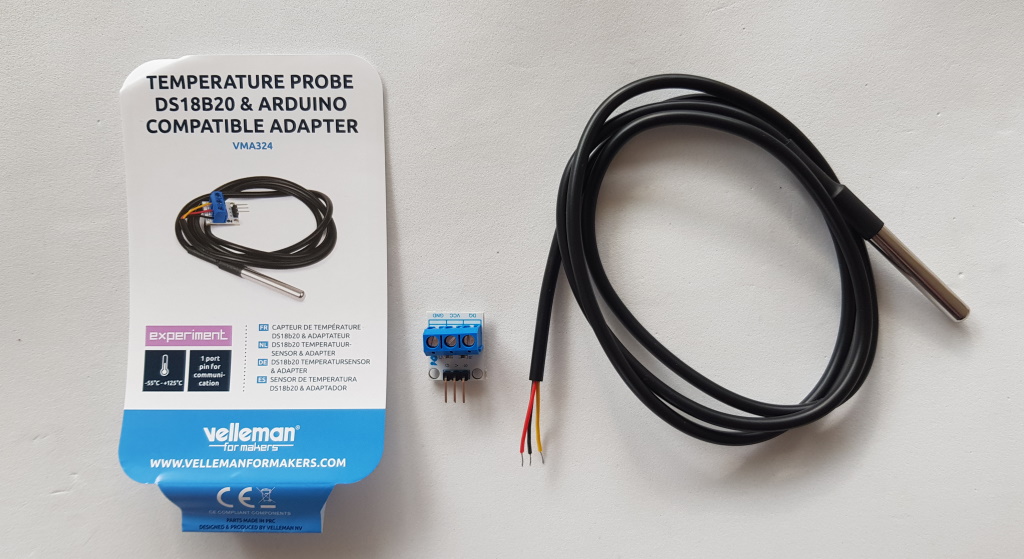
Recently I bought a DS18B20 Temperature Probe from my local electronic store. I want to do some temperature measures and this probe works outdoors, indoors, is waterproof, and has a range between -55°C and +125°C. That should be enough for all spots I can imagen to test it in!
Back to Index.
Prerequisites
Read this blog post about how to use the GPIO pins on a Raspberry Pi:
This is also a good post to read if you are unsure how to work with a Raspberry Pi:
Back to Index.
Hardware
The DS18B20 Temperature Probe is based on the component DS18B20. Normally you need to use a resistor with DS18B20, but that is already built into this probe. As already mentioned, it has a range between -55°C and +125°C.
It outputs the information digitally, that’s perfect because the Raspberry Pi is digital only, it does not have analogue input readings on the GPIO pins.
The probe can be used for your Raspberry Pi or Arduino projects. It comes with a socket that makes it easier to connect to.
Reading the documentation about DS18B20, it is possible to connect several temperature sensors on the same data wire because each one broadcast a unique number associated with it. It is also possible to feed power via the data wire, so you only need two wires (called parasitic connection).
The Probe can be fed 3-5V.
In this post we will be using the simplest setup. Only one probe and using all three wires.
Back to Index.
Setup
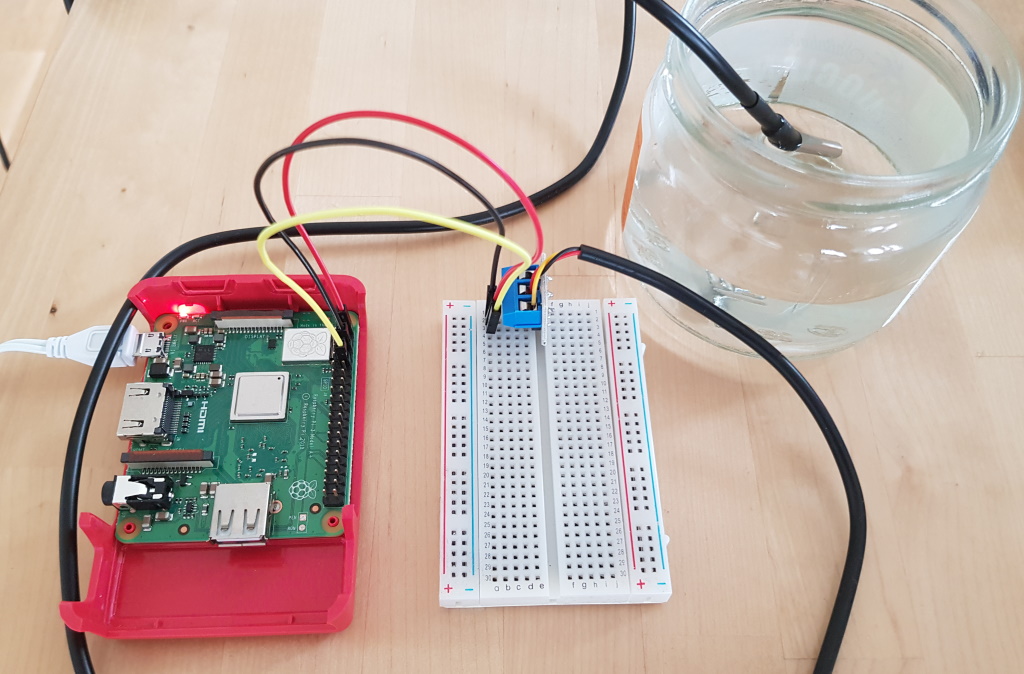
Here I have connected the Probe to the Pi via the socket and a bread board:
Wires:
- Red – Vcc (+5V)
- Black – Gnd
- Yellow – Data (GPIO15)

Back to Index.
Software Approach
Now when you want to interface with a device like this, you have a choice between two approaches to make:
- Read the datasheet of the device and components and figure out in detail how everything is working and write a software on your own for it.
- Go on the Internet and try to find someone that already did approach 1, so you don’t have to waste your time and energy and probably making a lot of mistakes on the way.
Going for approach 2, I found this github page:
https://github.com/timofurrer/w1thermsensor [2020-05-23].
This is a library in Python used for interfacing with the DS18B20 temperature sensor!
It is well documented and has plenty of examples, let’s use this one!
Info. People often write libraries like this in their spare time and put it on the Internet for free use. Every time you use someone else’s work like this, even if it is for free, consider donating or in some way appreciate the work of the author! Donations really contribute to encouraging people to keep up a fantastic coding community!
Back to Index.
Using ‘w1thermsensor’ python library
To use the library, we first need to install it.
Note. This library can handle different similar sensors and is supported on different platforms. In this post I will only be showing how I got it working in python3 and on a Rasbian (Buster) OS.
First run:
$ sudo apt update $ sudo apt install $ sudo apt upgradeTo install the w1thermsensor library, log in to your Pi and execute this command:
$ sudo apt-get install python3-w1thermsensor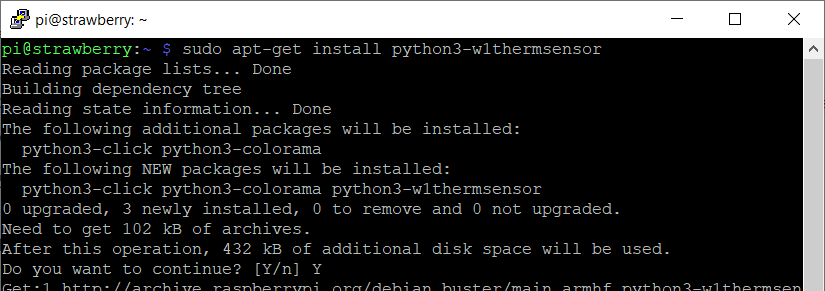
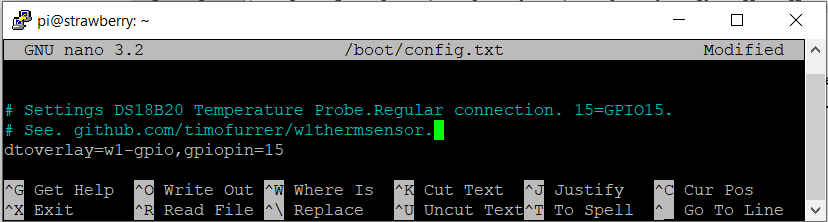
After the installation, we need to make changes to a config file in Raspbian.
From the authors github page:
“On the Raspberry Pi, you will need to add dtoverlay=w1-gpio” (for regular connection) or dtoverlay=w1-gpio,pullup=”y” (for parasitic connection) to your /boot/config.txt. The default data pin is GPIO4 (RaspPi connector pin 7), but that can be changed from 4 to x with dtoverlay=w1-gpio,gpiopin=x “.
We use a regular connection where I want the data wire on GPIO15. So, add this line to the file /boot/config.txt:
Reboot your Pi.
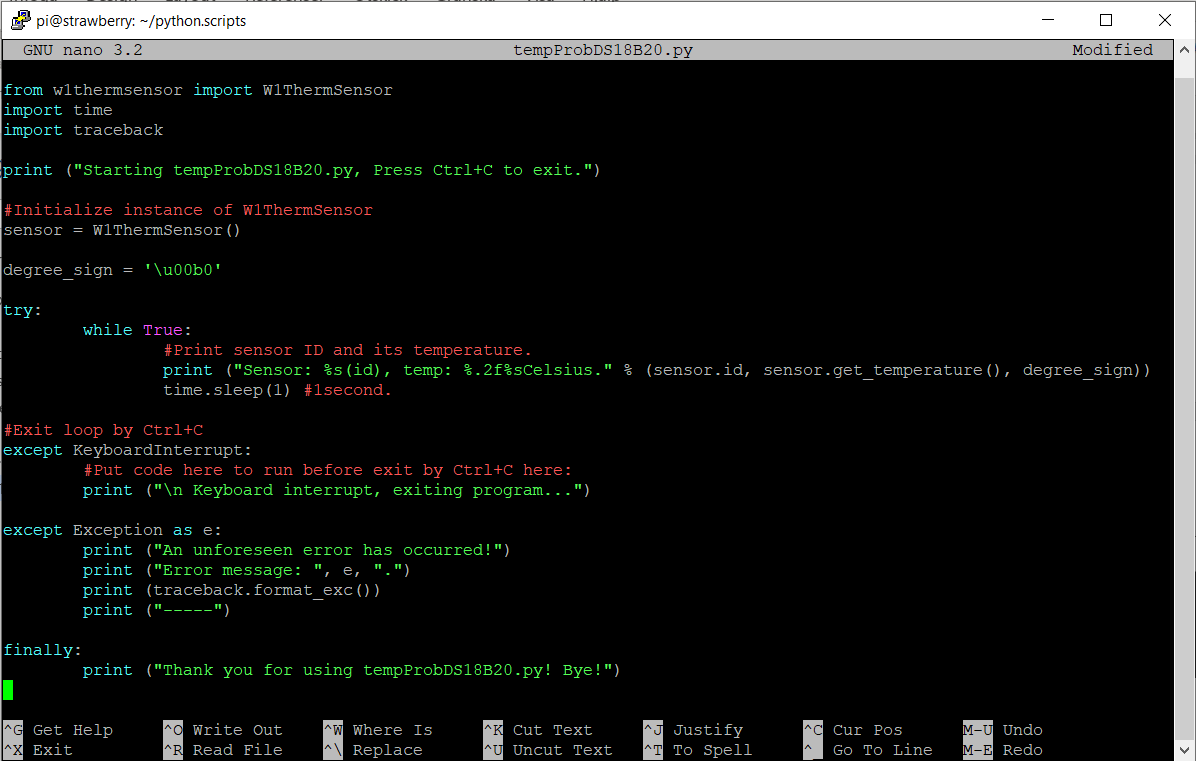
$ sudo rebootHere is a code example, how to use the library in Python3:
Info. The print statement uses python % (String Formatting Operators), read more about them here: https://python-reference.readthedocs.io/en/latest/docs/str/formatting.html [2020-05-23].
tempProbeDS18B20.py
from w1thermsensor import W1ThermSensor
import time
import traceback

print ("Starting tempProbDS18B20.py, Press Ctrl+C to exit.")

#Initialize instance of W1ThermSensor
sensor = W1ThermSensor()

degree_sign = '\u00b0'

try:
	while True:
		#Print sensor ID and its temperature.
		print ("Sensor: %s(id), temp: %.2f%sCelsius." % (sensor.id, sensor.get_temperature(), degree_sign))
		time.sleep(1) #1second.

#Exit loop by Ctrl+C
except KeyboardInterrupt:
	#Put code here to run before exit by Ctrl+C here:
	print ("\n Keyboard interrupt, exiting program...")

except Exception as e:
	print ("An unforeseen error has occurred!")
	print ("Error message: ", e, ".")
	print (traceback.format_exc())
	print ("-----")

finally:
	print ("Thank you for using tempProbDS18B20.py! Bye!")
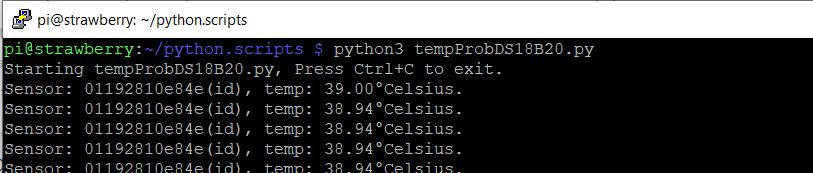
Here is output from the program:

A simple test with hot water:
And the output from the program:
Back to Index.
Conclusion
In this post we have:
- Read the temperature from an external device.
- Used a third-party library.
Back to Index.
Resources
- Nice tutorial: https://www.circuitbasics.com/raspberry-pi-ds18b20-temperature-sensor-tutorial/ [2020-05-23]
- Datasheet DS18B20: https://www.alldatasheet.com/datasheet-pdf/pdf/58557/DALLAS/DS18B20.html [2020-05-23]
- Suppliers homepage about the DS18B20 Temperatur Probe: https://www.velleman.eu/products/view/?id=439184 [2020-05-23]
- w1thermsensor library: https://github.com/timofurrer/w1thermsensor [2020-05-23]
Back to Index.