NESPi Project Part 10 – Summary
This is the final blogpost in the NESPi project. I won’t present any new stuff to the NESPi here. The purpose of this post is to provide the reader a quick overview of the project, from idea to finished product. And if you are interested to make one NESPi yourself, you can read about all the details in the corresponding blogpost for each section.
Summary
This is how the final NESPi looks like:
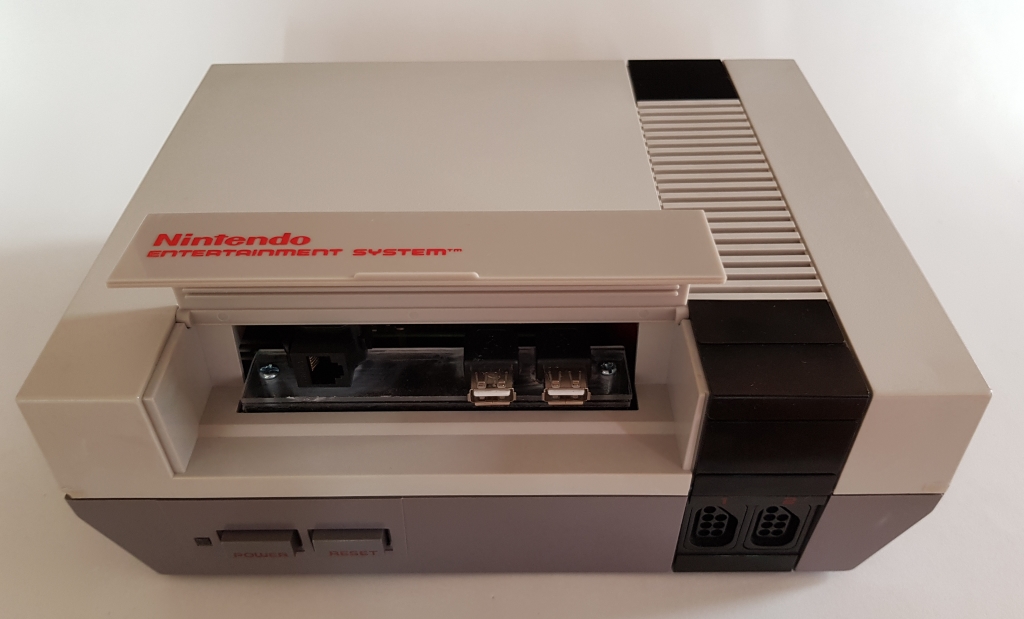
This NES had one foot in the grave when I picked it up. And look at it now! It will be an NES emulation station, ready for many gaming hours!
NESPi Project Part 1 & 2
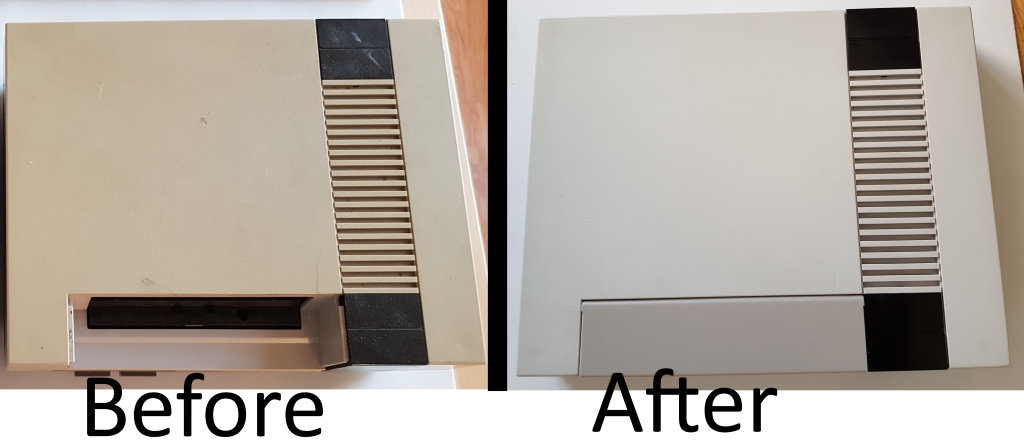
In Part 1 and Part 2 I showed you how to clean and reconditioning old plastics. I presented the widely used technique of retro brightening. The result:
I also stated my guiding principles of the project:
- The finished console should look and feel authentic.
- Minimal or no damage to the original hardware.
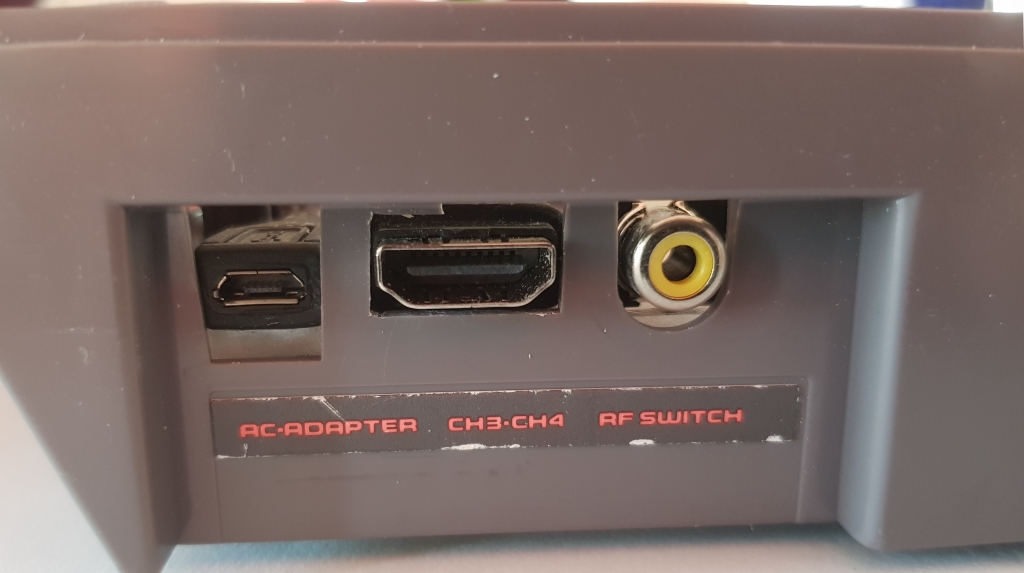
NESPi Project Part 3 – Video output and DC input
In Part 3 I introduced the concept of replacing the old PCB boards with acrylic plastics of the same size. By doing this, it is possible to reuse already existing screw holes. This has the benefit of a stable construction and no modification of the original hardware is required. I also started to work with extension cables:
Unfortunately, I couldn’t stick 100% to my principles. I had to compromise the “no harm to the original hardware” in favour of “look and feel authentic” to fit the HDMI cable:
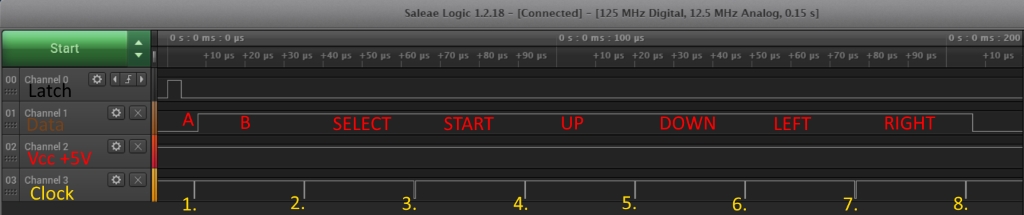
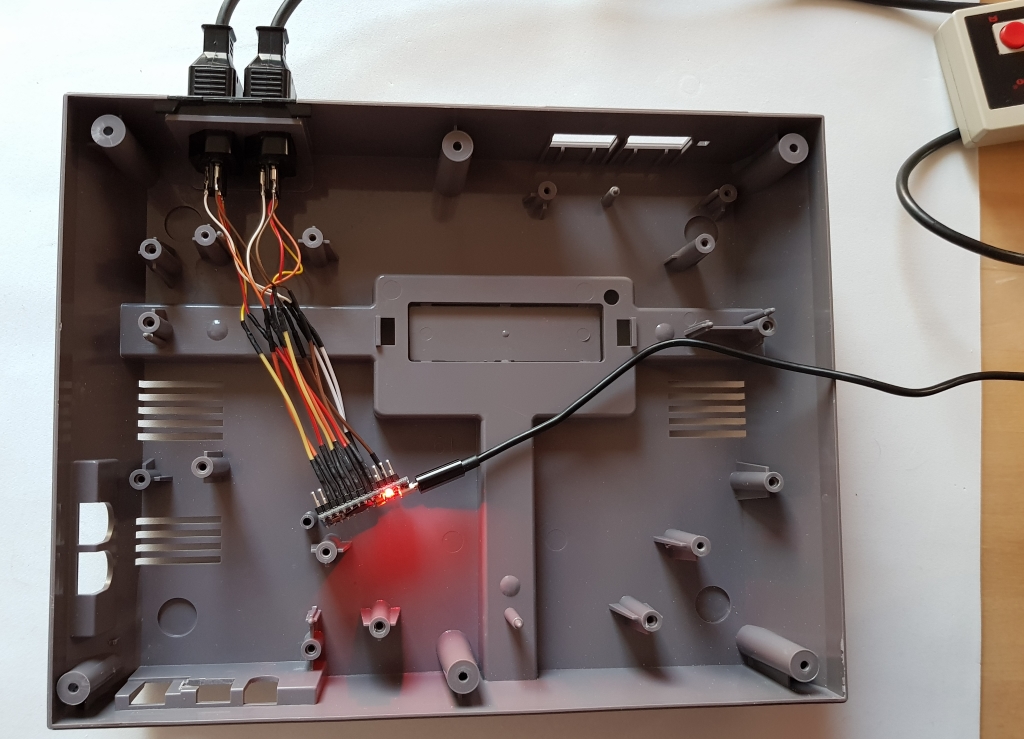
NESPi Project Part 4 – The NES controller protocol
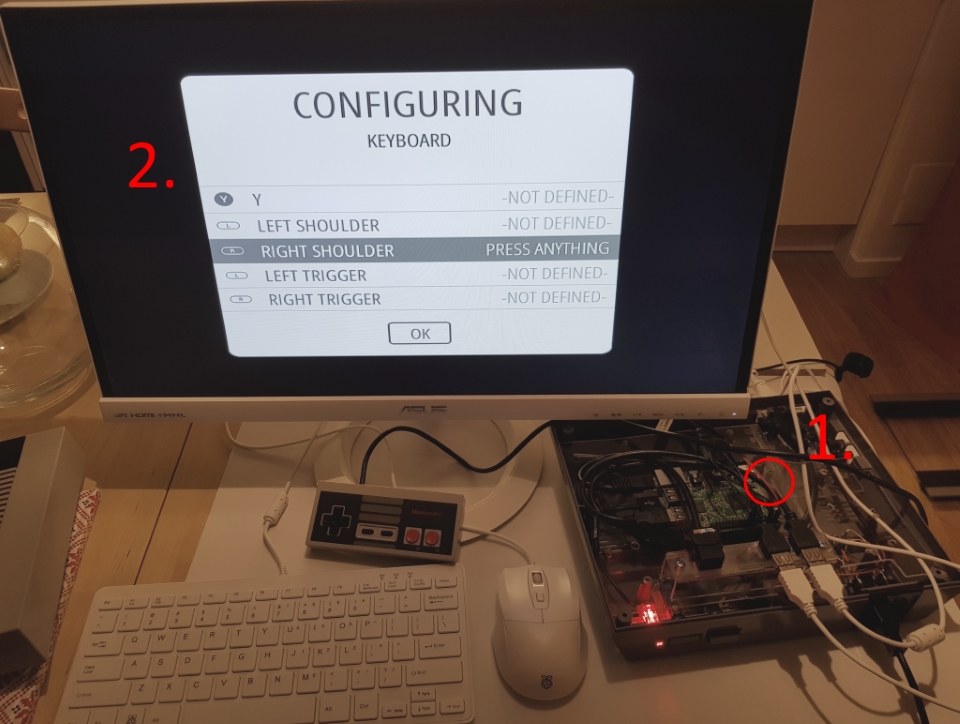
In Part 4 we stretched some programming skills. The whole post is about how to use original controllers with the Raspberry Pi. Here is a summary of the NES controller protocol (only A button pushed here):
This knowledge was implemented in code, in an Arduino microcontroller that emulates a keyboard. Everything in place:
NESPi Project Part 5 – Power and Reset button board
You can turn of and on the Raspberry Pi with the original power and reset buttons. In Part 5 I showed how and where to solder all the cables needed for utilizing the buttons. We also made some more cables with help of heat shrinking tubes:
NESPi Project Part 6 – Main Board and Extension Cables
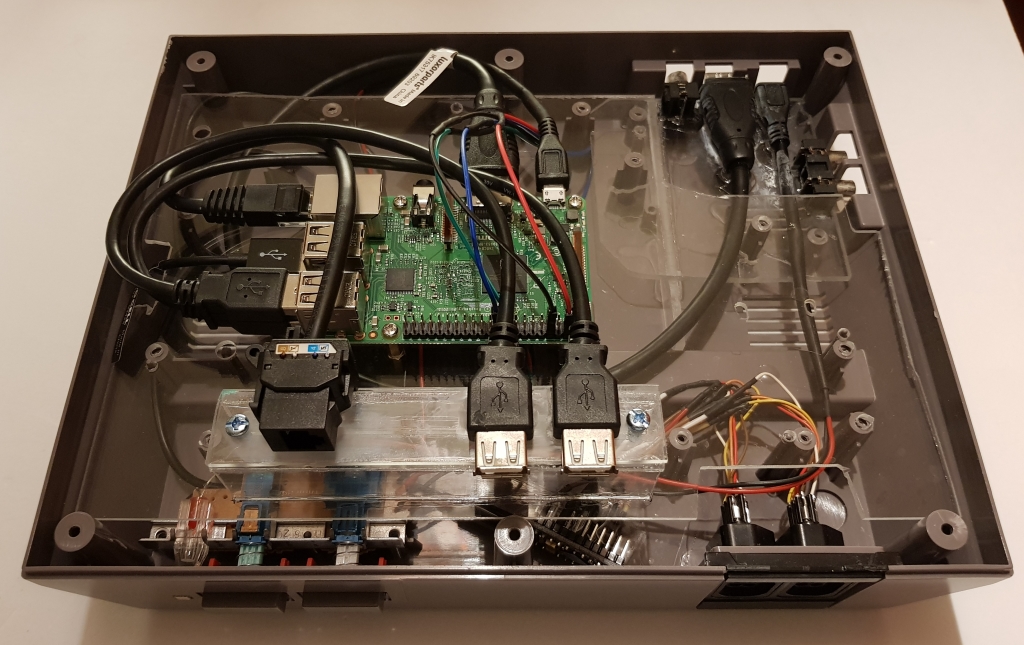
Part 6 was mainly about acrylic plastics and extension cables, like in Part 3. Only this time we mounted all necessarily hardware for the project:
NESPi Project Part 7 – Installing software
Part 7 is a long post about the necessarily software, installations and configurations you need, to turn the Raspberry Pi into a retro game console. Everything is built around the beloved RetroPie image.
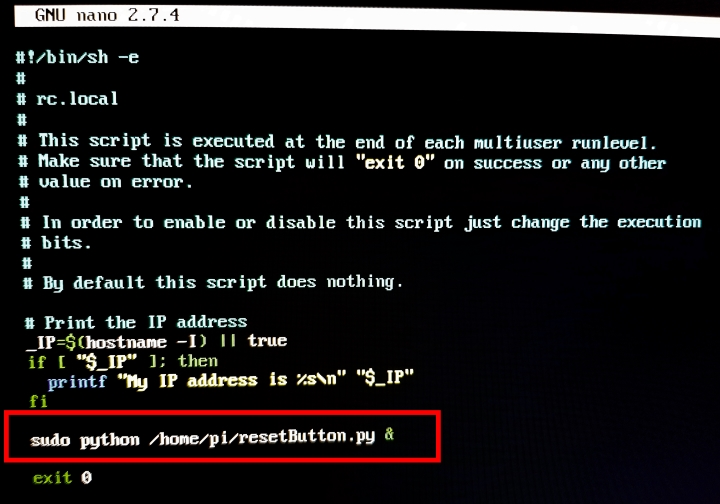
NESPi Project Part 8 – Reset Button and Reset Script
In Part 8 we looked at how to write a Python script and schedule it. The script will execute when you push the reset button and it will safely turn of the Pi. It is similar like when you click the start menu on your desktop and choose turn of computer. But instead of doing this from a menu, we can do all this with just one button press.
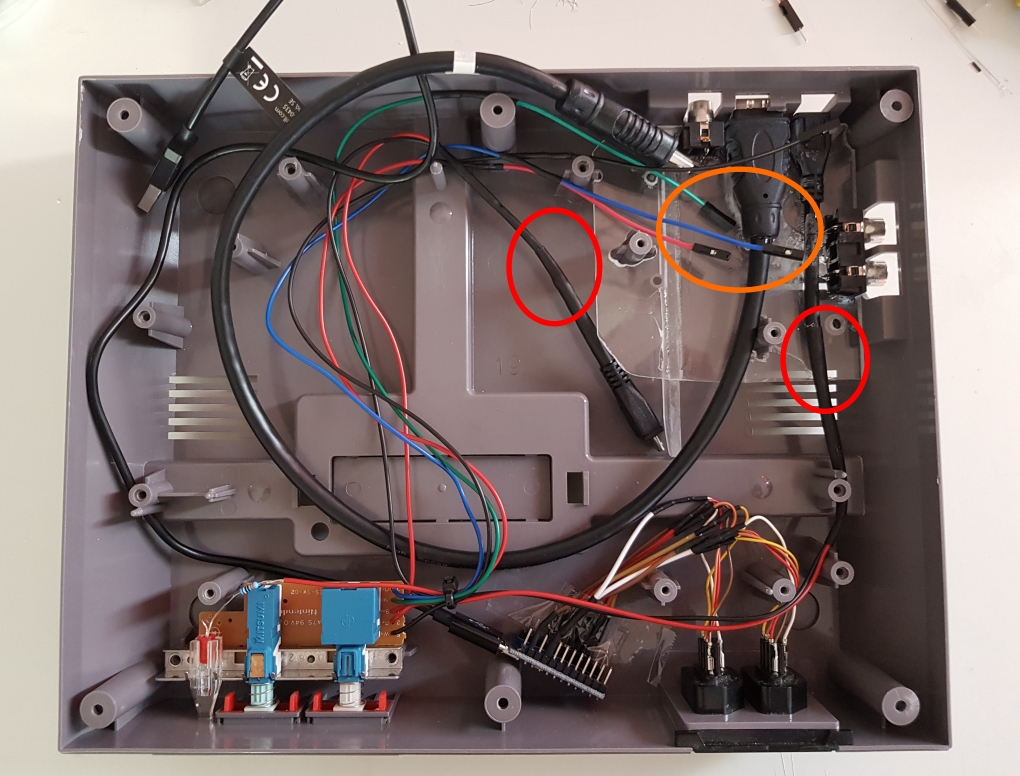
NESPi Project Part 9 – Composite Video
To really address the principle, look and feel authentic, you might want to play on an old CRT TV. This is made possible in blog post Part 9. Do note that zapper (light gun) games will never work with emulators! These games was built upon 80’s technology. If you want to play light gun games, you are stick to the original hardware!
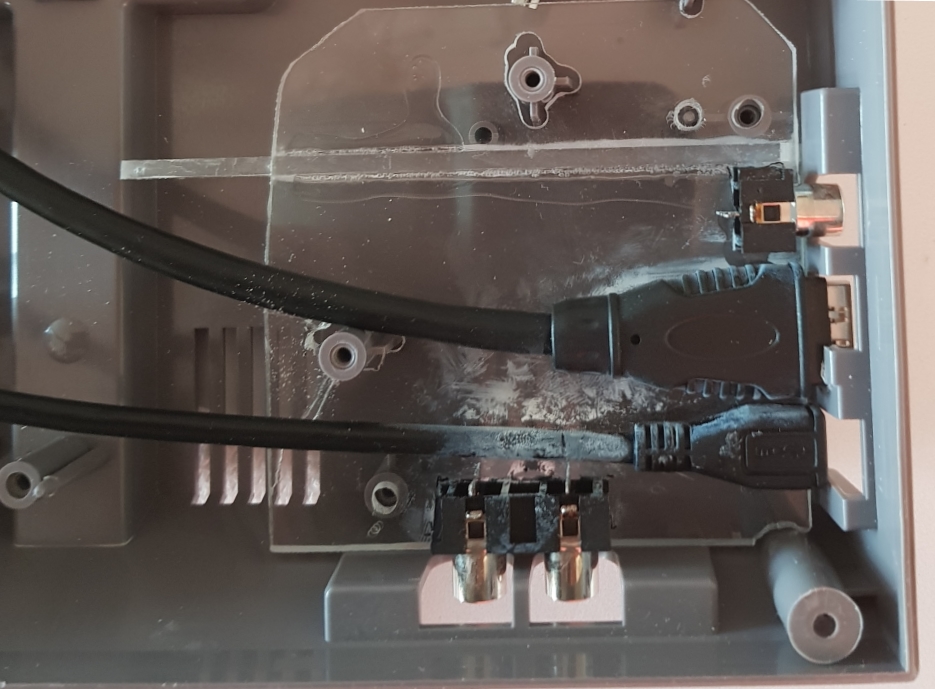
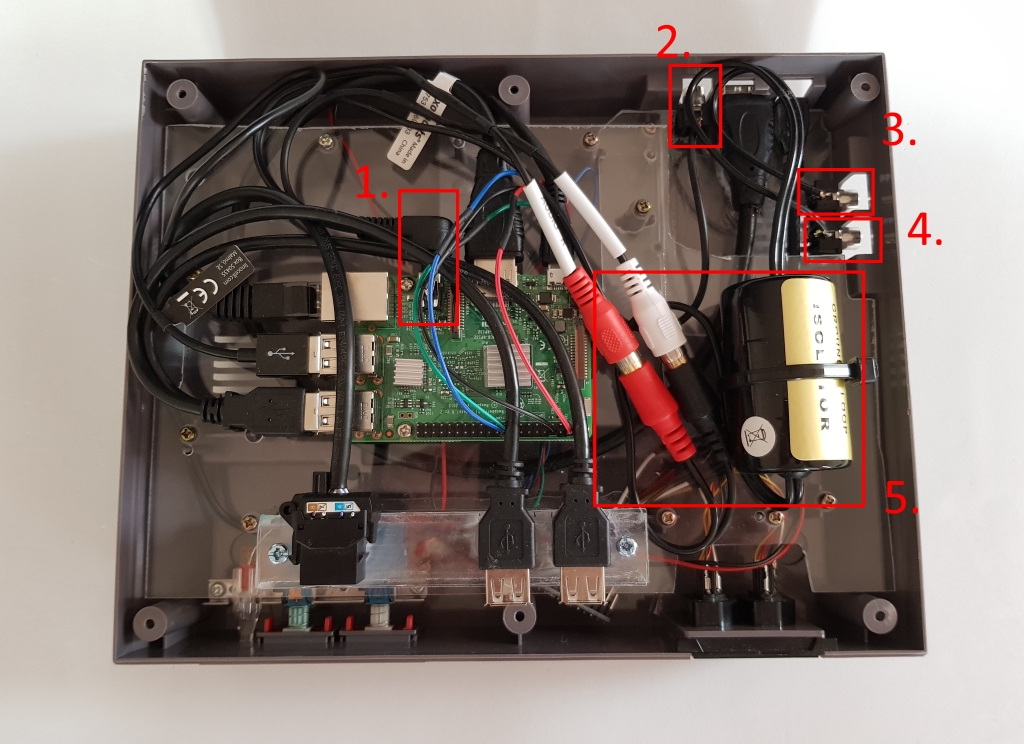
Here is the final NESPi from the inside. I also added internally a ground loop isolator (big black thing on the right of the Pi). It is to remove noise on the analog output. The effect was minimal, so don’t spend time on this in you project.
That’s all folks!